WJ Refurbishment Overview
Tom’s 2002 Jeep Grand Cherokee Limited WJ Rebuild Project
Introduction
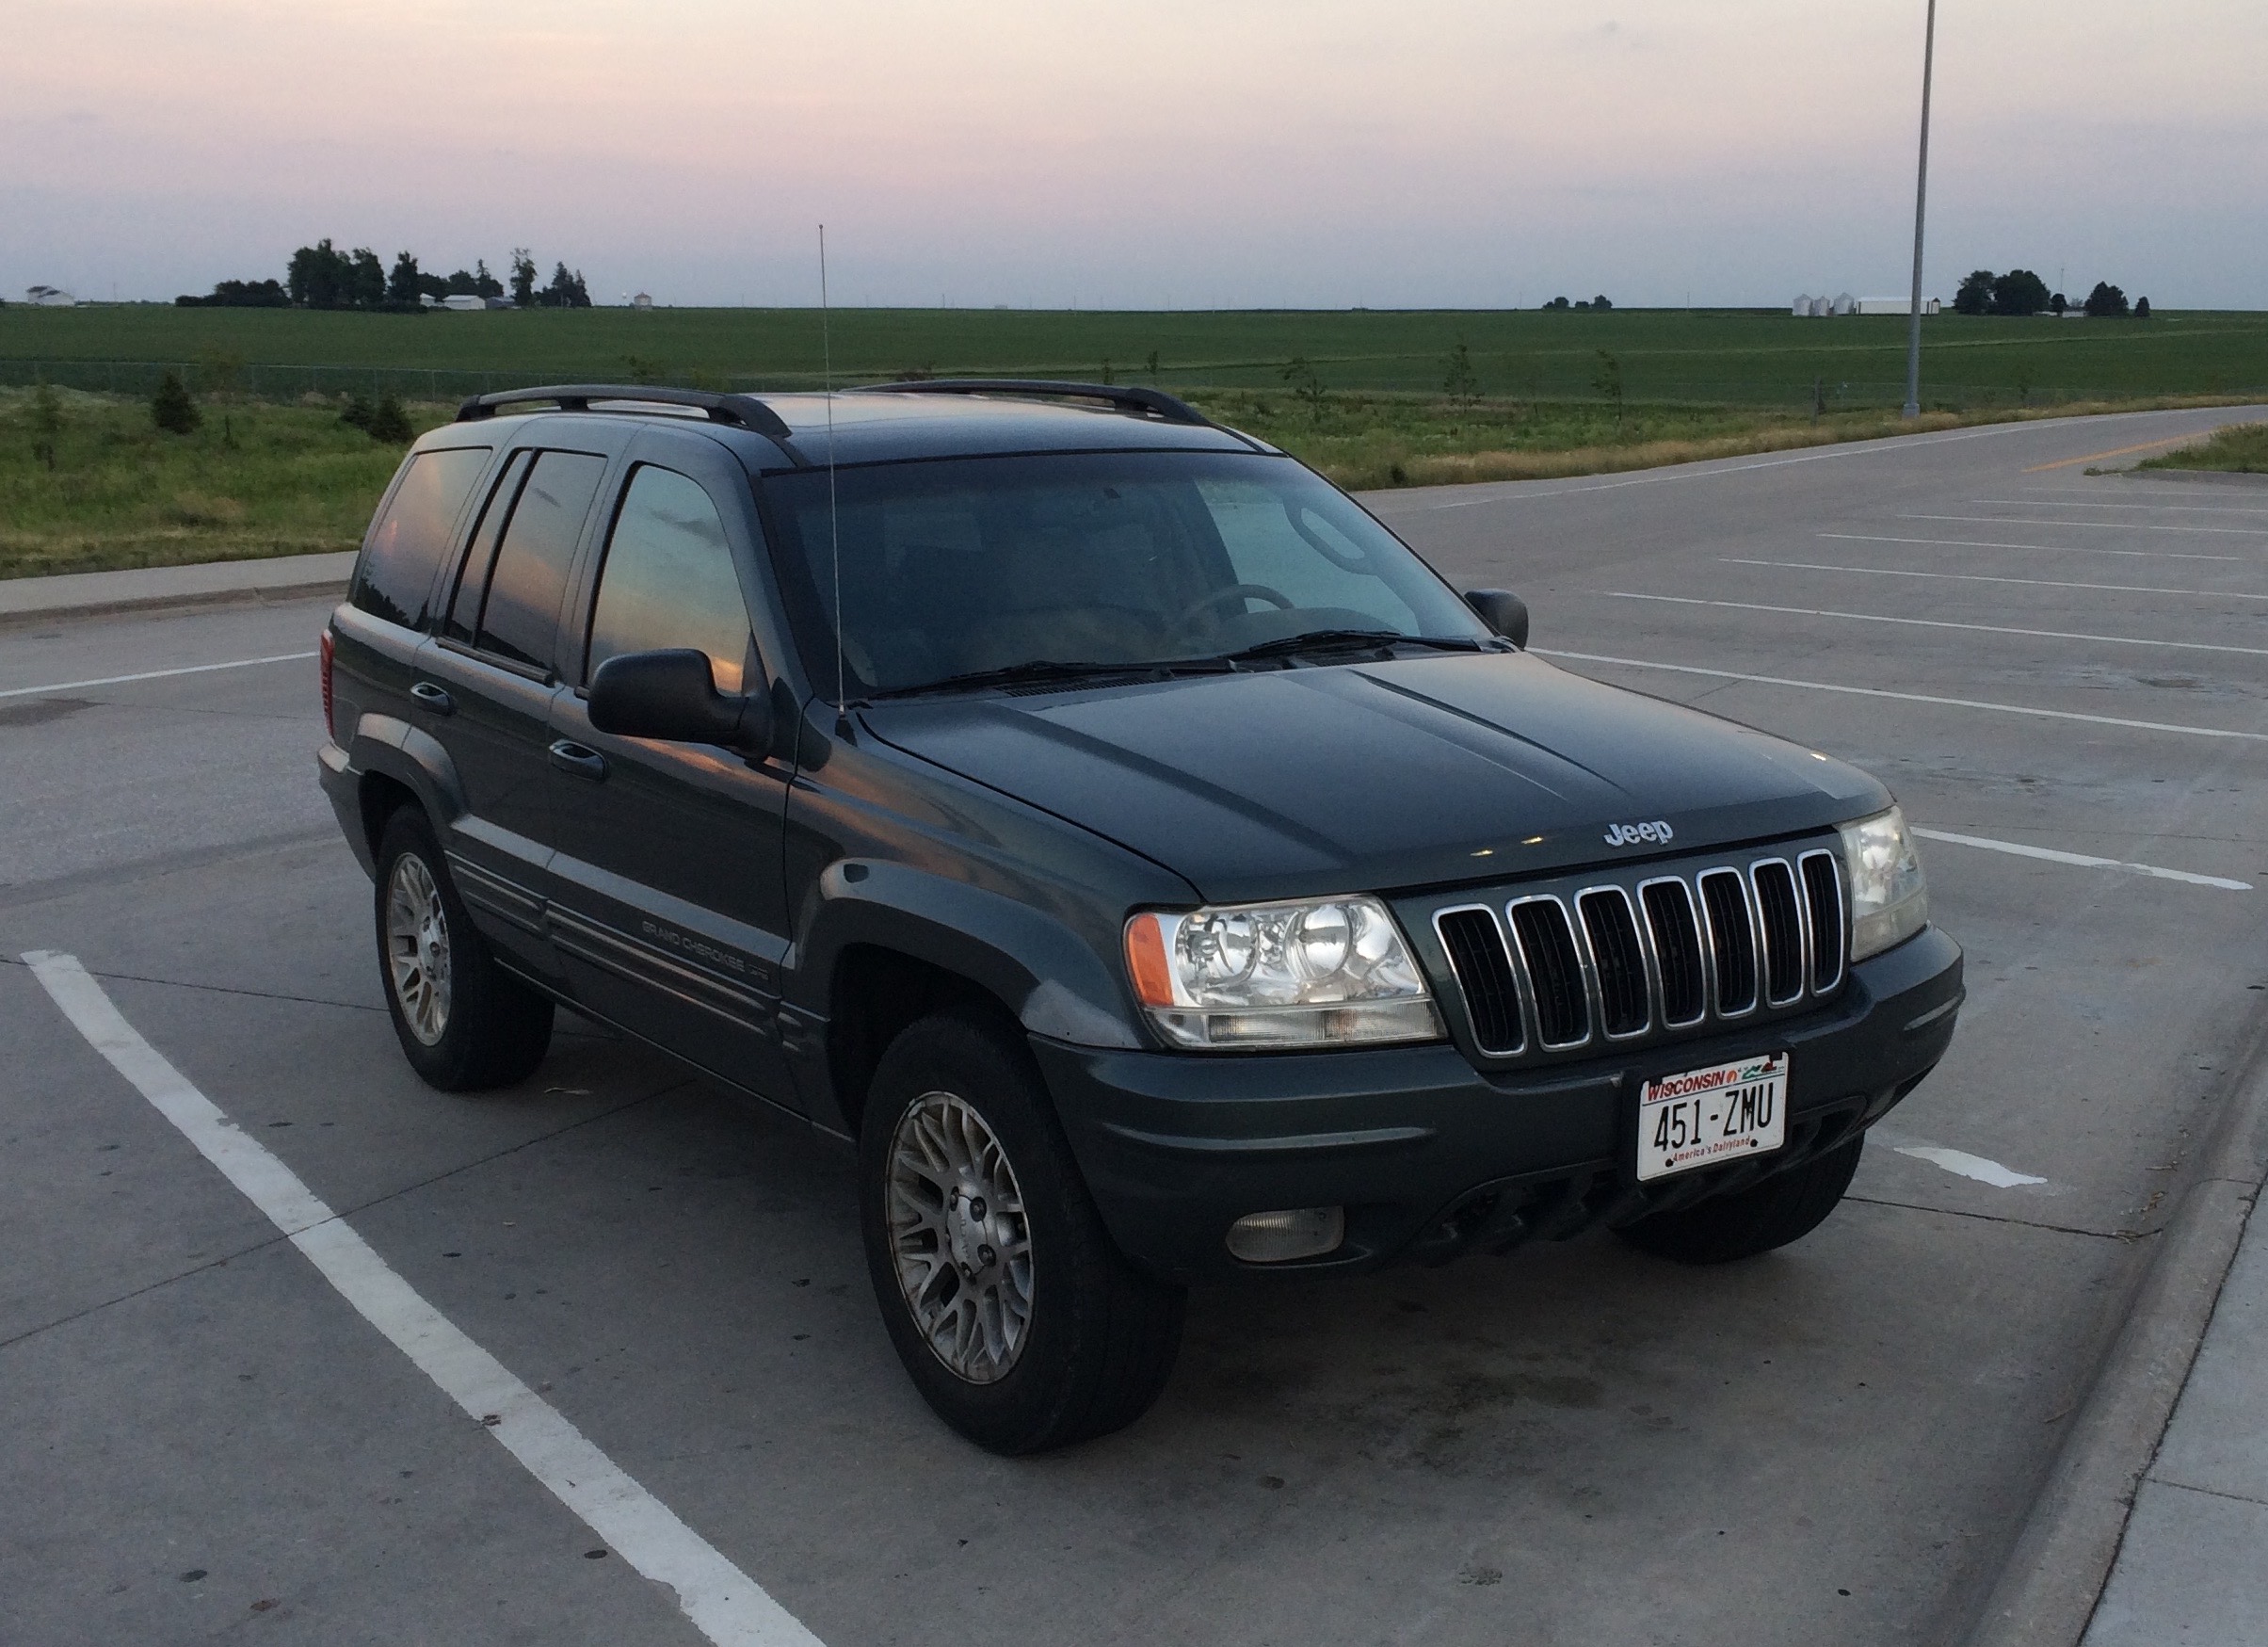
For many years I had a 1998 Jeep Cherokee XJ at my lake home in Wisconsin, and had always intended to rebuild it. As a semi-retired telecommunications engineer, I am able to deal with modern vehicle electronics. So I recently decided to move up to a more luxurious vehicle for my “twilight” years 😉 with lots of buttons & blinkey lights, heated leather seats, AWD, smoother & quieter ride, good towing capacity, etc. In spring of 2017 I purchased a late production (June) 2002 Grand Cherokee Limited WJ with 175K miles on it, with the idea of doing an end-to-end rebuild. Here is a little history of how it went.
The WJ new and used
I consider the WJ as the last of the true American made Jeeps…. I think many reviewers agree that WJ is better in some ways than the later Daimler-Chrysler designed WKs, or the most recent Fiat influenced WK2s. I see the WJ as the archetype of all modern SUVs, even more so than the iconic XJ. It has an elegant, compact, form-follows-function aerodynamic body, not voluminous like the WK2 and all the copy-cat imports, as well as solid old school engineering that I can deal with. I even like the problematic hydraulically powered engine cooling fan! The sticker price for my WJ model with its deluxe equipment (Quadra Drive w/Vari-Lok, side air bags, full size spare, V8, towing package, CD changer, leather 10 way seats, TPMS, etc. See: WJBuild) back in 2003 looks to have been $38,405 ($53,663 in 2019 dollars), not counting sales taxes and license fees. These days you can find used high milage 4.7L V8 WJs on Craigslist for between $500 and $1500, but they often have structural rust and/or bad engines caused by a chronic problem of gouging cylinder walls resulting from a dropped crushed valve seat due to overheating. BlueBook on a serviceable good condition high milage WJ with these options is around $2,500. I paid about $2,725 for this one in 2017 because it had a recently remanufactured engine with 40K miles on it that was done by a quality rebuilder, and was the Onyx Green color I wanted. See the old version of wjjeeps.com archived on the Interenet Wayback Machine for some excellent background on the WJ.
Cost To Rebuild
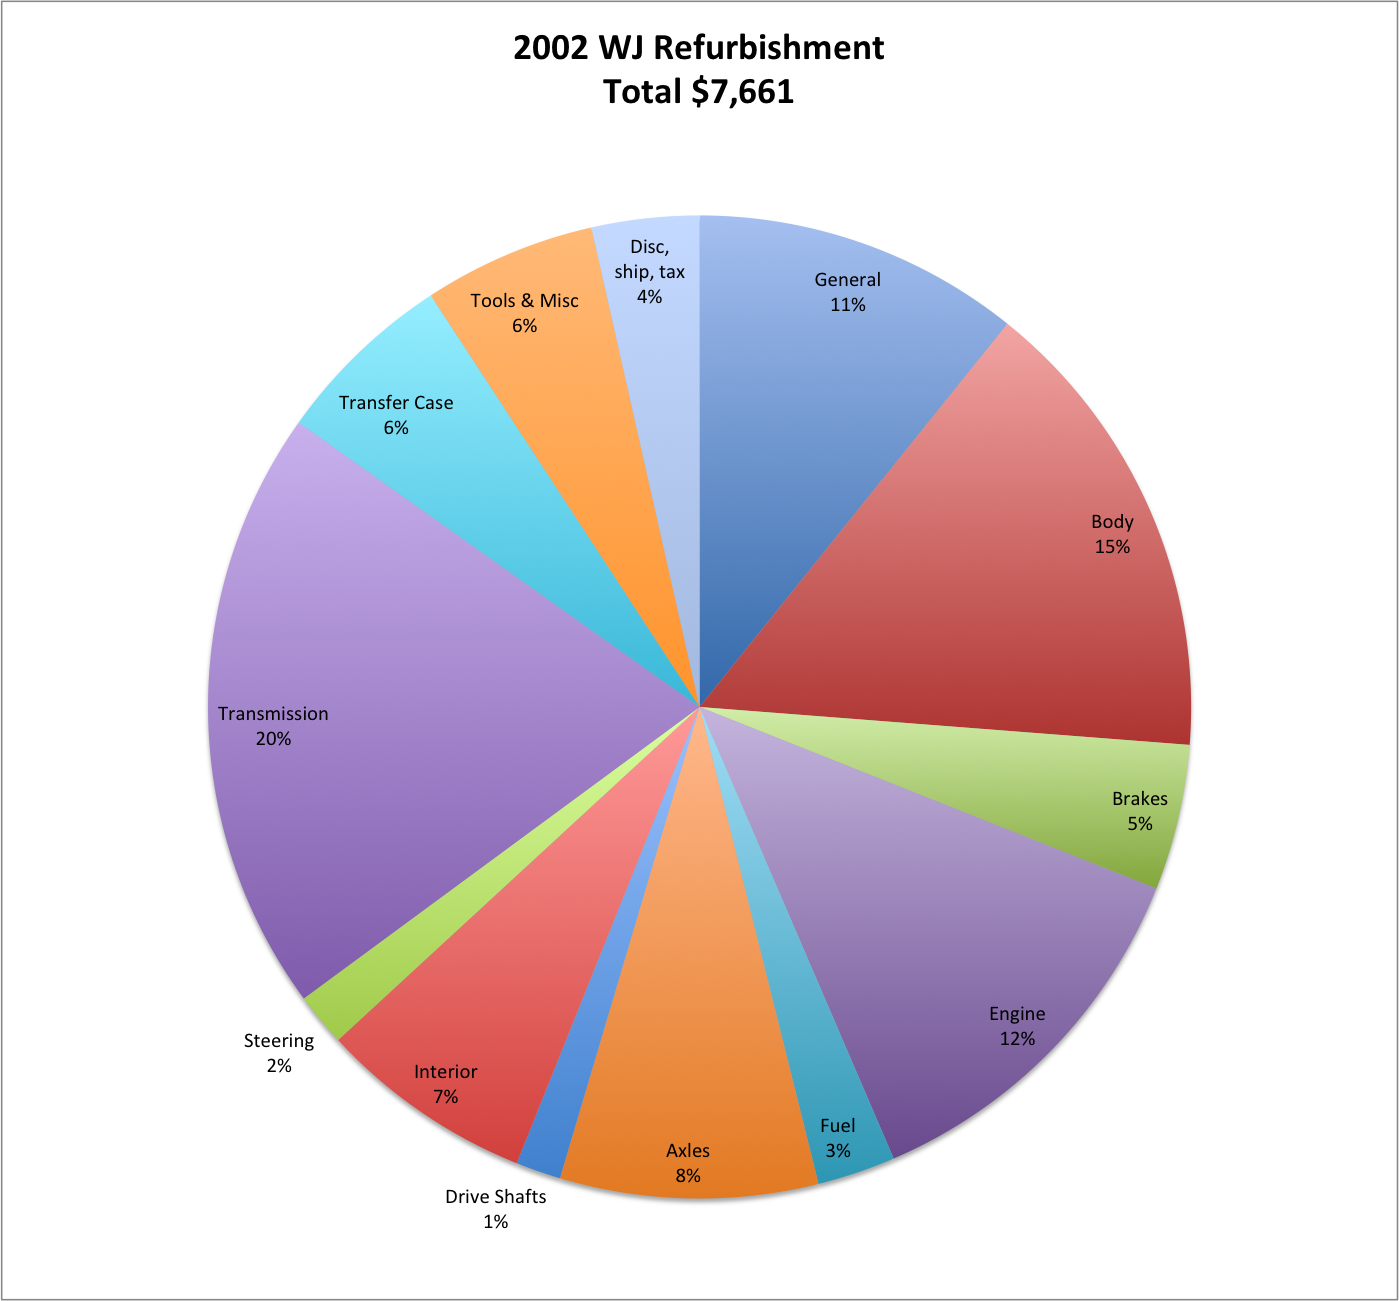
In all I spent a total of $7,661 on this project, and did all the work myself. Here is a spreadsheet of all the parts receipts. (Note that this does not include a long-block… as this one was recently rebuilt.) There are a number of places where I made a wasteful mistake or two, so in retrospect, it might be possible to do this rebuild for more like $6,500 if you are smart, careful, and lucky.
The pie chart below shows the distribution of these costs….
Condition as purchased:
Besides the color, features, proximity, and the remanufactured engine, it came with recently replaced radiator, A/C condenser, A/C pump, PS pump, starter, window regulators, etc. (and several pounds of iron oxide… 😉 )
Like most older high mileage WJ Grand Cherokees it needed a rebuild end-to-end. My inspection confirmed the common/expected problems as follows:
- Transmission & Transfer case were OK, no shift problems, hesitation, or slippage, fluid was clean, not burnt, but @175K its prudent to inspect and rebuild if you want a reliable vehicle when it is -30F in the winter or +100F in the summer, and you are towing a heavy trailer.
- Various small vacuum and evap hoses had split ends
- All U joints and the front drive line Carden ball needed replacing
- Brake lines were rusty and unsafe (pin holes developing), hoses were old and beginning to crack
- Disks and calipers in need of refurbishment
- Fuel pump OK, but @175K it was time to replace
- Leather seats excellent, except drivers bottom stitching torn, seat heaters not working
- Steering wheel leather was discolored and stretched
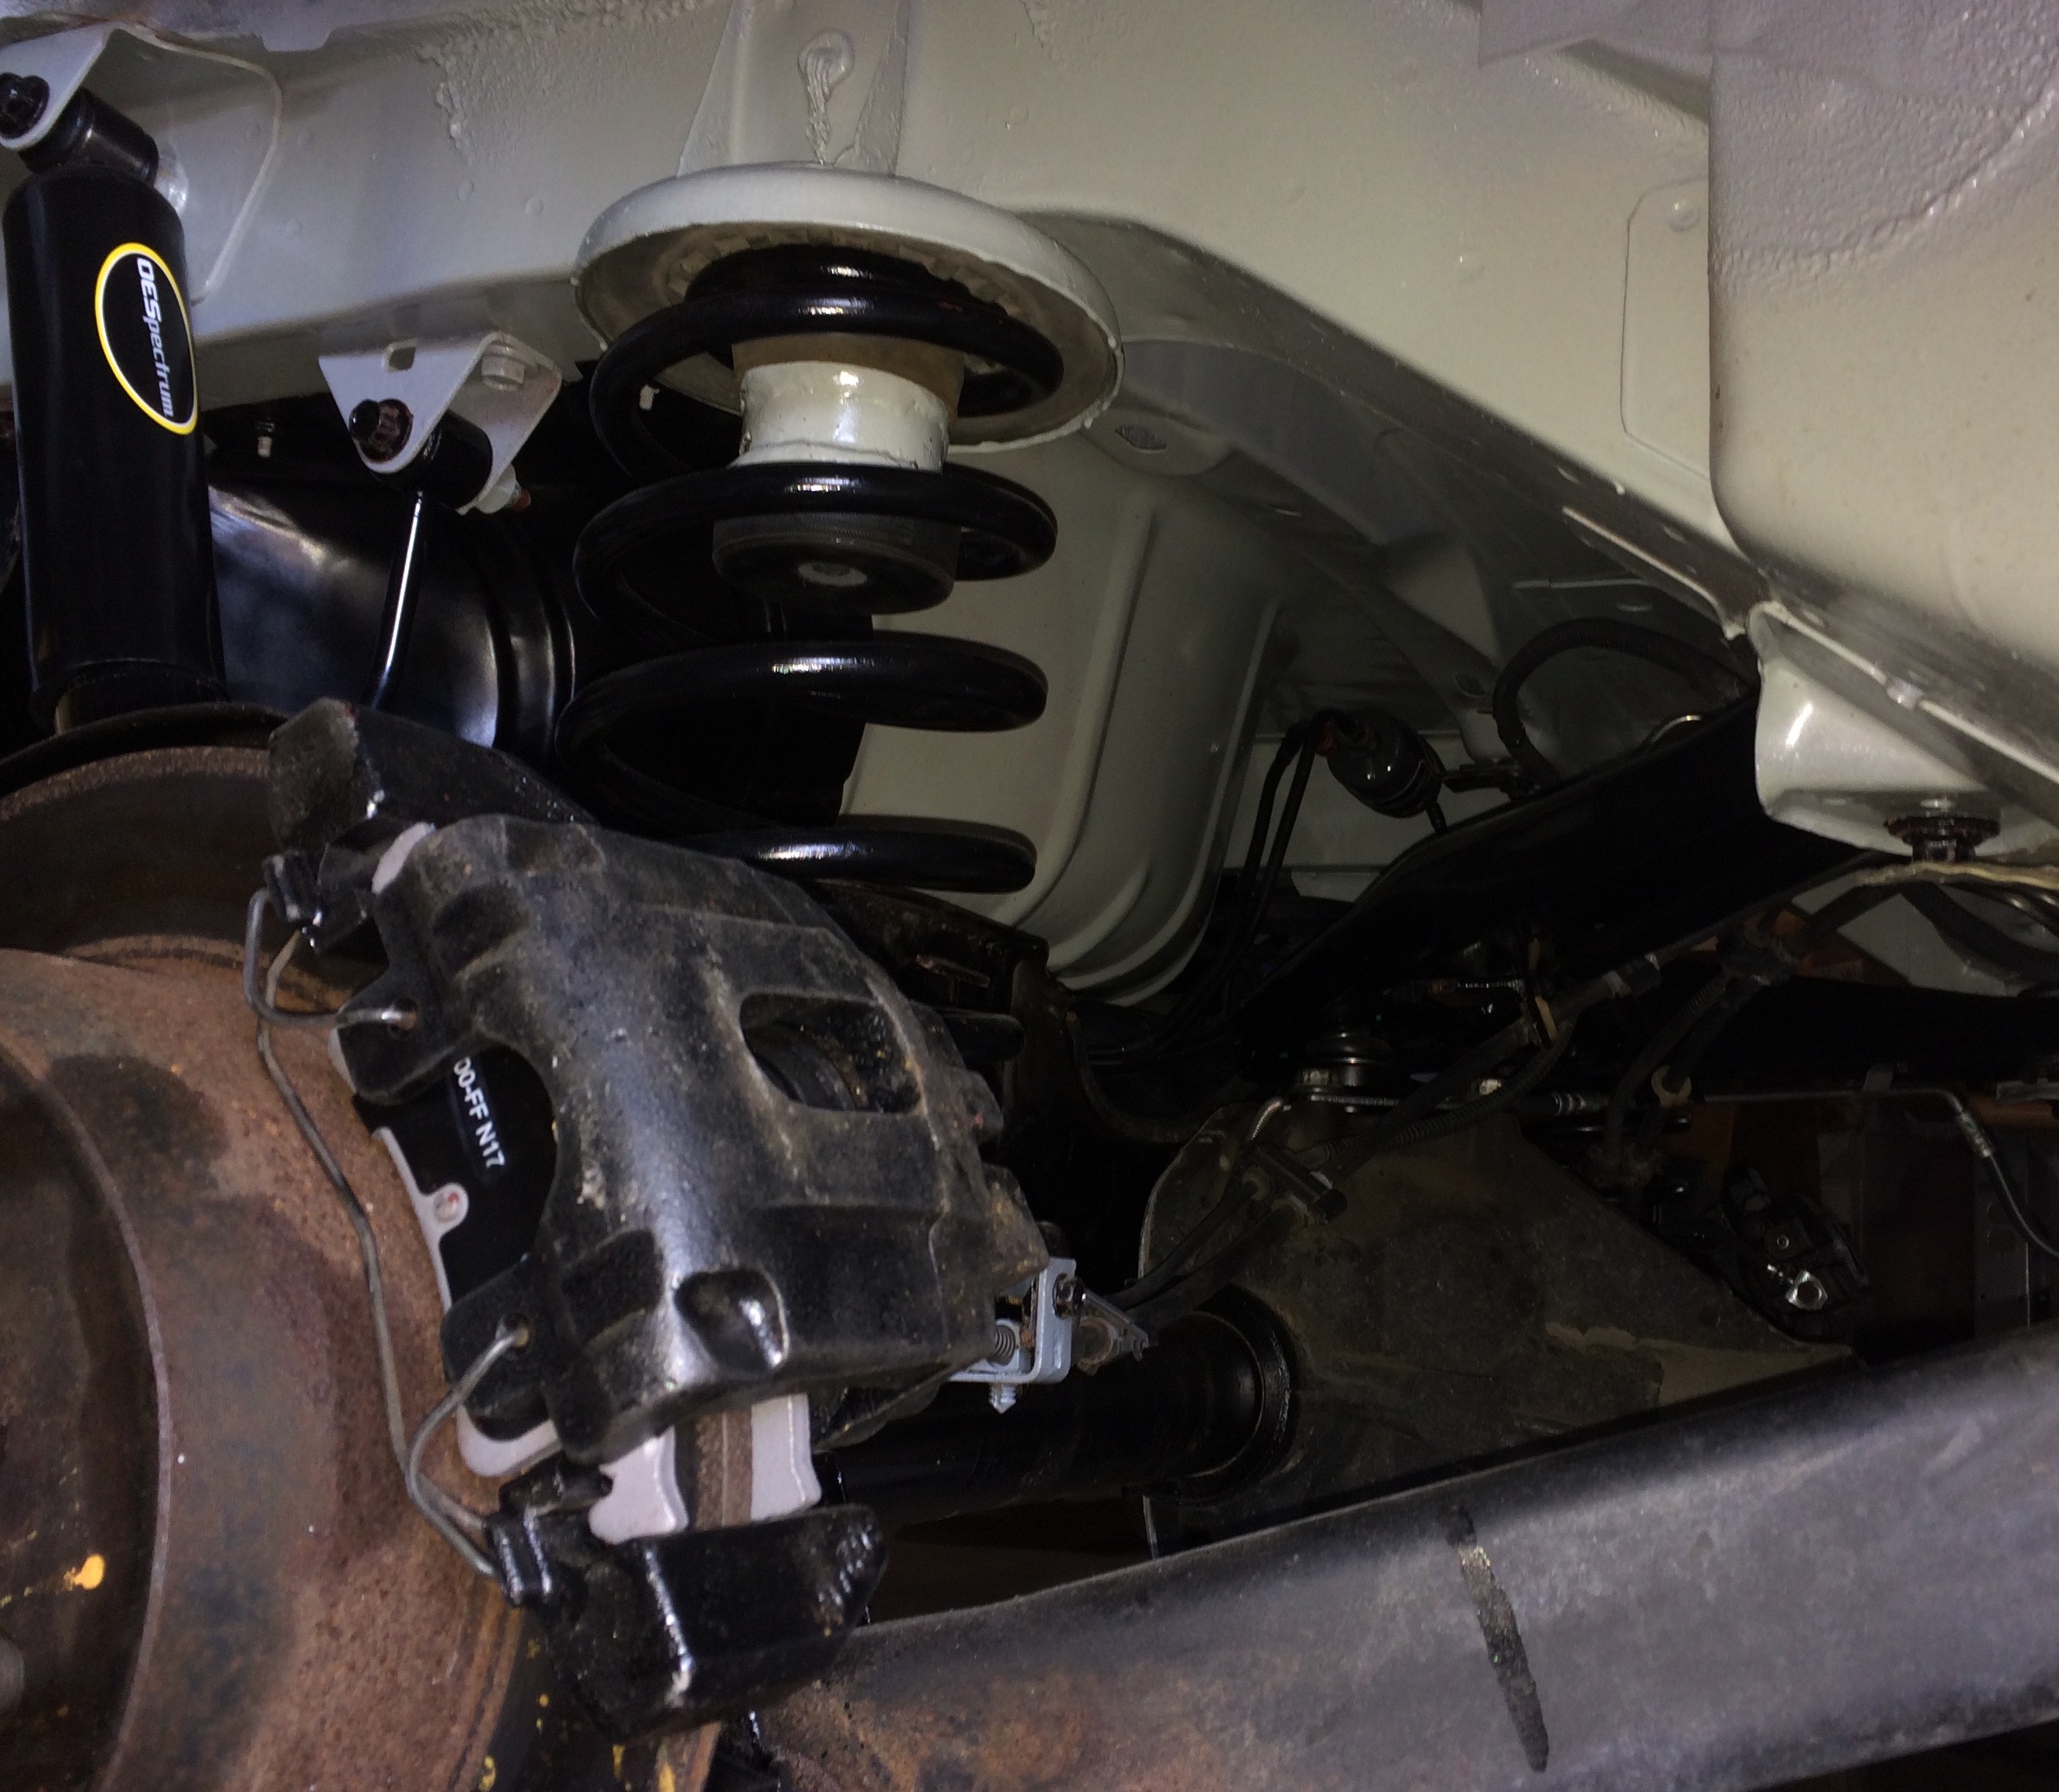
- Shocks worn out
- Bushings and ball joints serviceable, but getting old
- Hydraulic cooling fan was OK, but should be replaced/rebuilt, as very hard to find in a pinch for a reasonable price if it fails, and a failure can trigger the chronic engine overheat valve seat problem
- Tires worn down to < 20%
- Metalized plastic hub caps were corroded/pealing
- Interior plastic and carpet in good condition and clean
- Some speakers needed to be replaced (dash, LR door)
- Drivers door electrical harness at hinge was intermittent
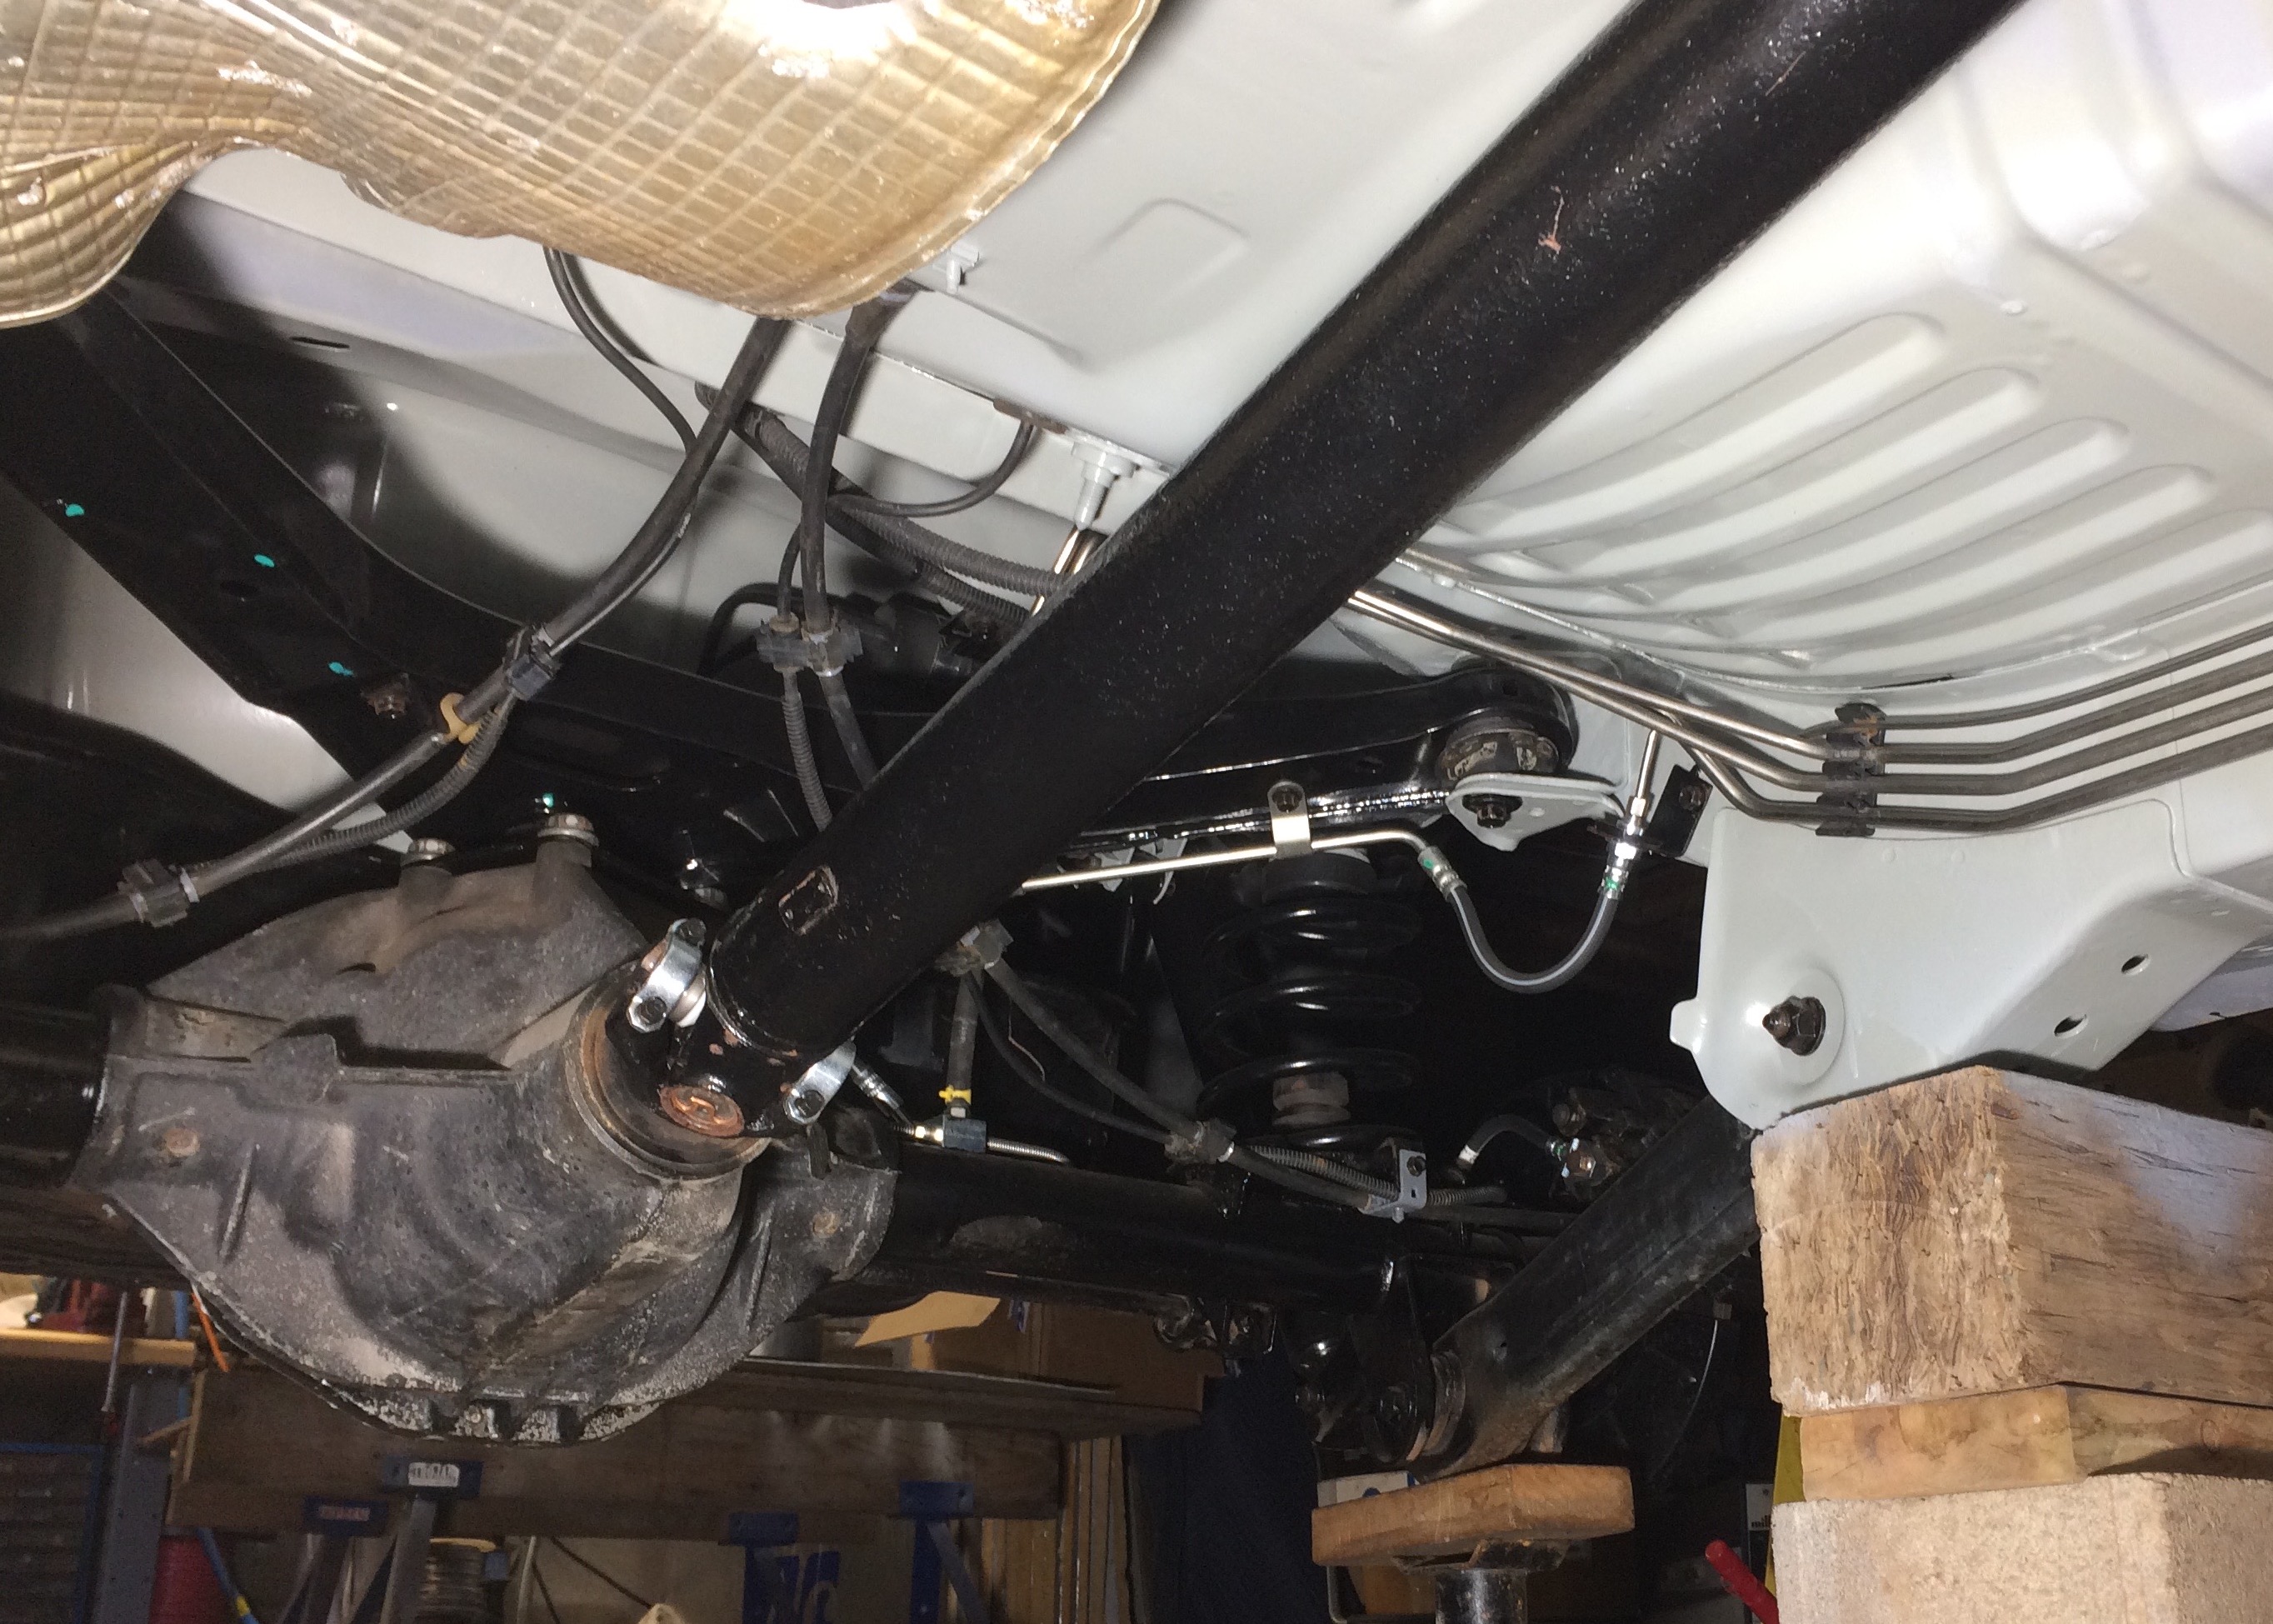
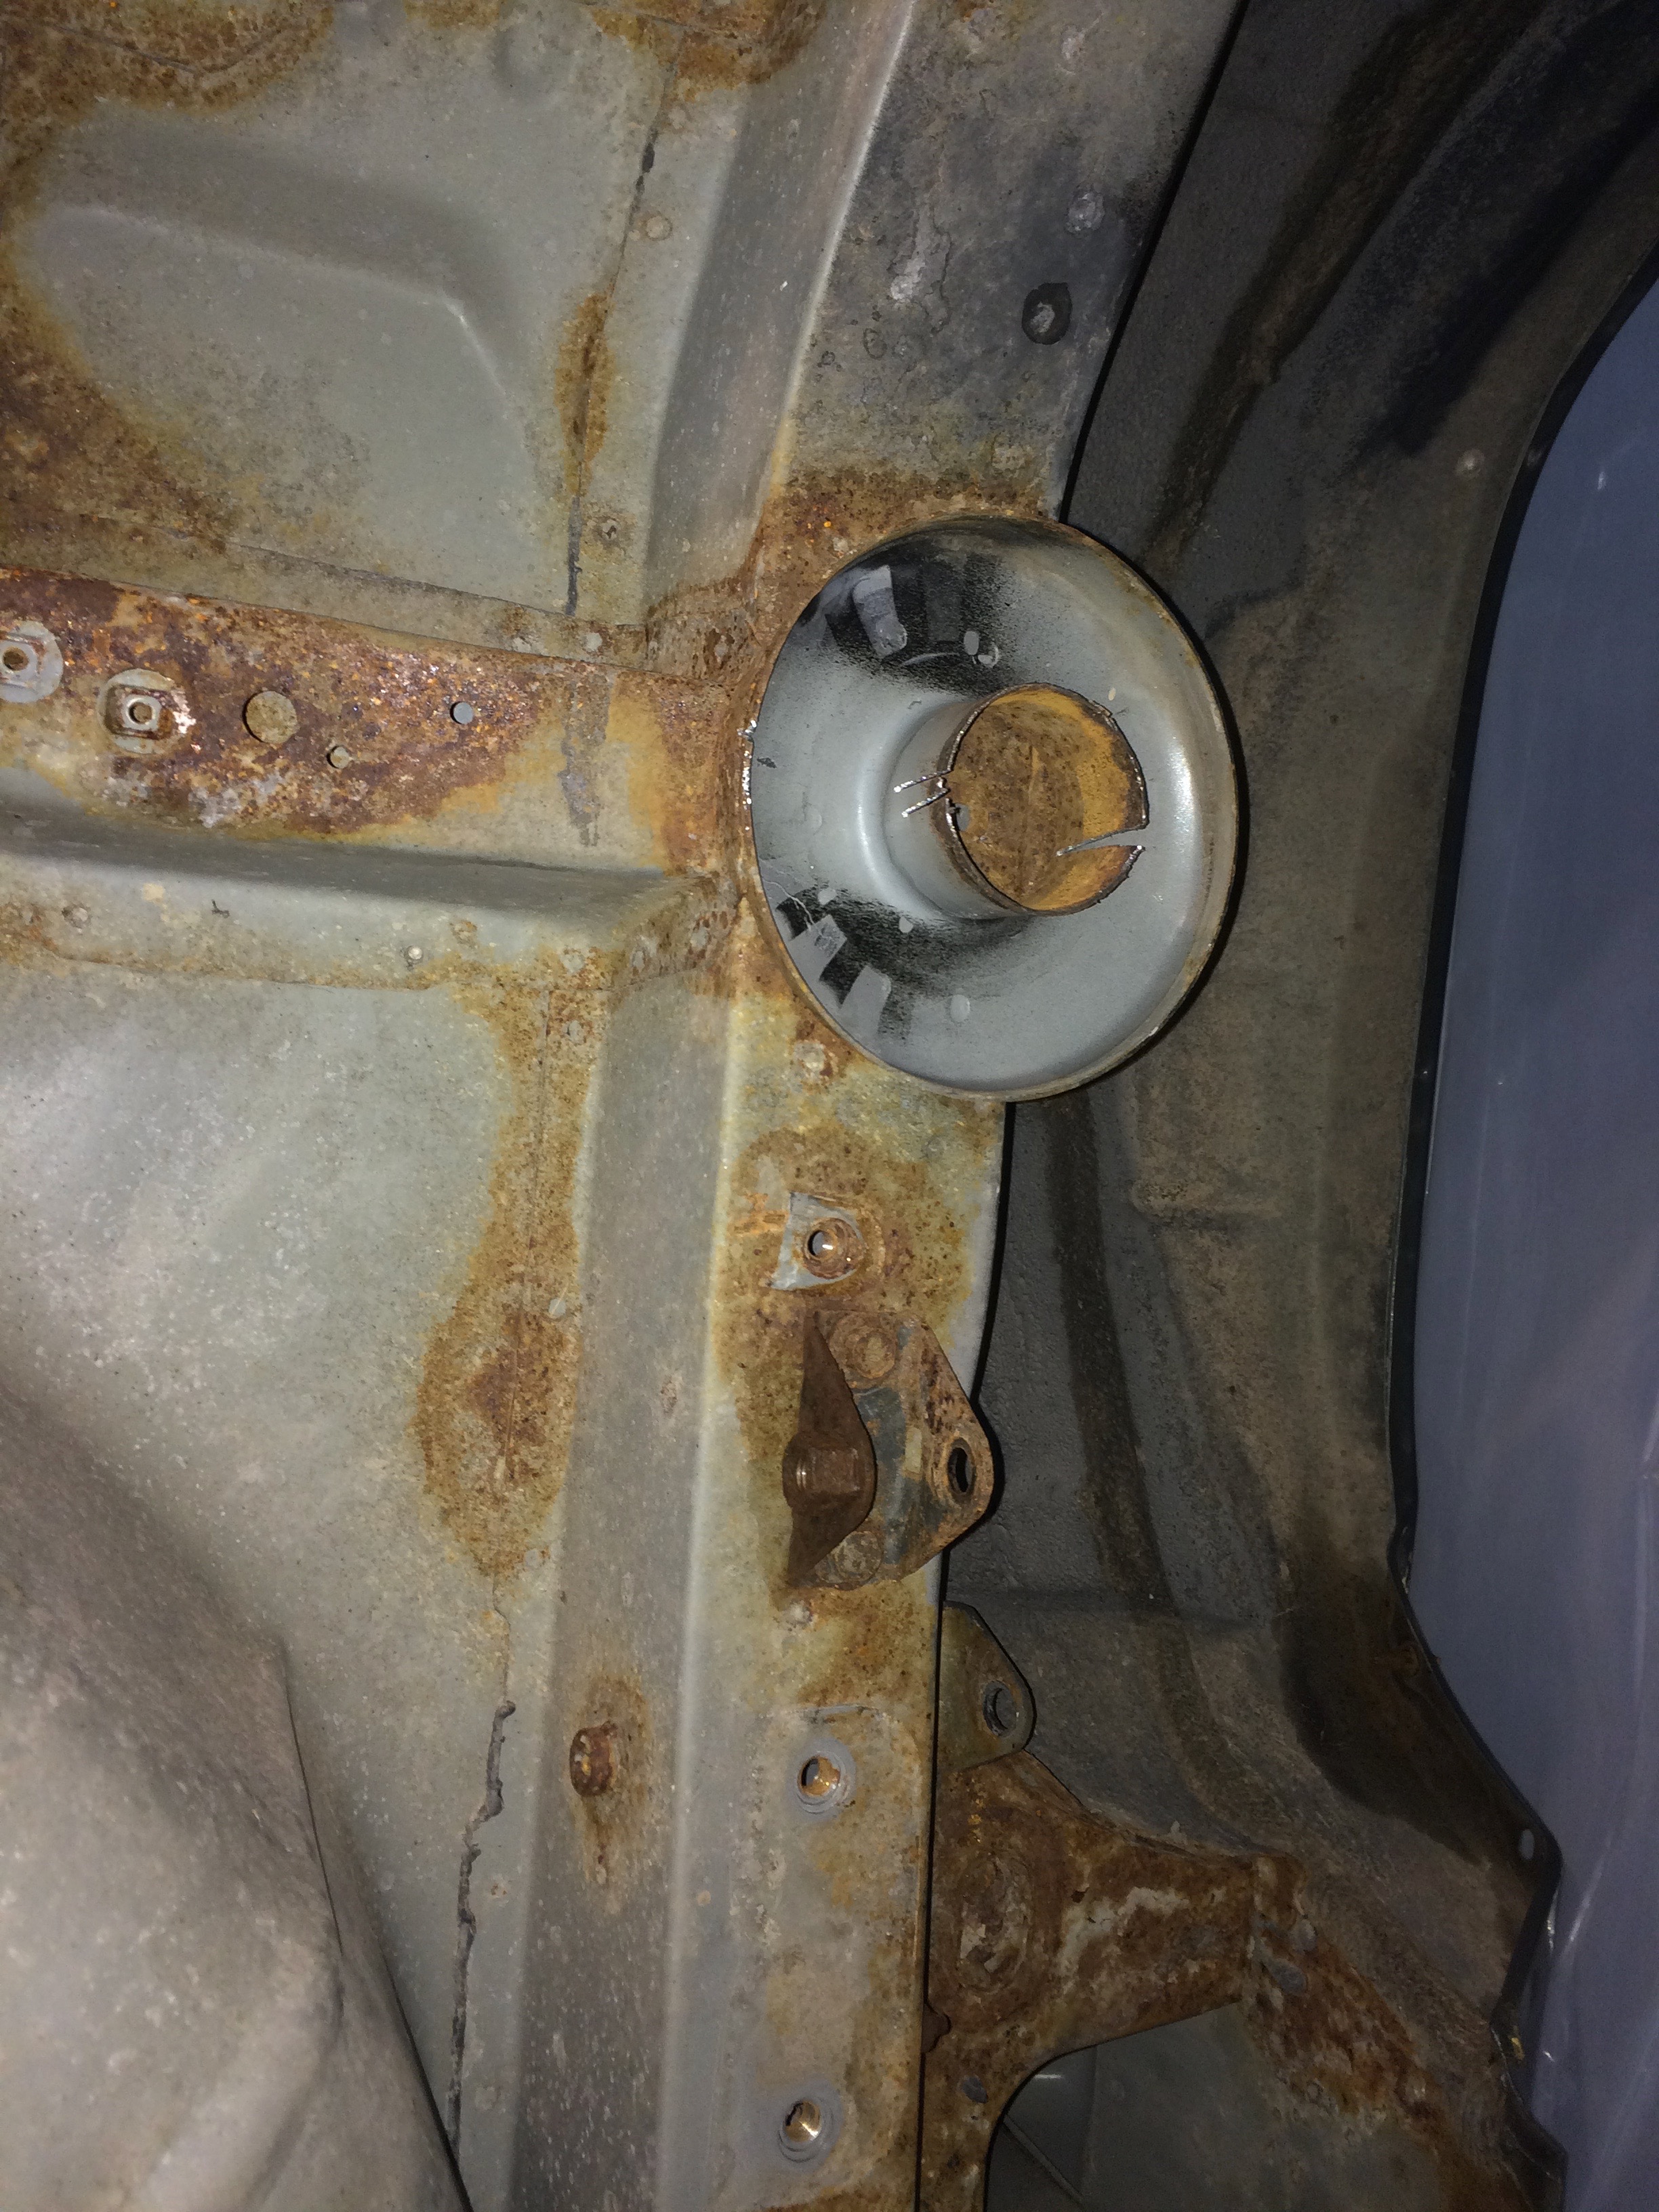
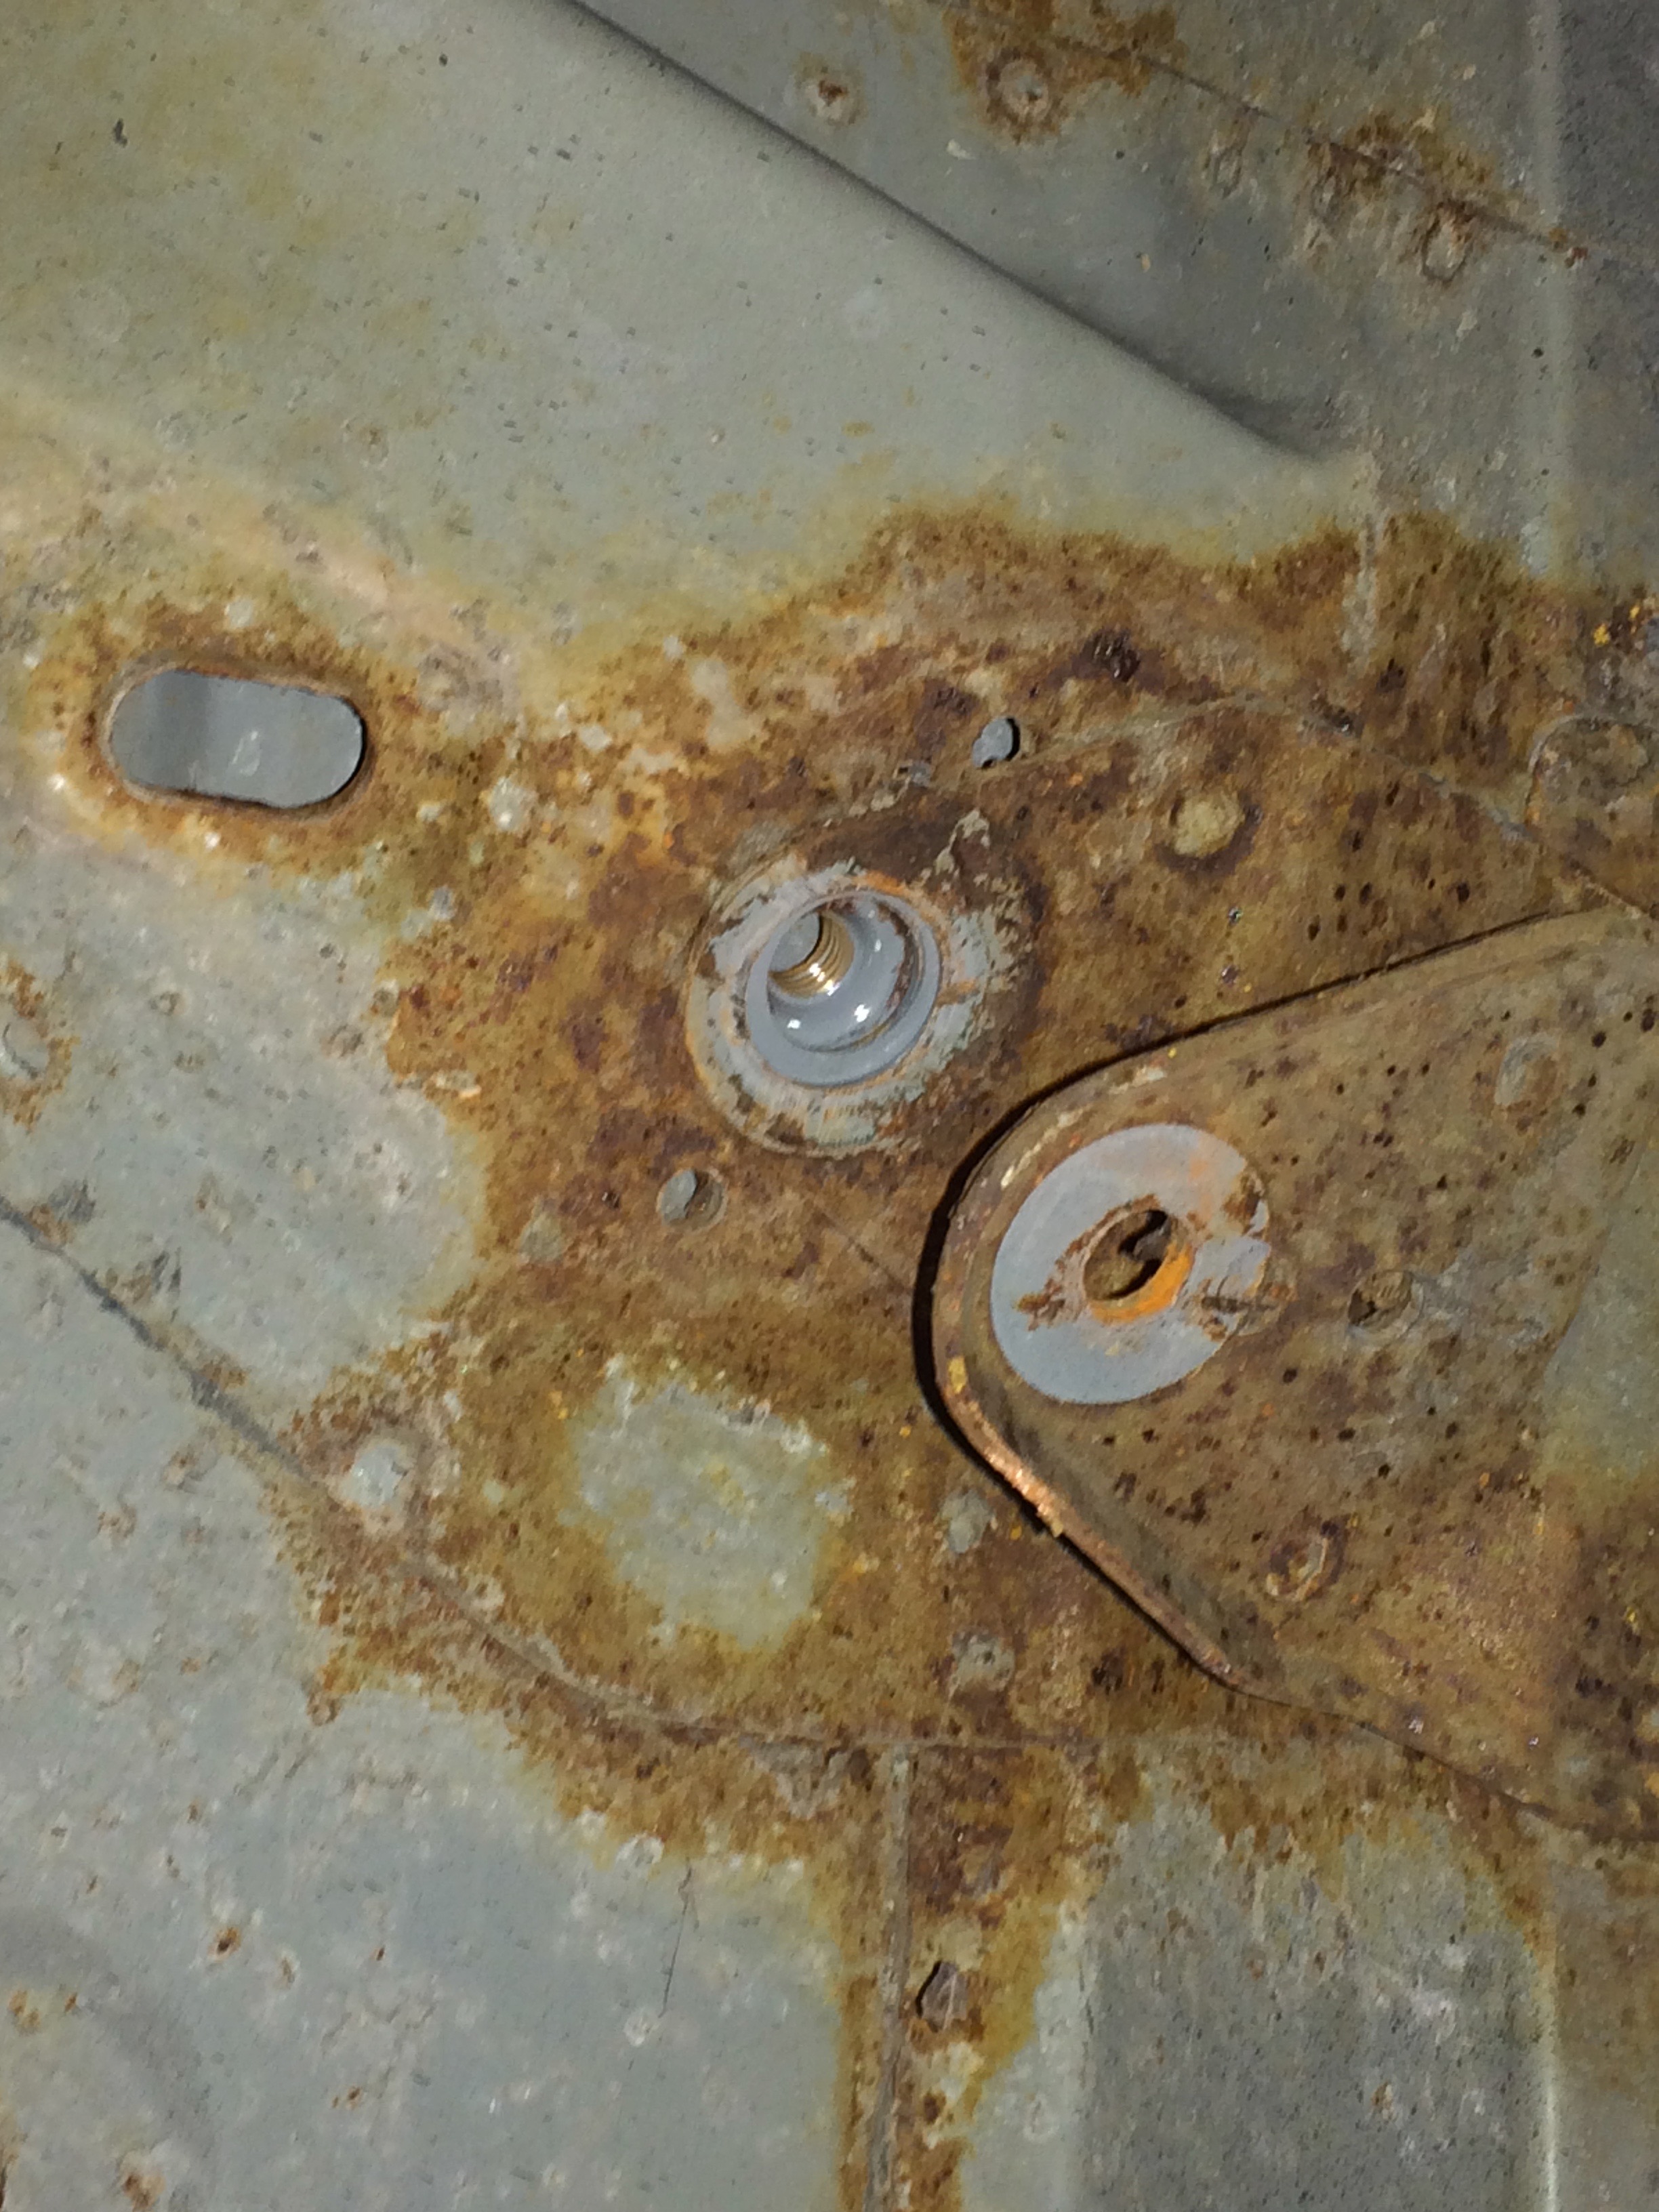
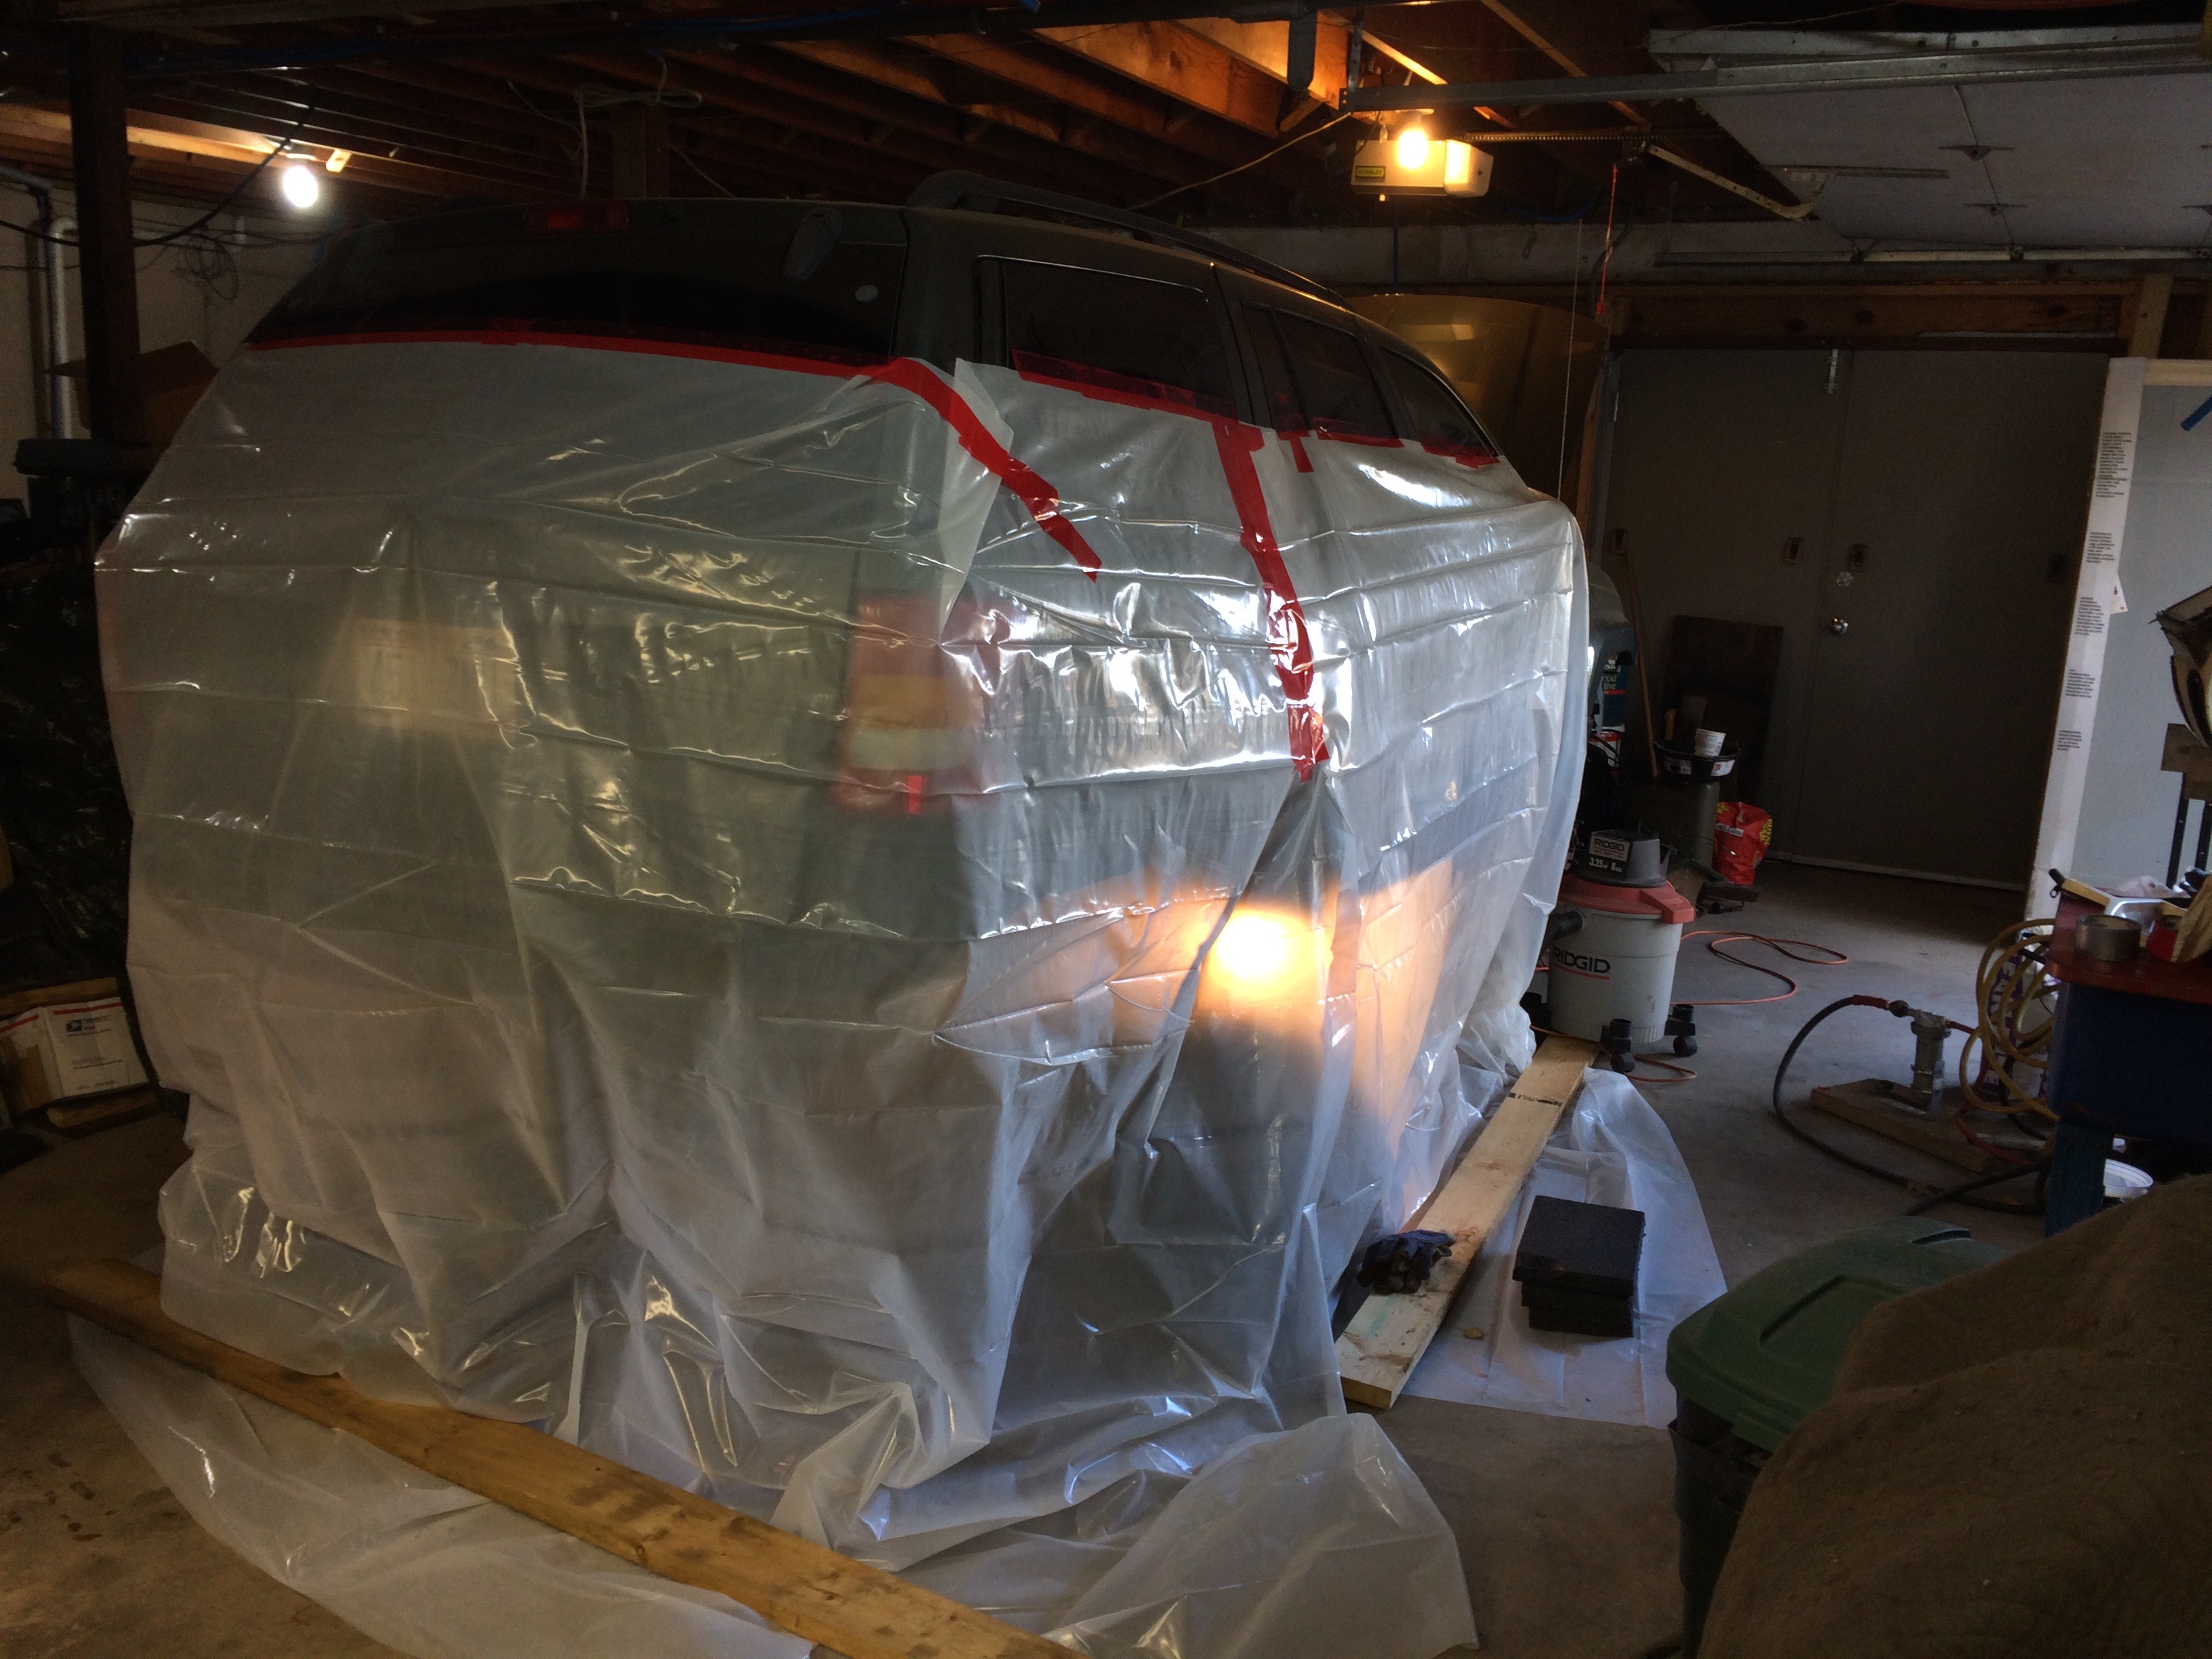
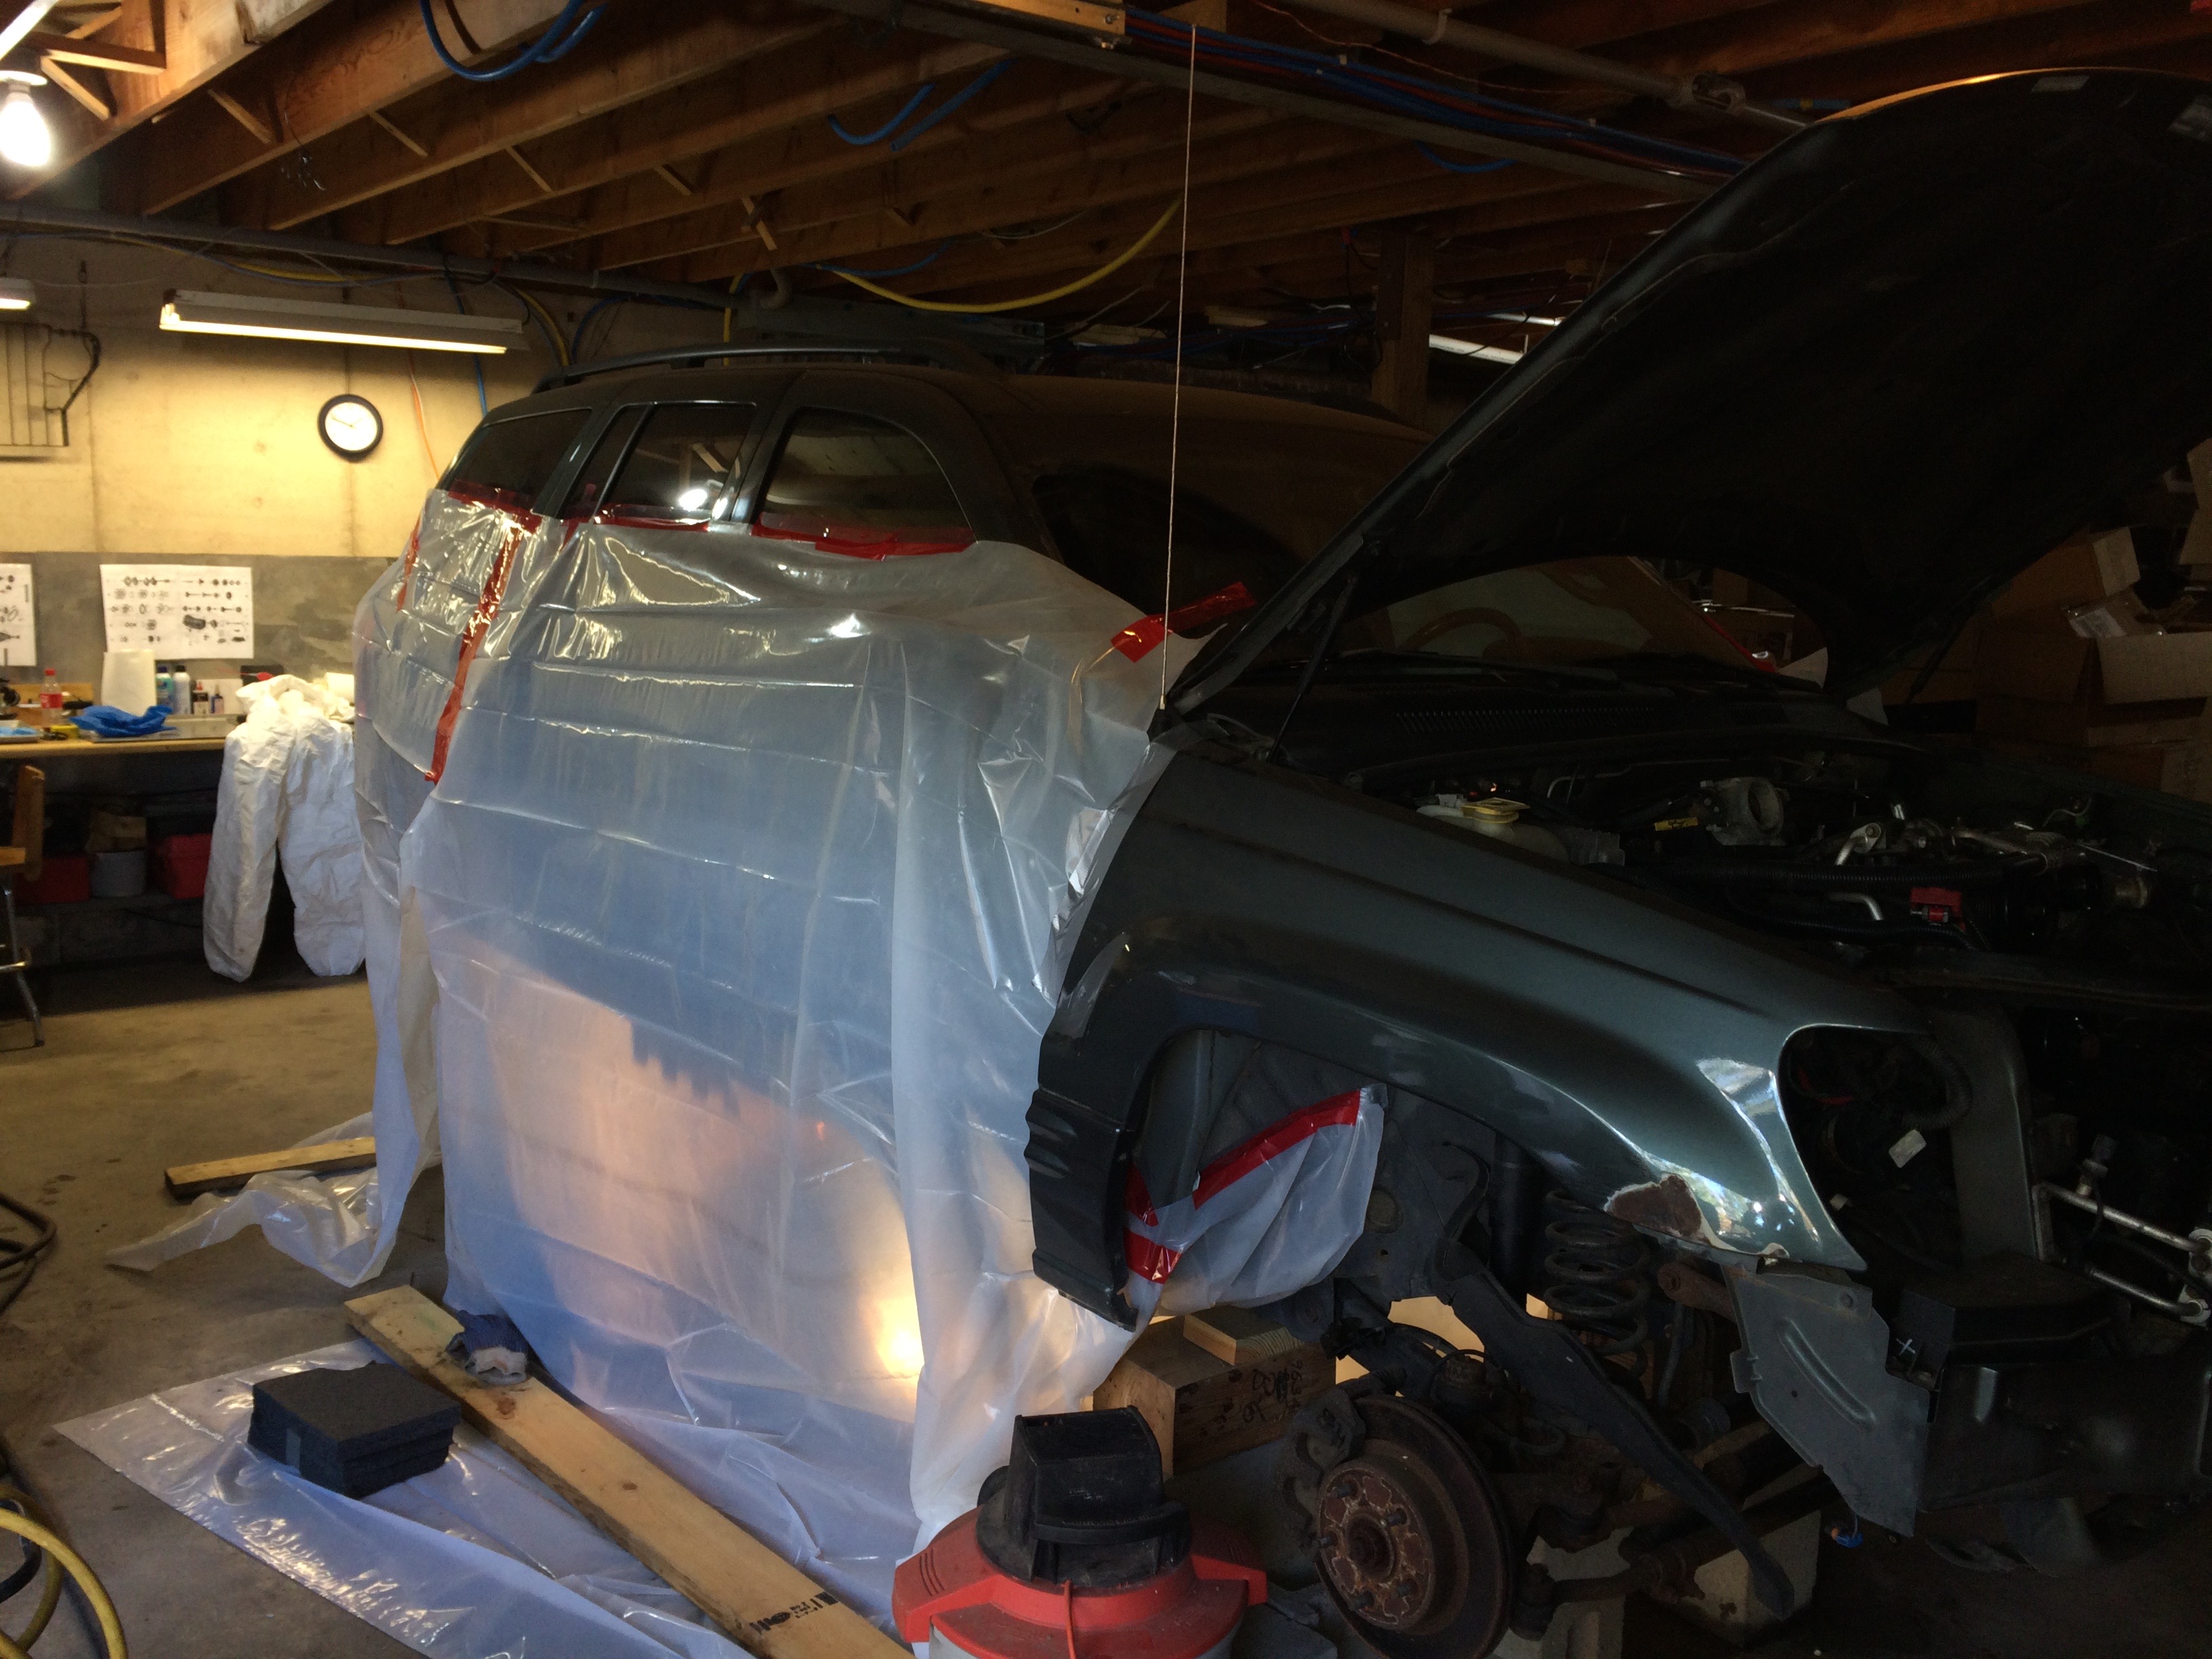
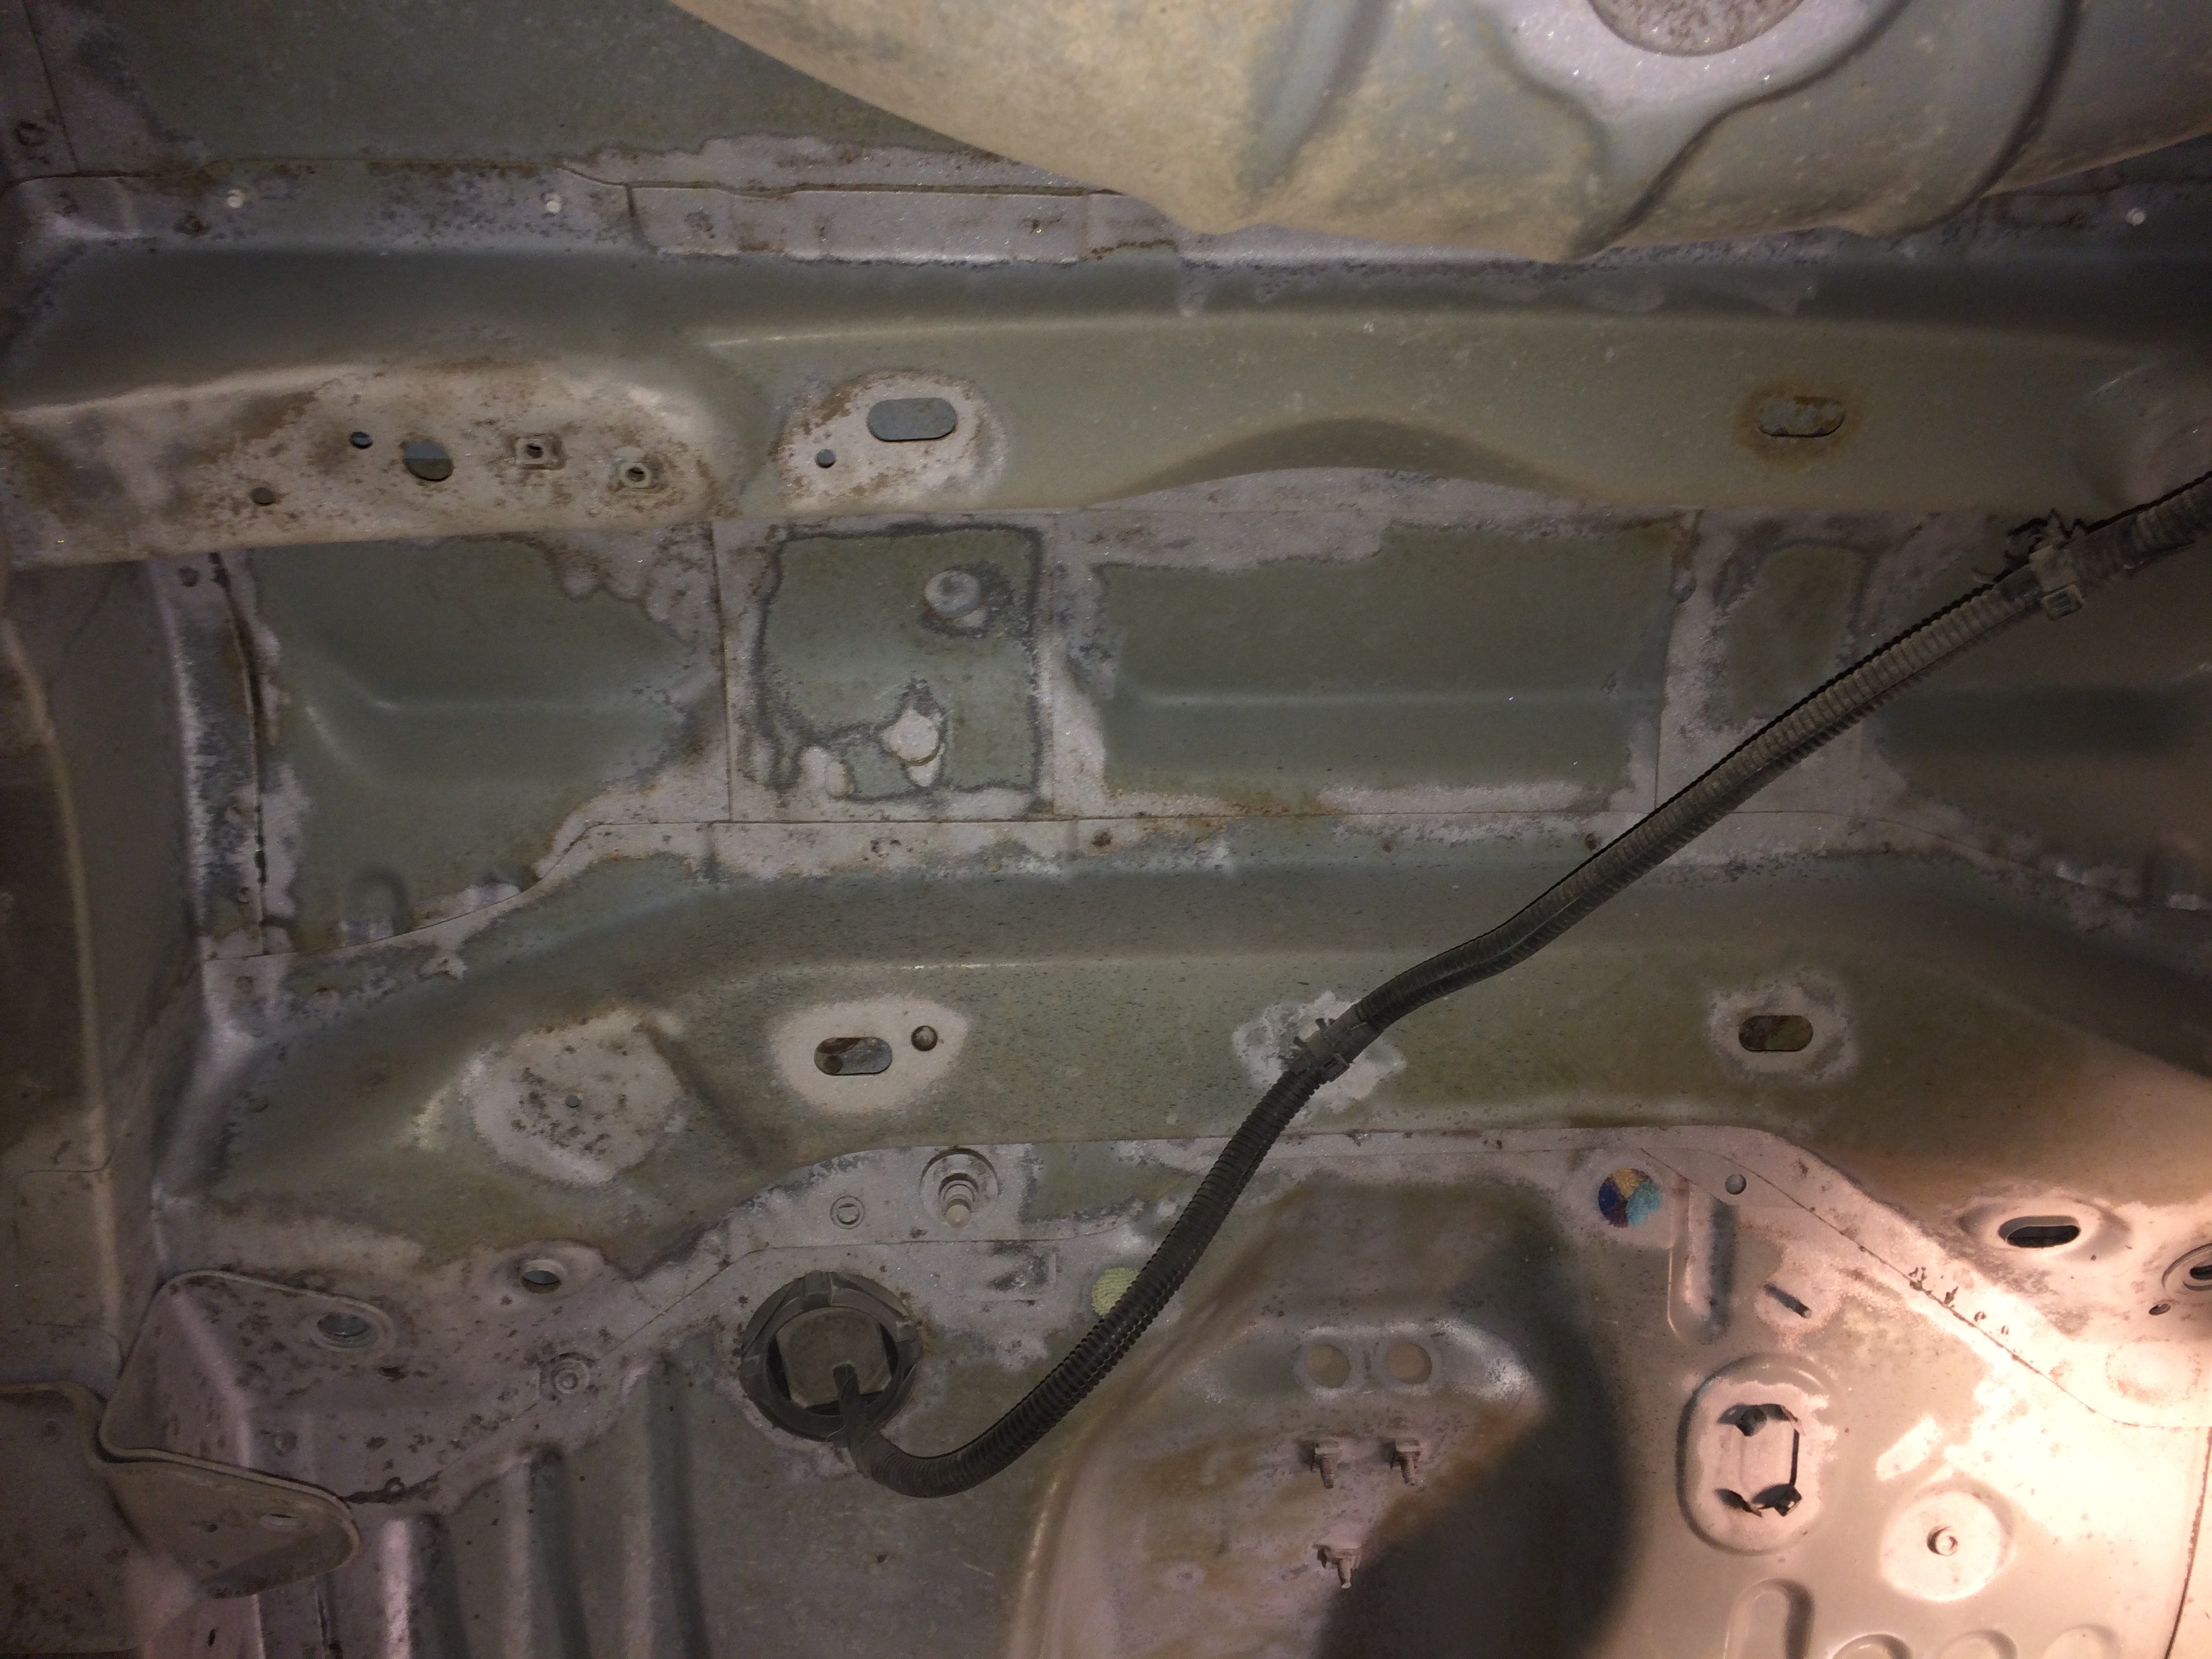
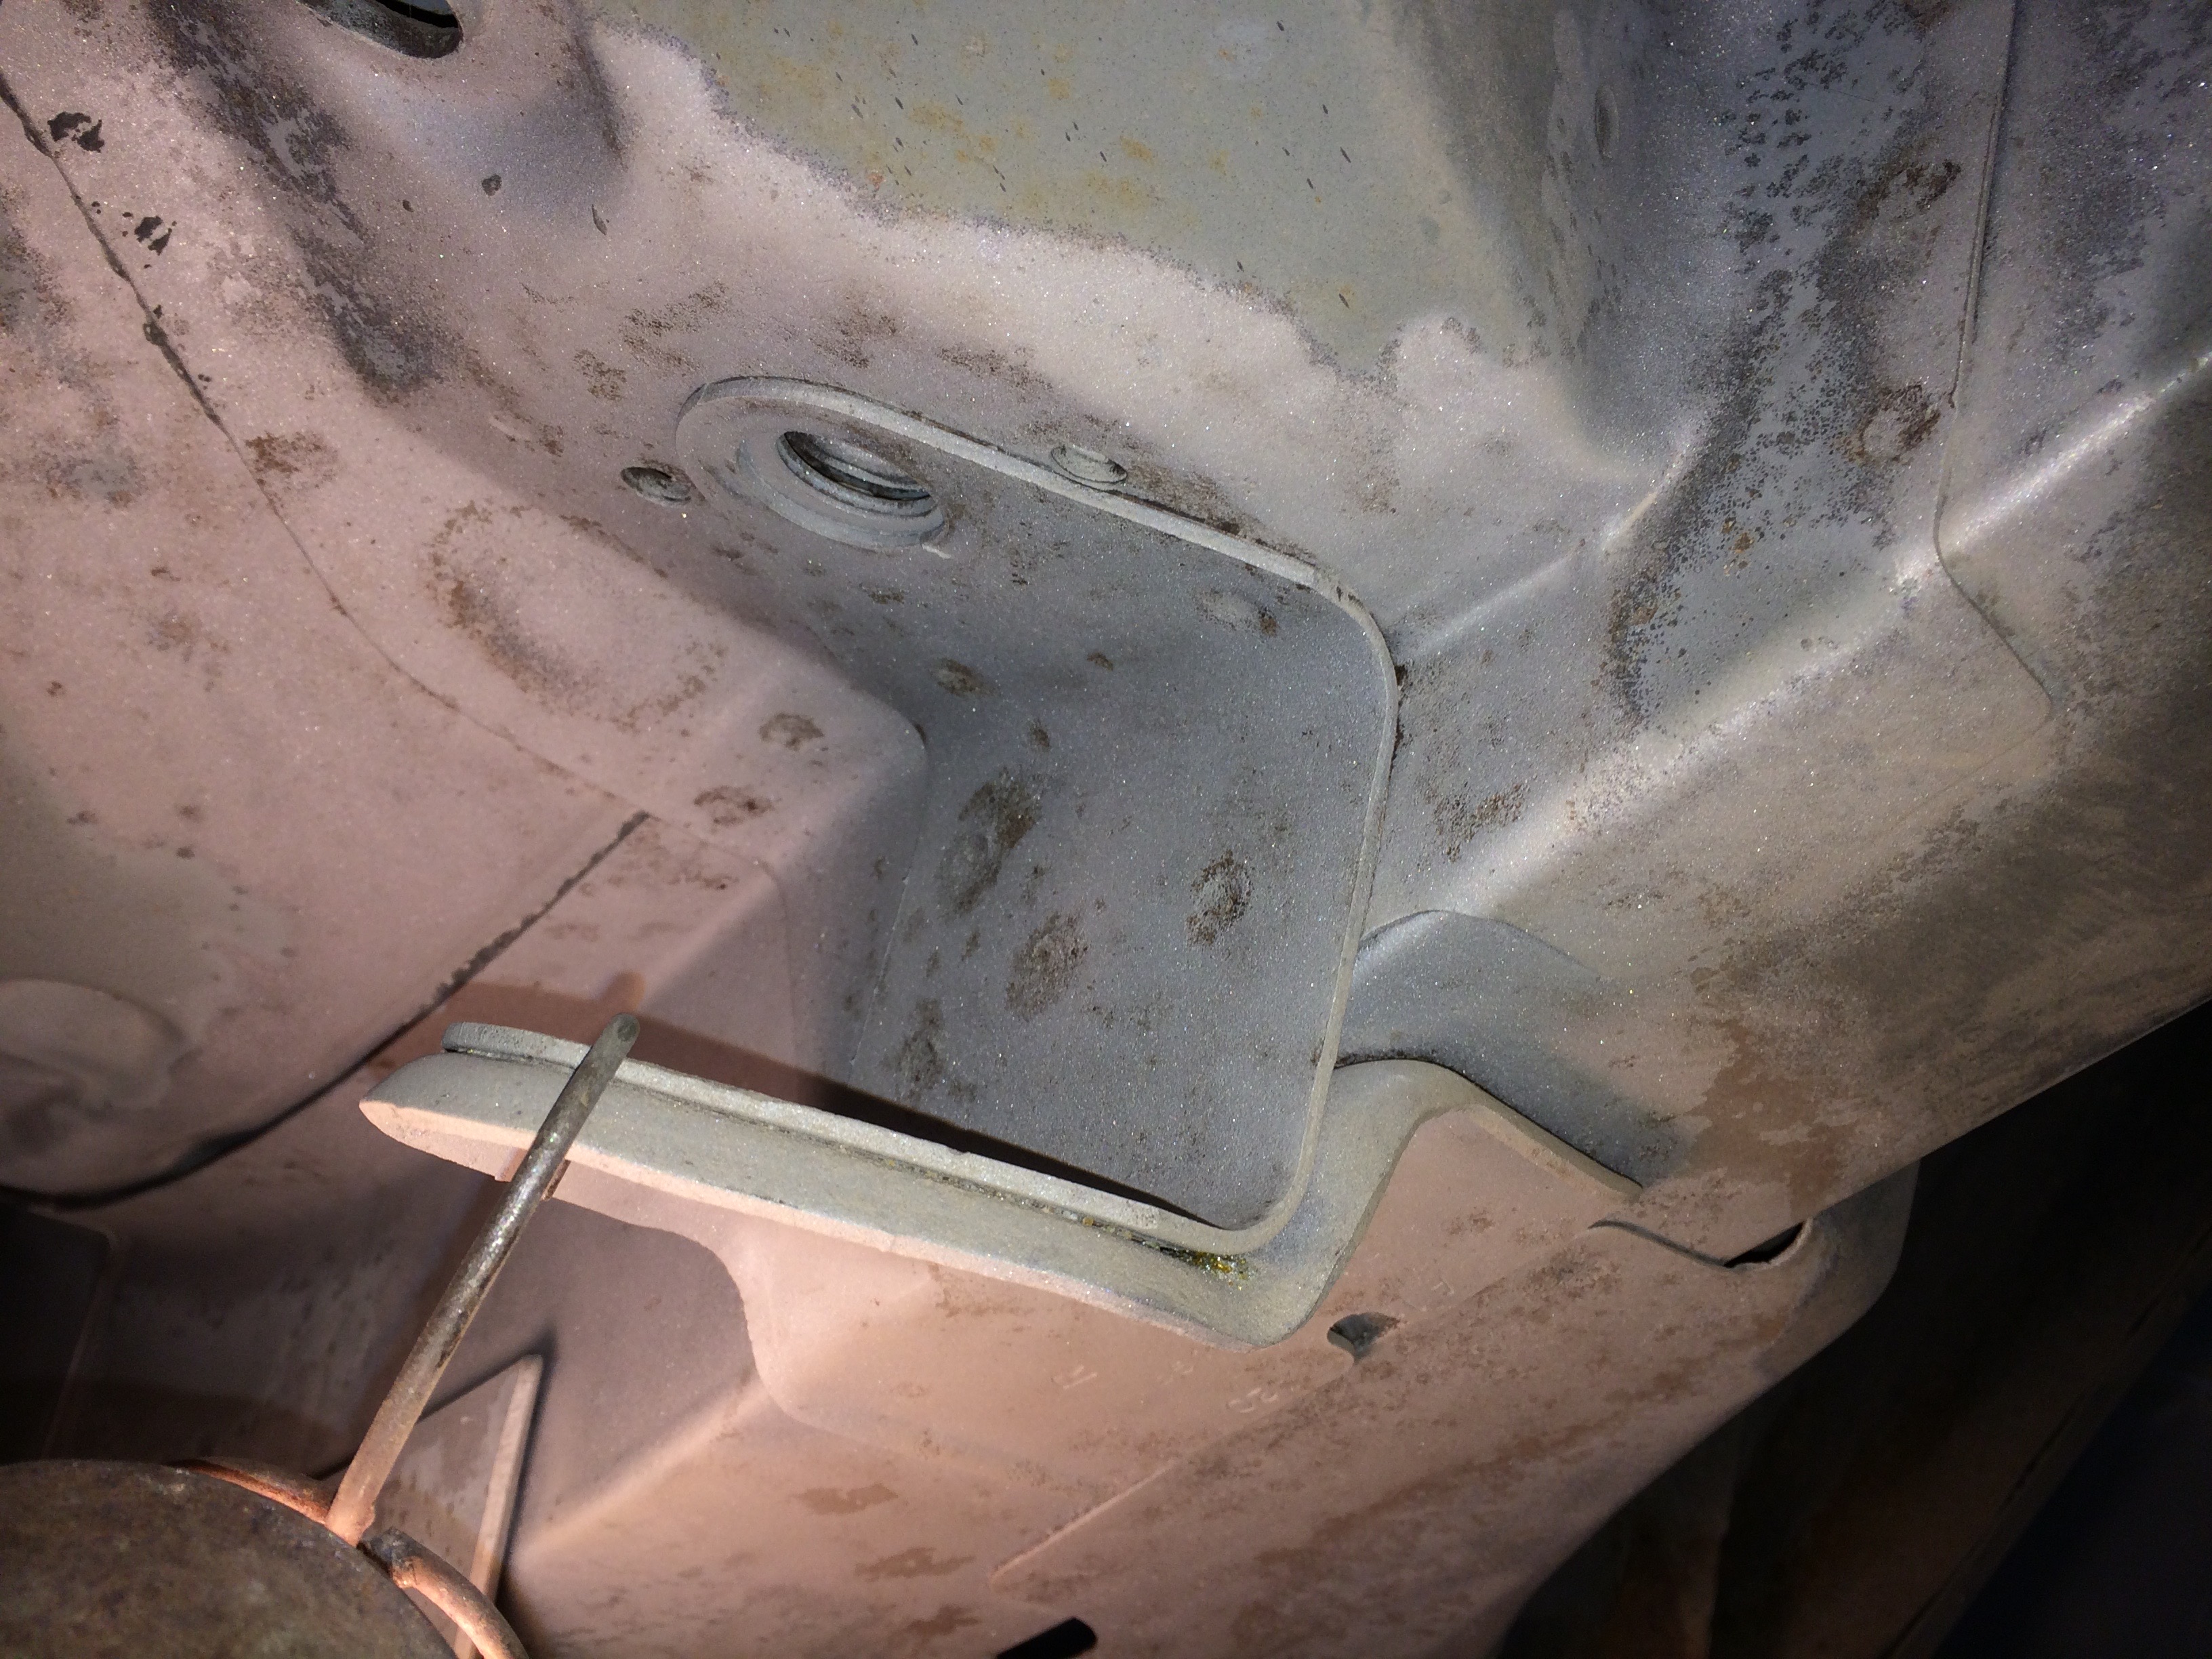
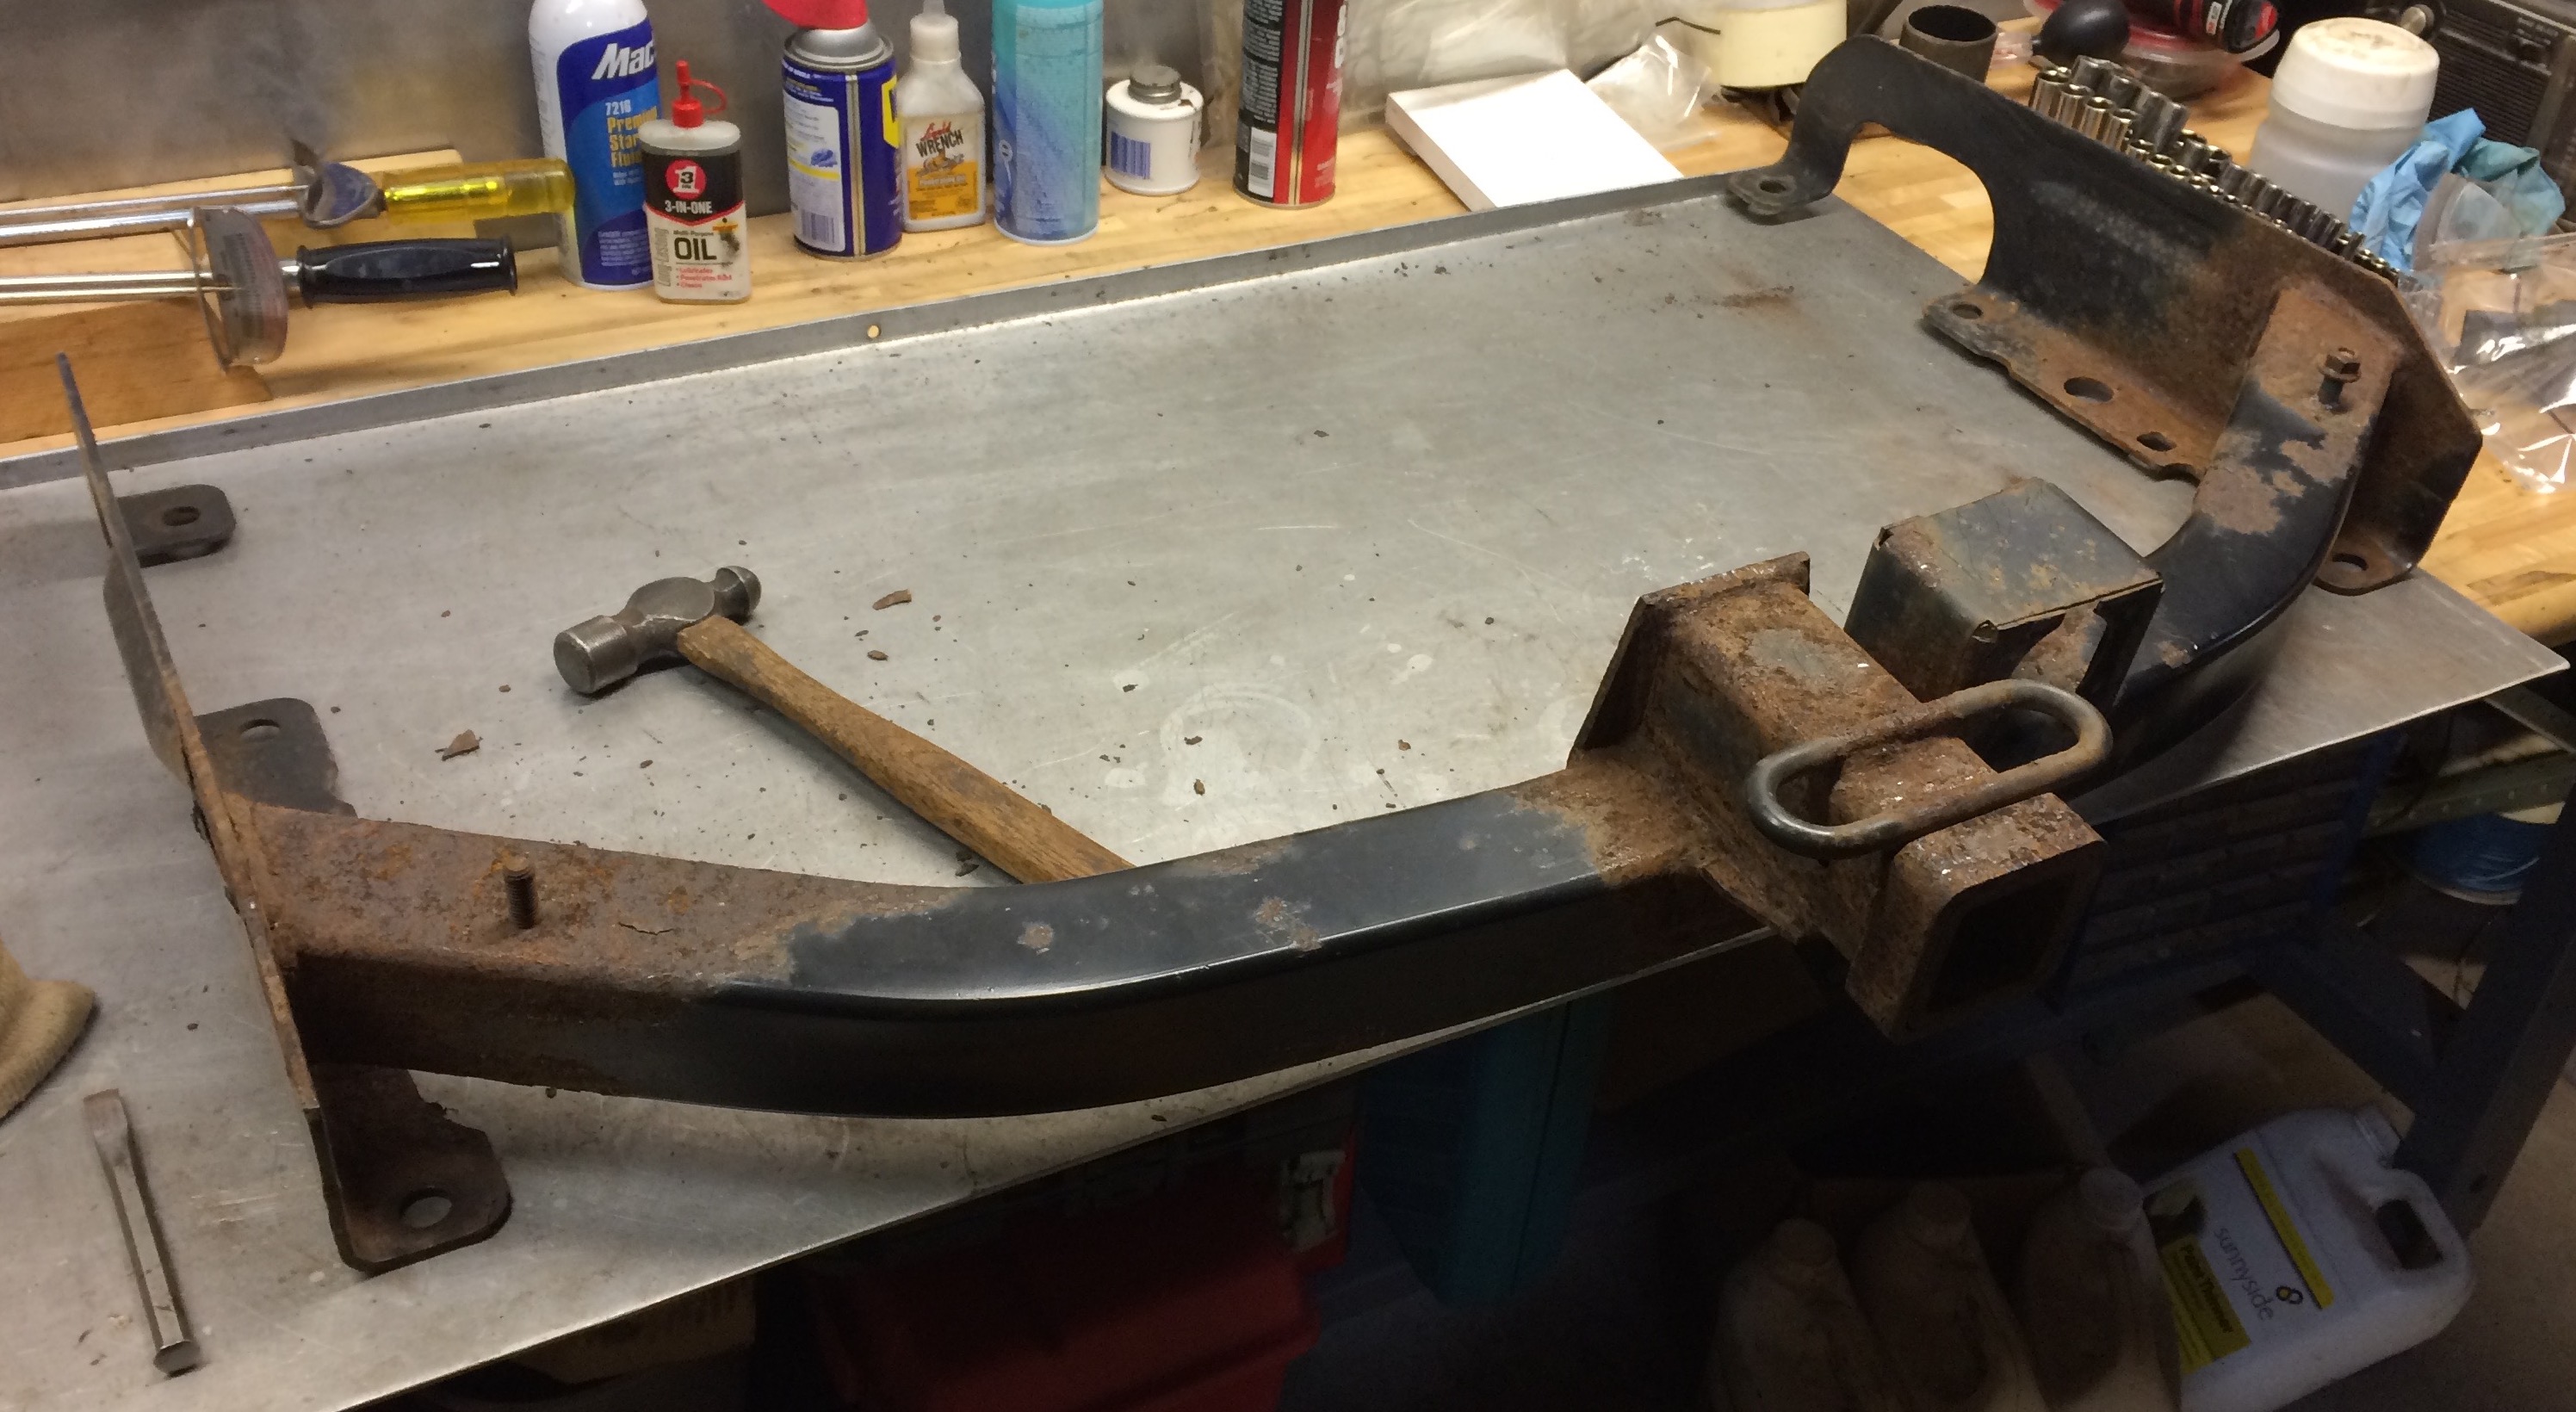
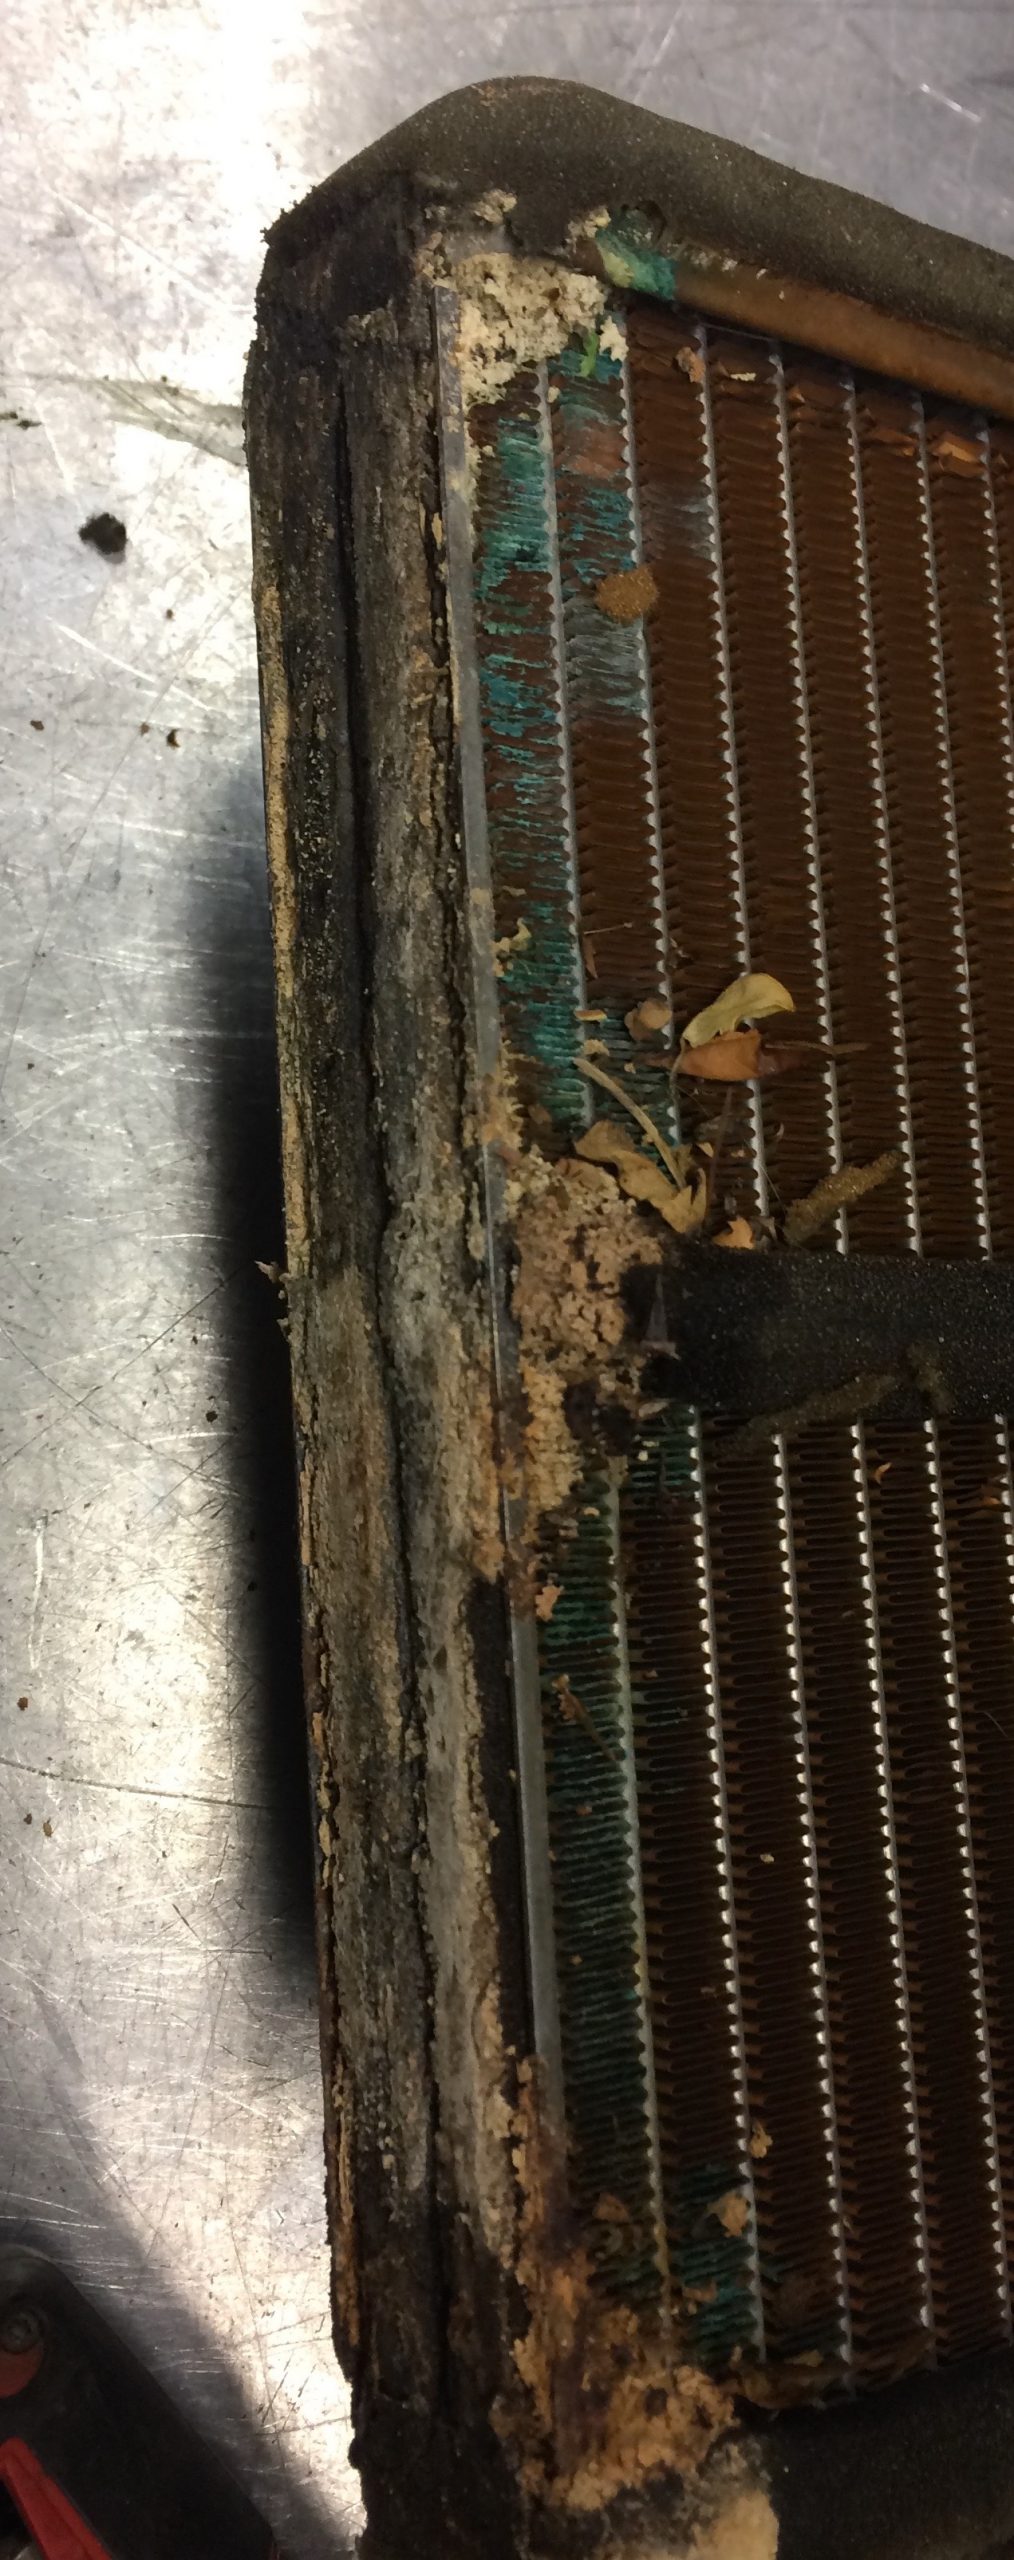
- Rocker panels badly rusted at several points, two small fender edges rusted from inside, moderate surface rust on underside, engine oil pan and rear wishbone badly rusted, evap bracket at left rear badly rusted. Unibody frame channels and suspension attachment points solid.

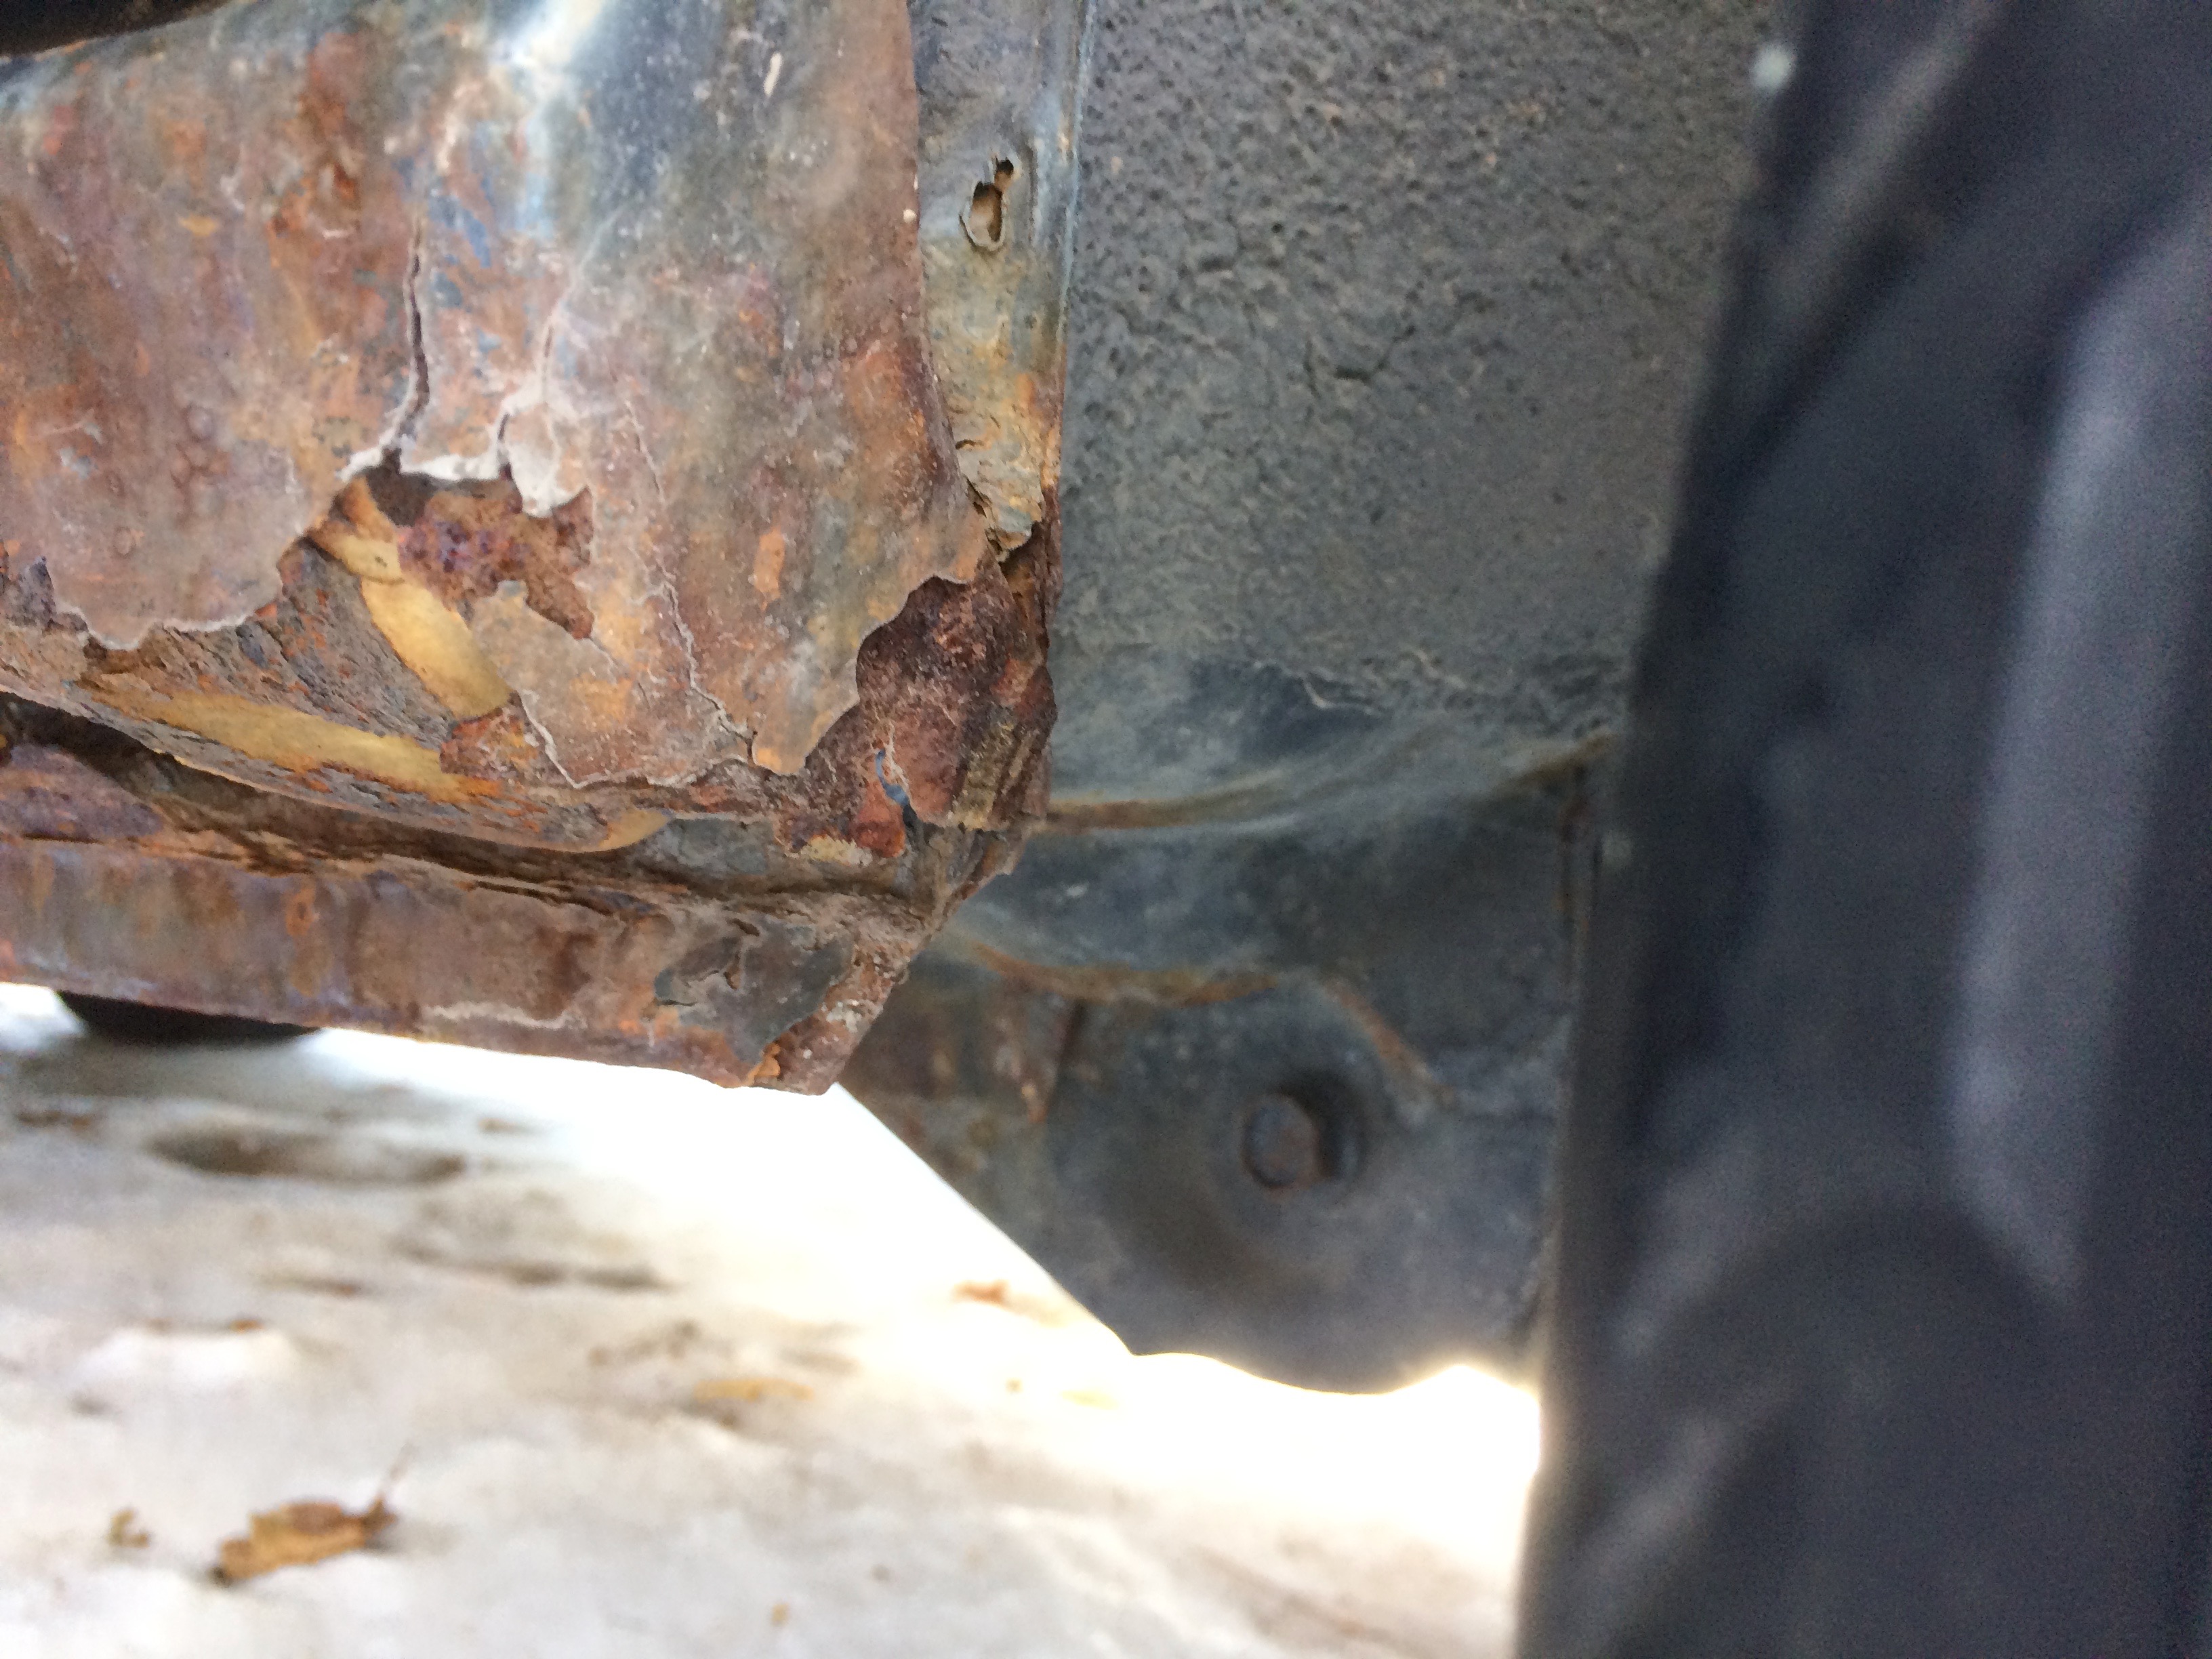

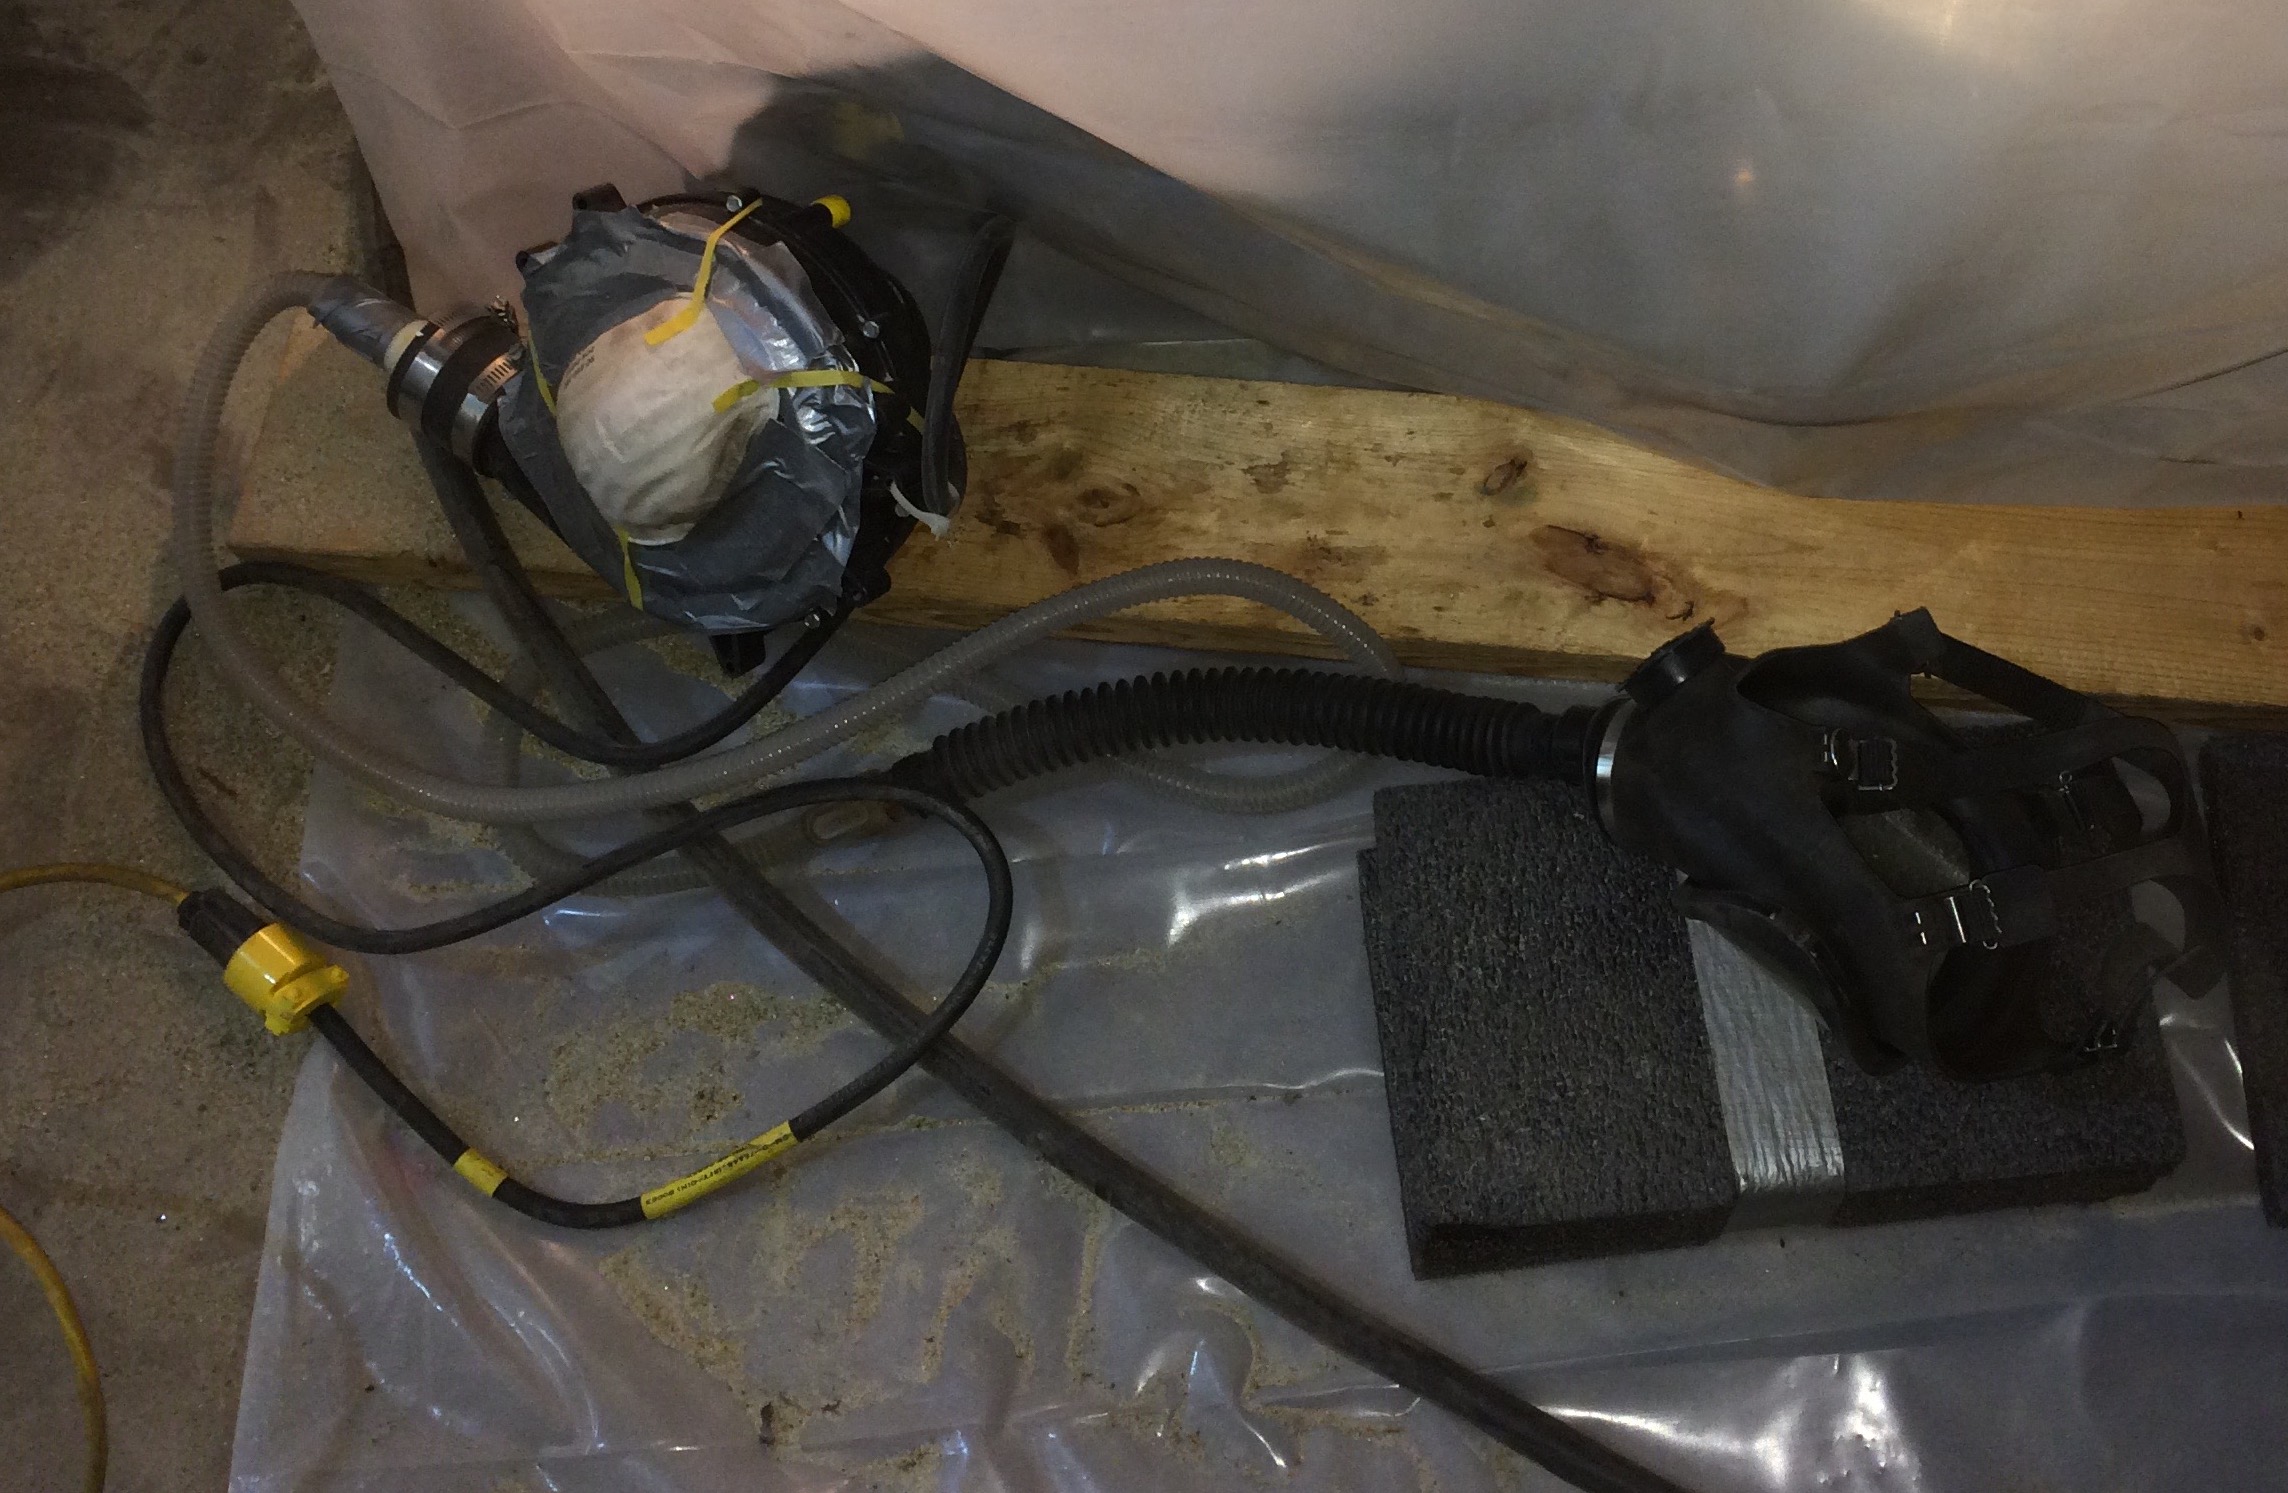
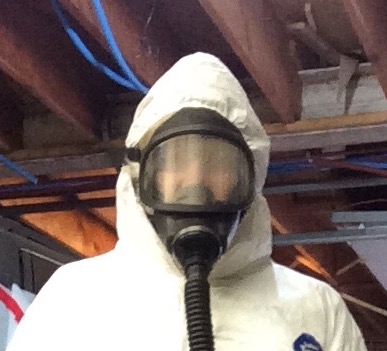
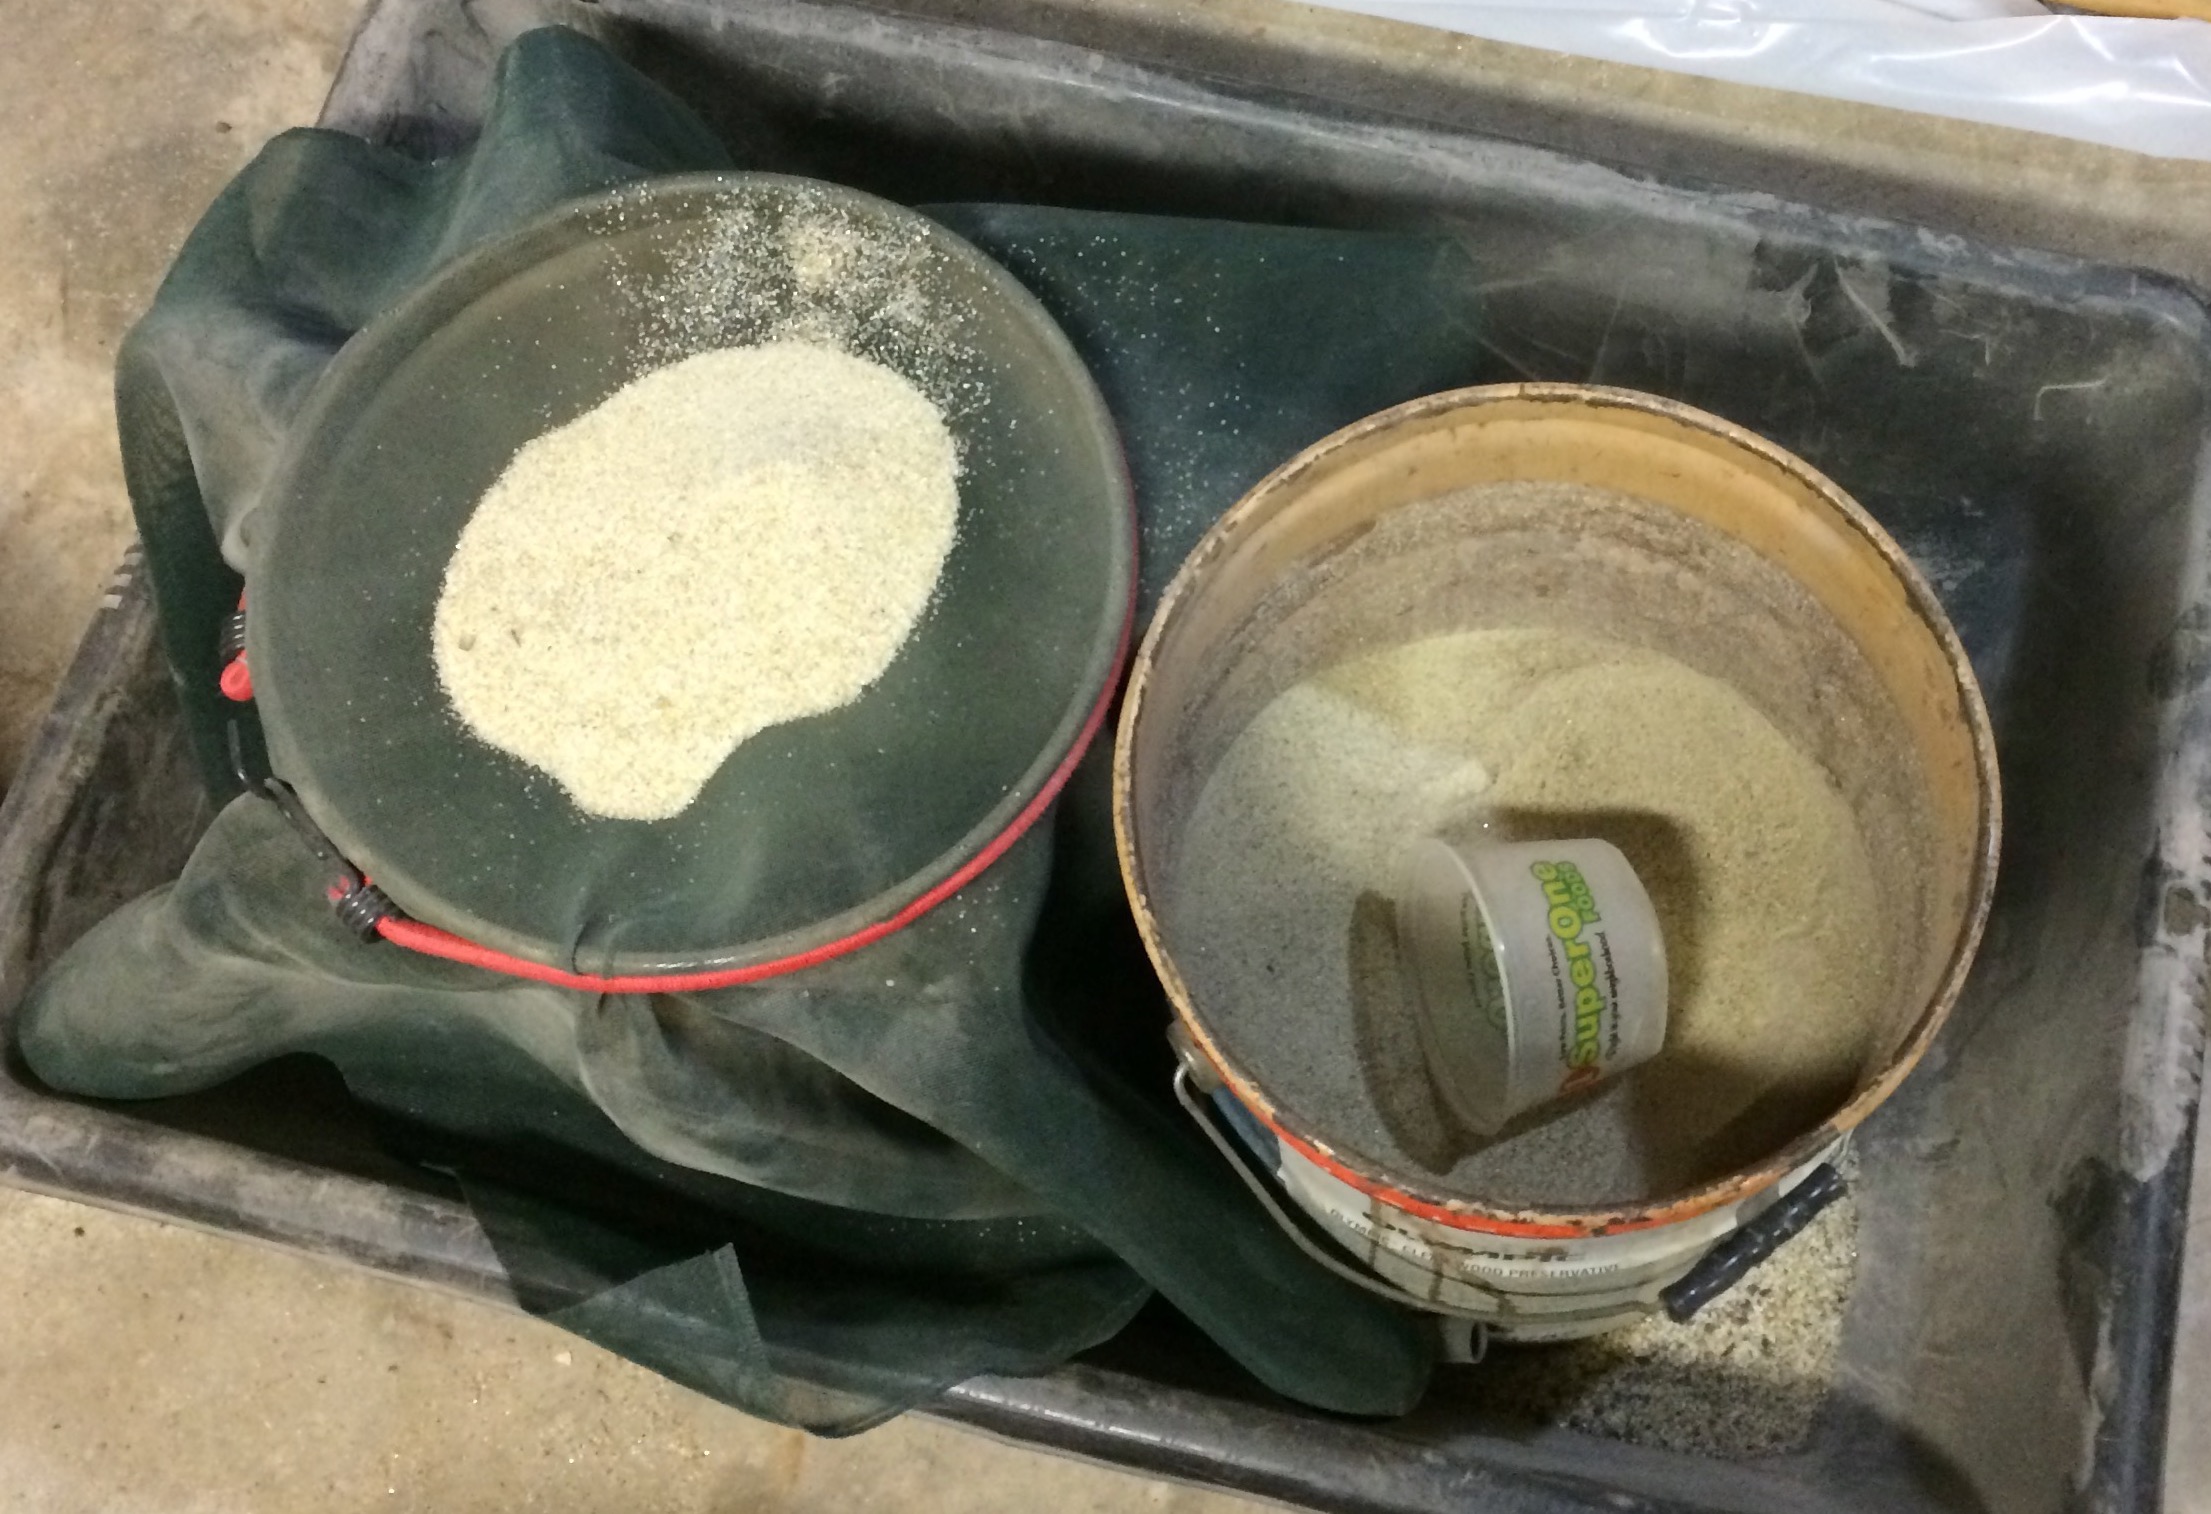
In retrospect, if I ever do this again, I might go to Las Vegas or someplace sunny and dry to buy a vehicle… Several days laying on my back in a Tyvek suit and breathing mask with my glass bead blaster, and some MIG and spot welding of new factory style fitted rocker panels, has rectified my foolish mistake of buying a used vehicle in Minnesota….;-)
Other items:
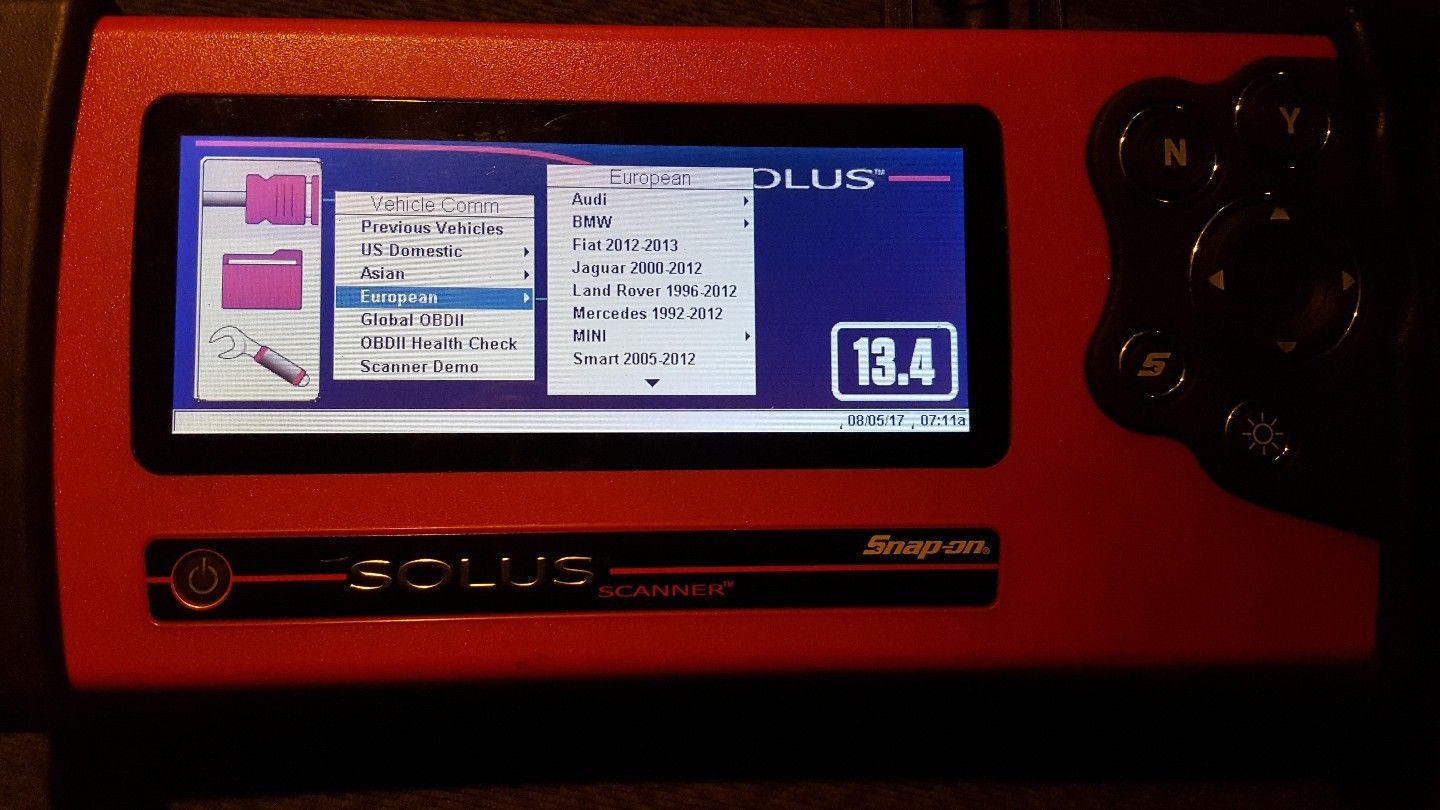
For this project, I purchased a used older Snap-On “Solus” diagnostic tool on eBay for $225. It can talk to both the standard ODB-II bus and the proprietary Chrysler PCI Bus (SAE J1850) used on this vehicle. Its what they call a “bidirectional” scanner and so supports many OEM diagnostics normally only available at dealers such as initiating transmission “learn” mode, display of the transmission clutch volume data, cycling the ABS brake system during bleeding, etc. as well as interpreting the normal oxygen sensor, air mass, misfire diagnostics, etc. The original Solus is no longer being updated for newer cars, and so professionals are getting rid of them and are very affordable.
BTW, check out Scanner Danner for some excellent tutorials on modern vehicle electronics, and using Snap-On and other aftermarket professional scanners.
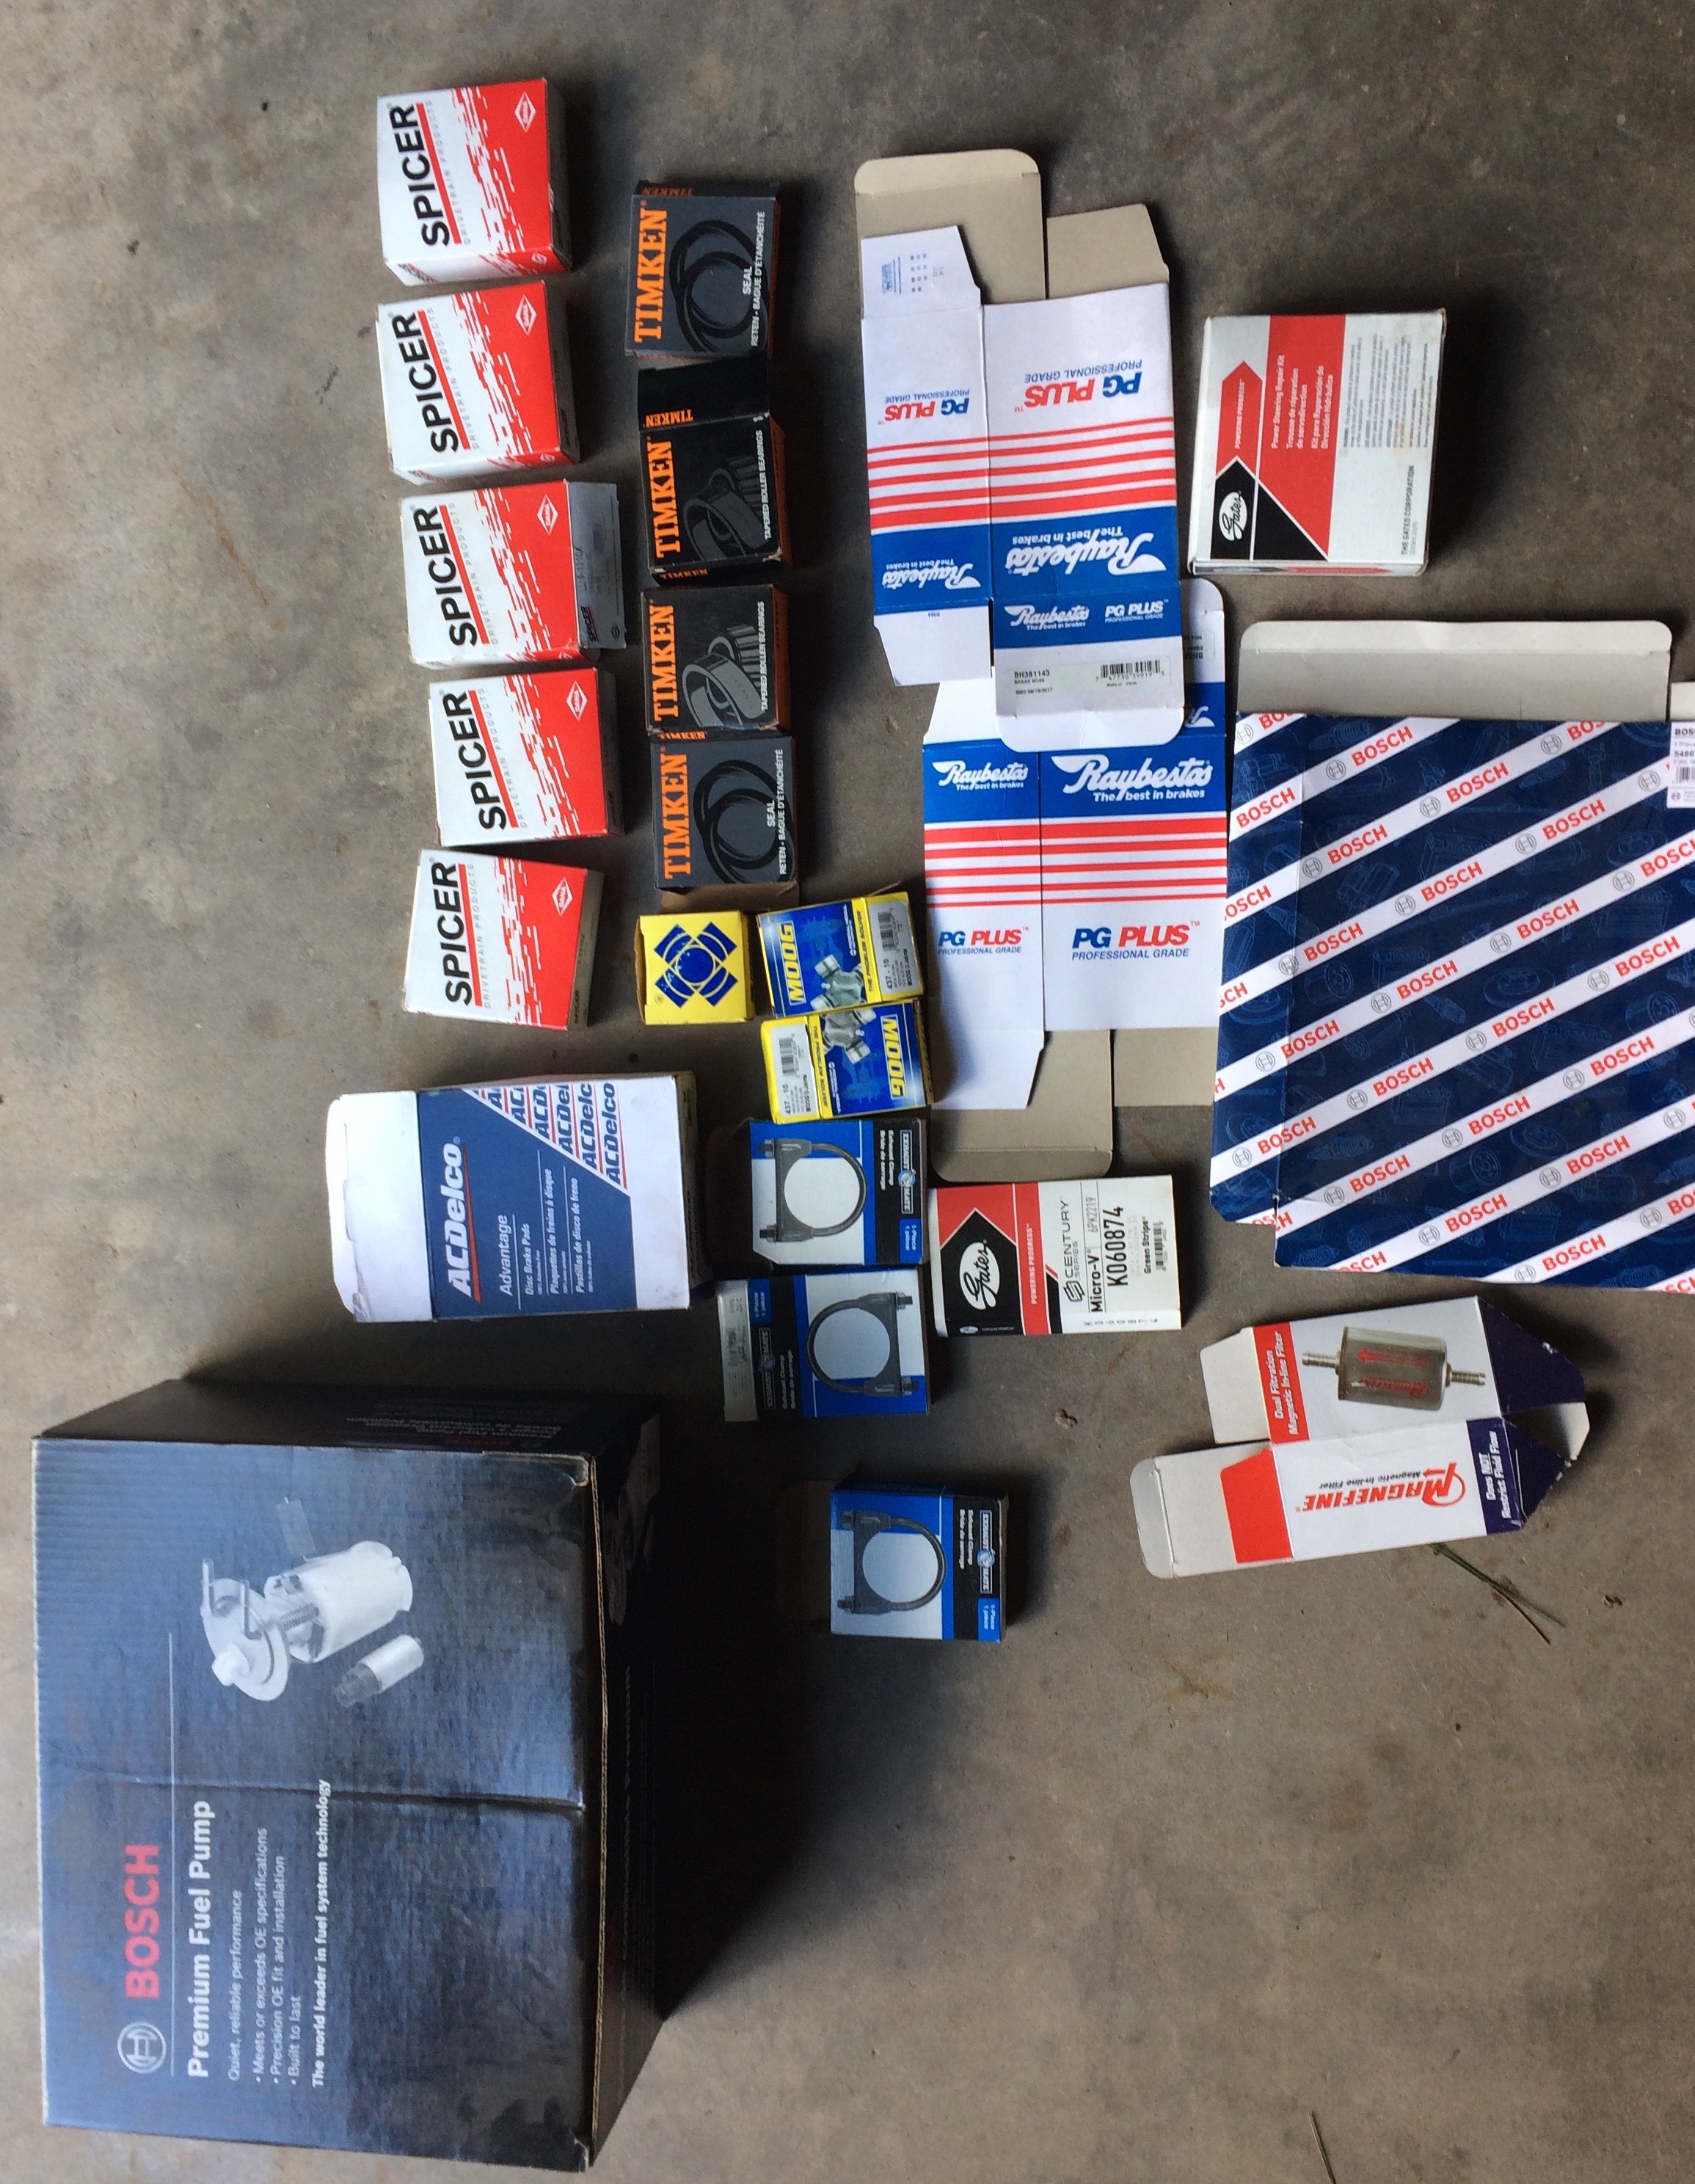
I bought only good quality parts, mostly from RockAuto, MOPAR dealer discount sites, or well rated US vendors on eBay. I used only Timken, SKF, NSK, Nachi and Torrington bearings. When necessary, genuine Chrysler MOPAR parts. Other parts from original OEM suppliers such as Bosch, Gates, Moog, Dana/Spicer, or BorgWarner (After checking they were not poor quality off-brand parts re-boxed by these vendors, as is frequently the case these days).
The Rebuild:
Engine
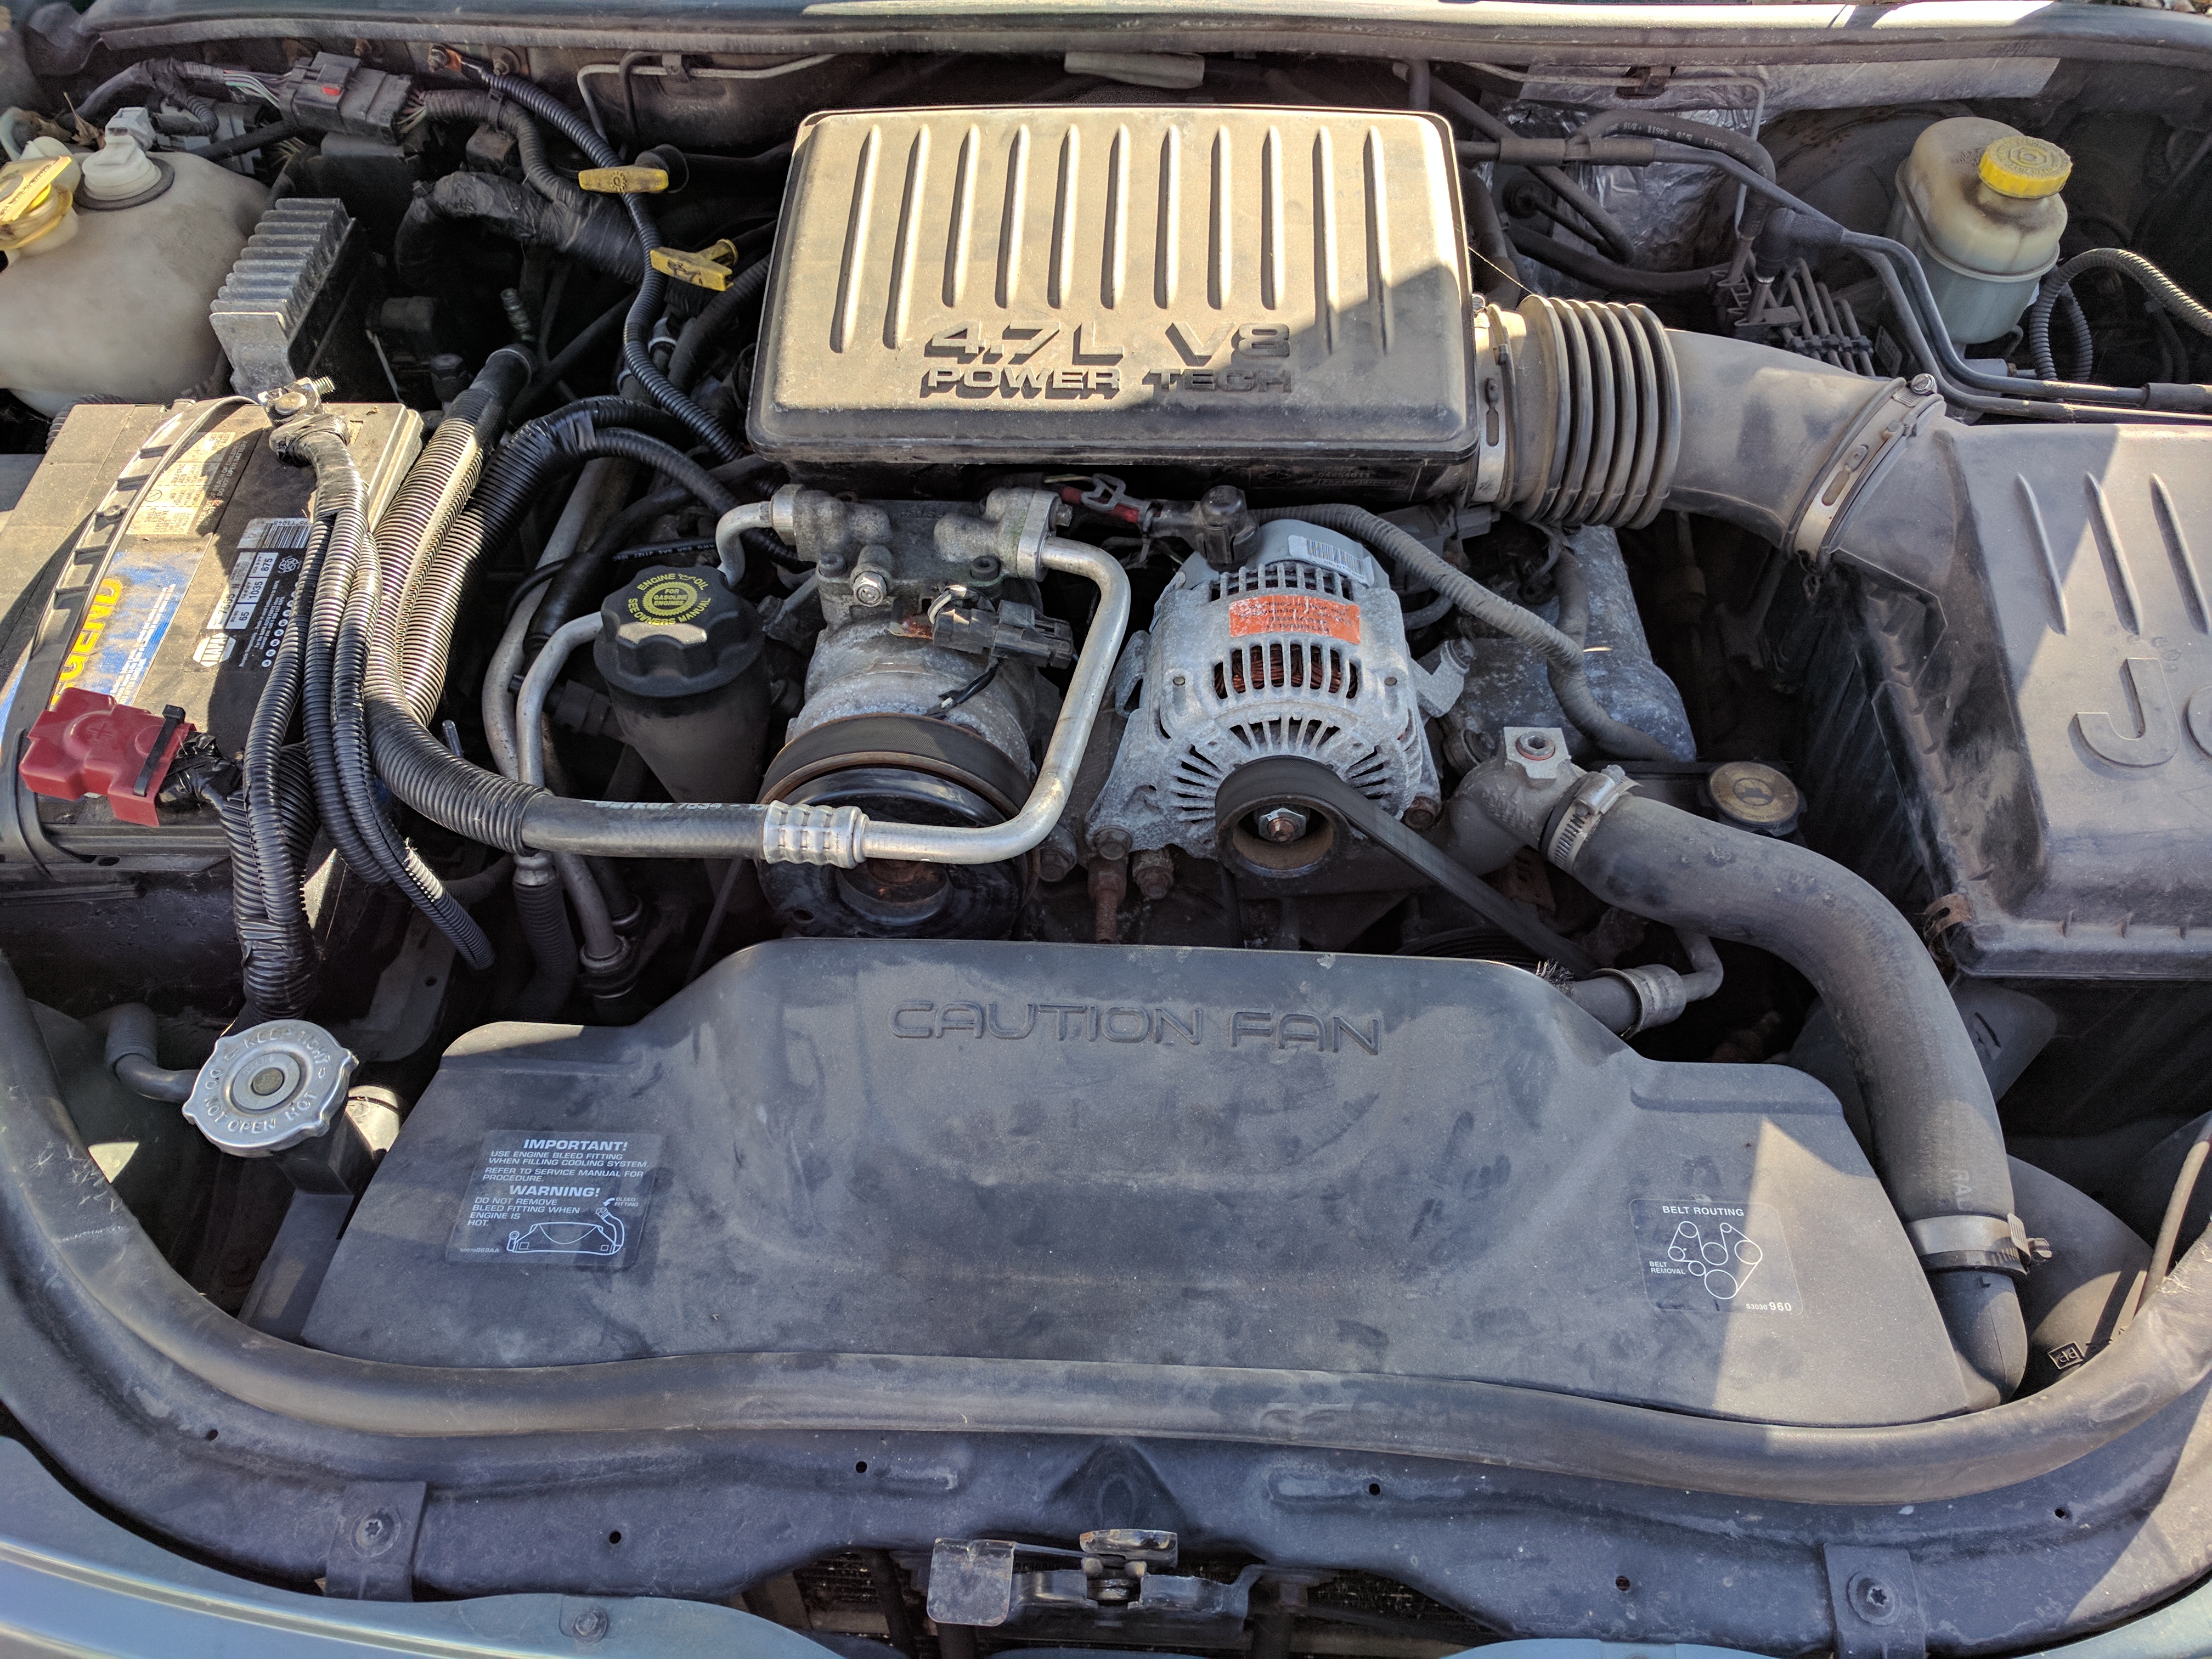
Chrysler 4.7L V8
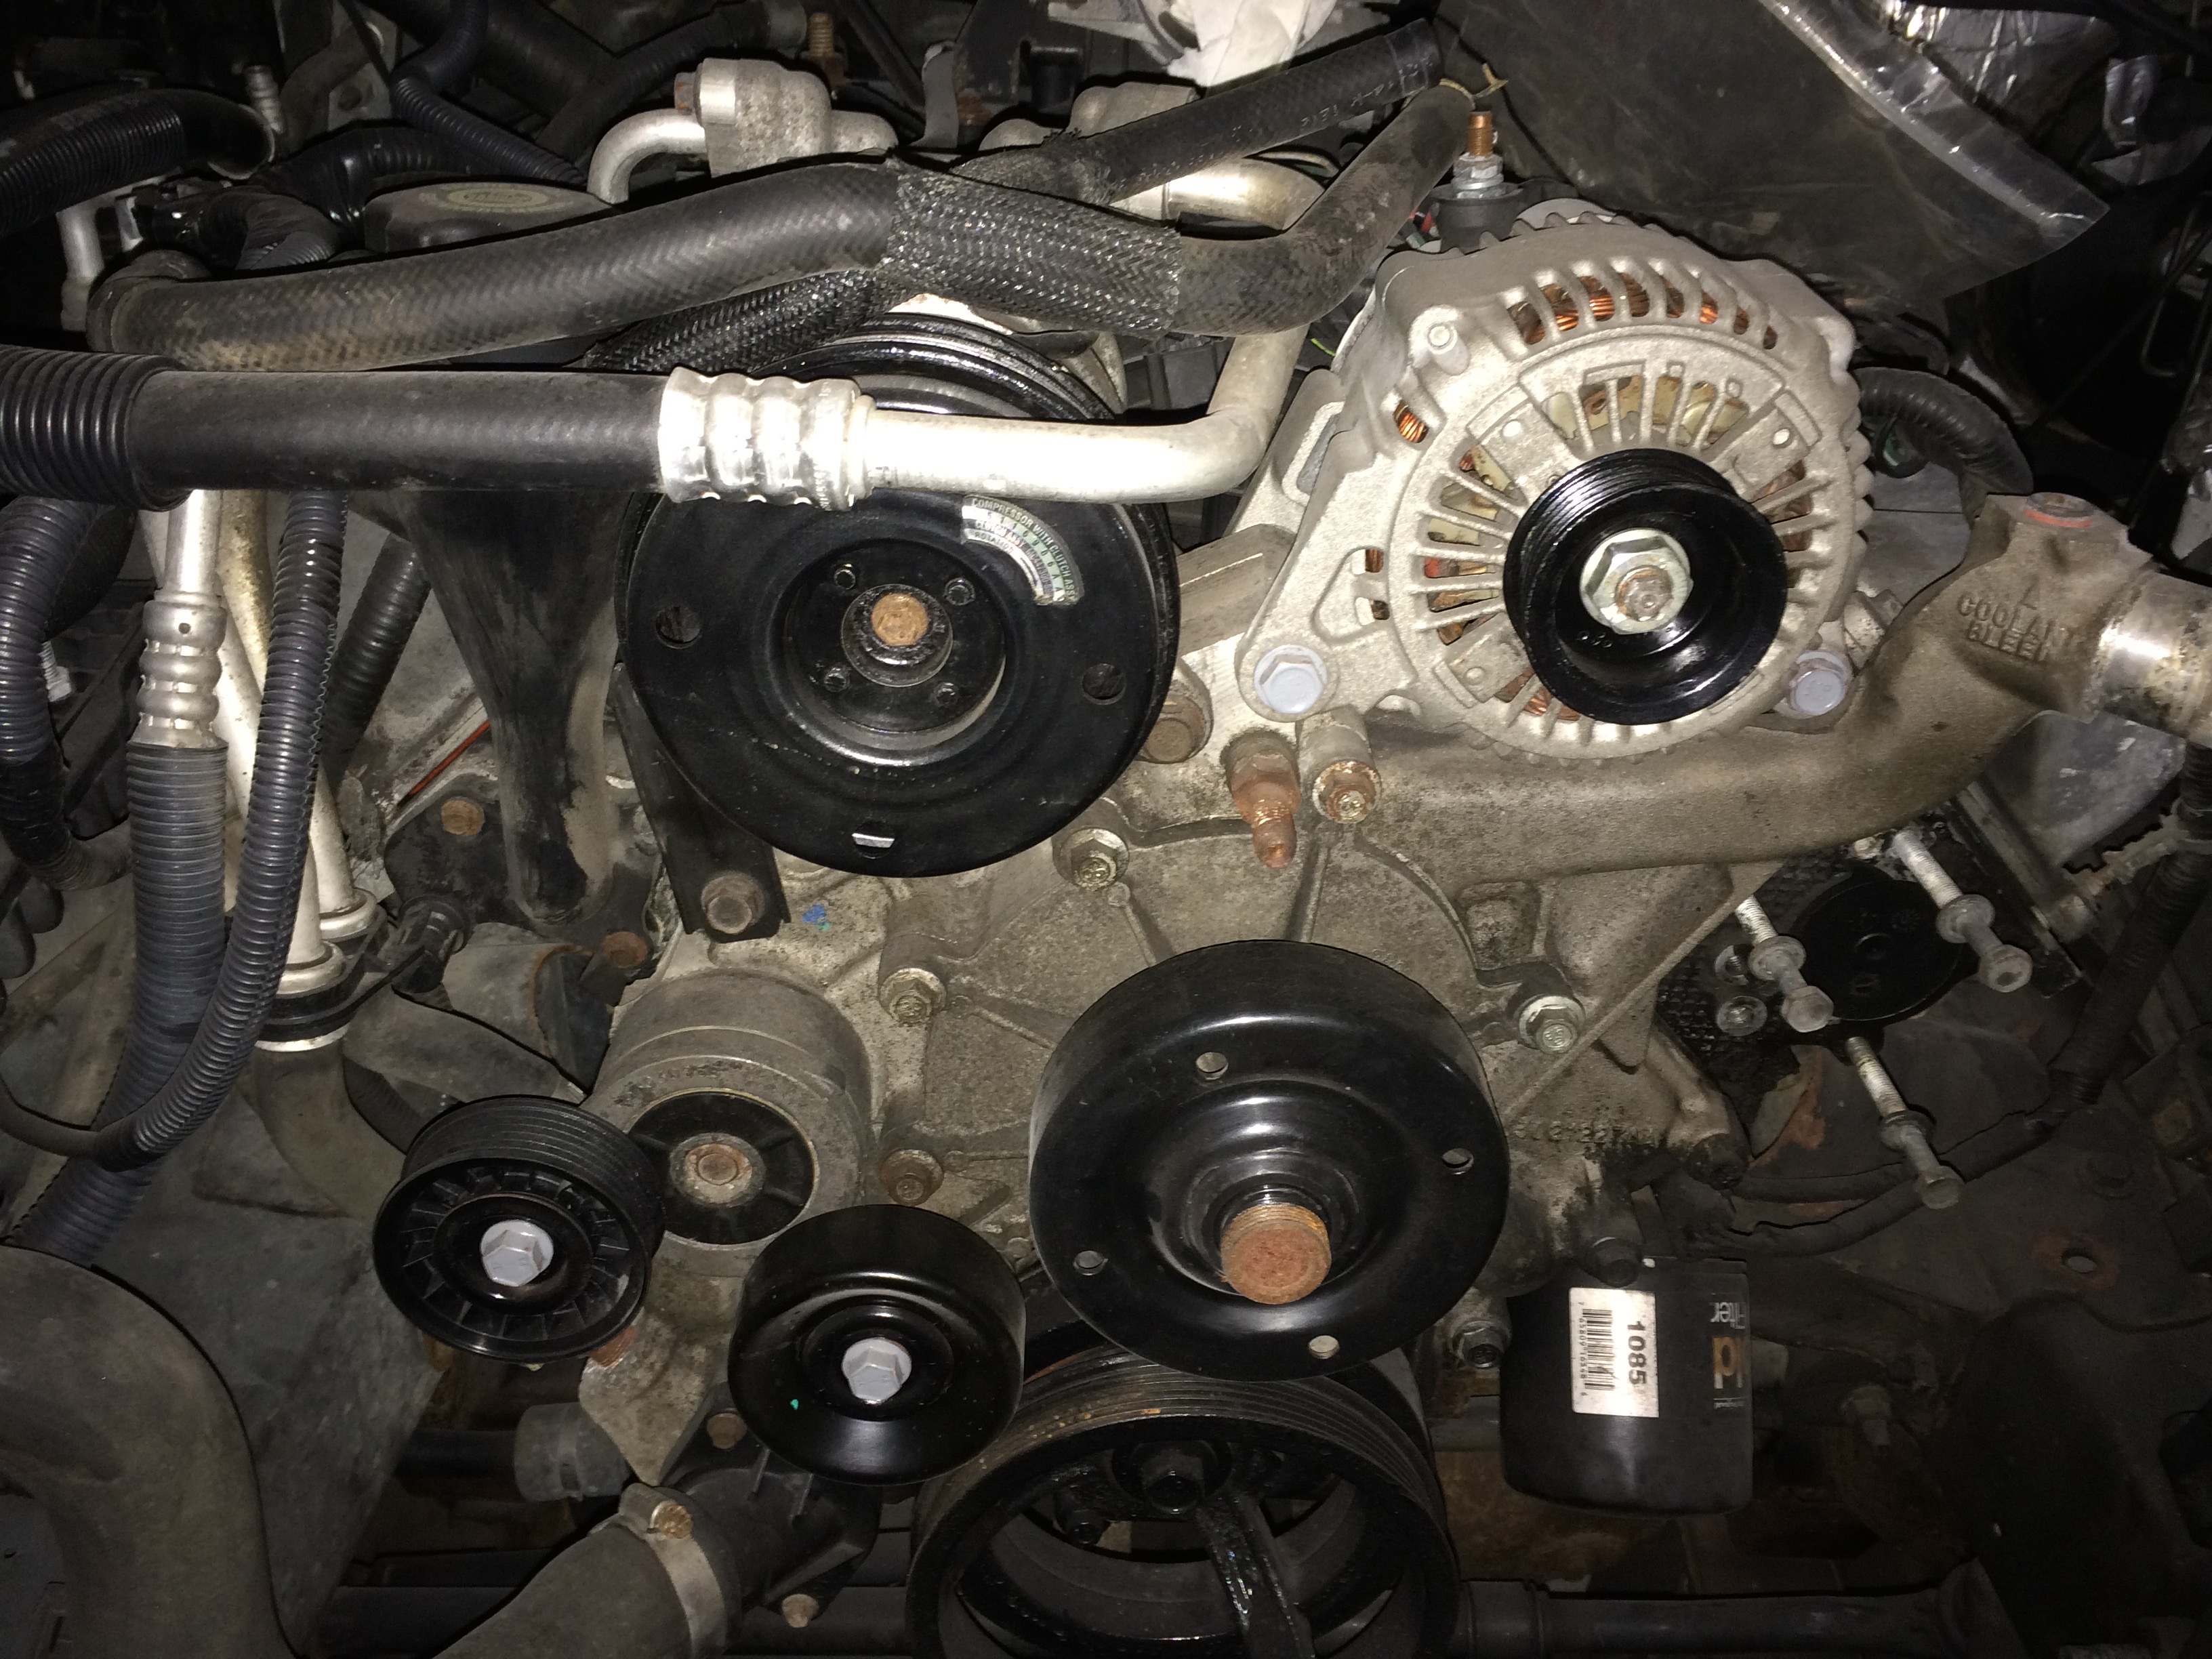
- Rebuilt alternator with new bearings & brushes
- Rebuilt A/C clutch with new dual row bearing
- Replaced idler pulleys & bearings
- Replaced serpentine belt
- Checked thermostat
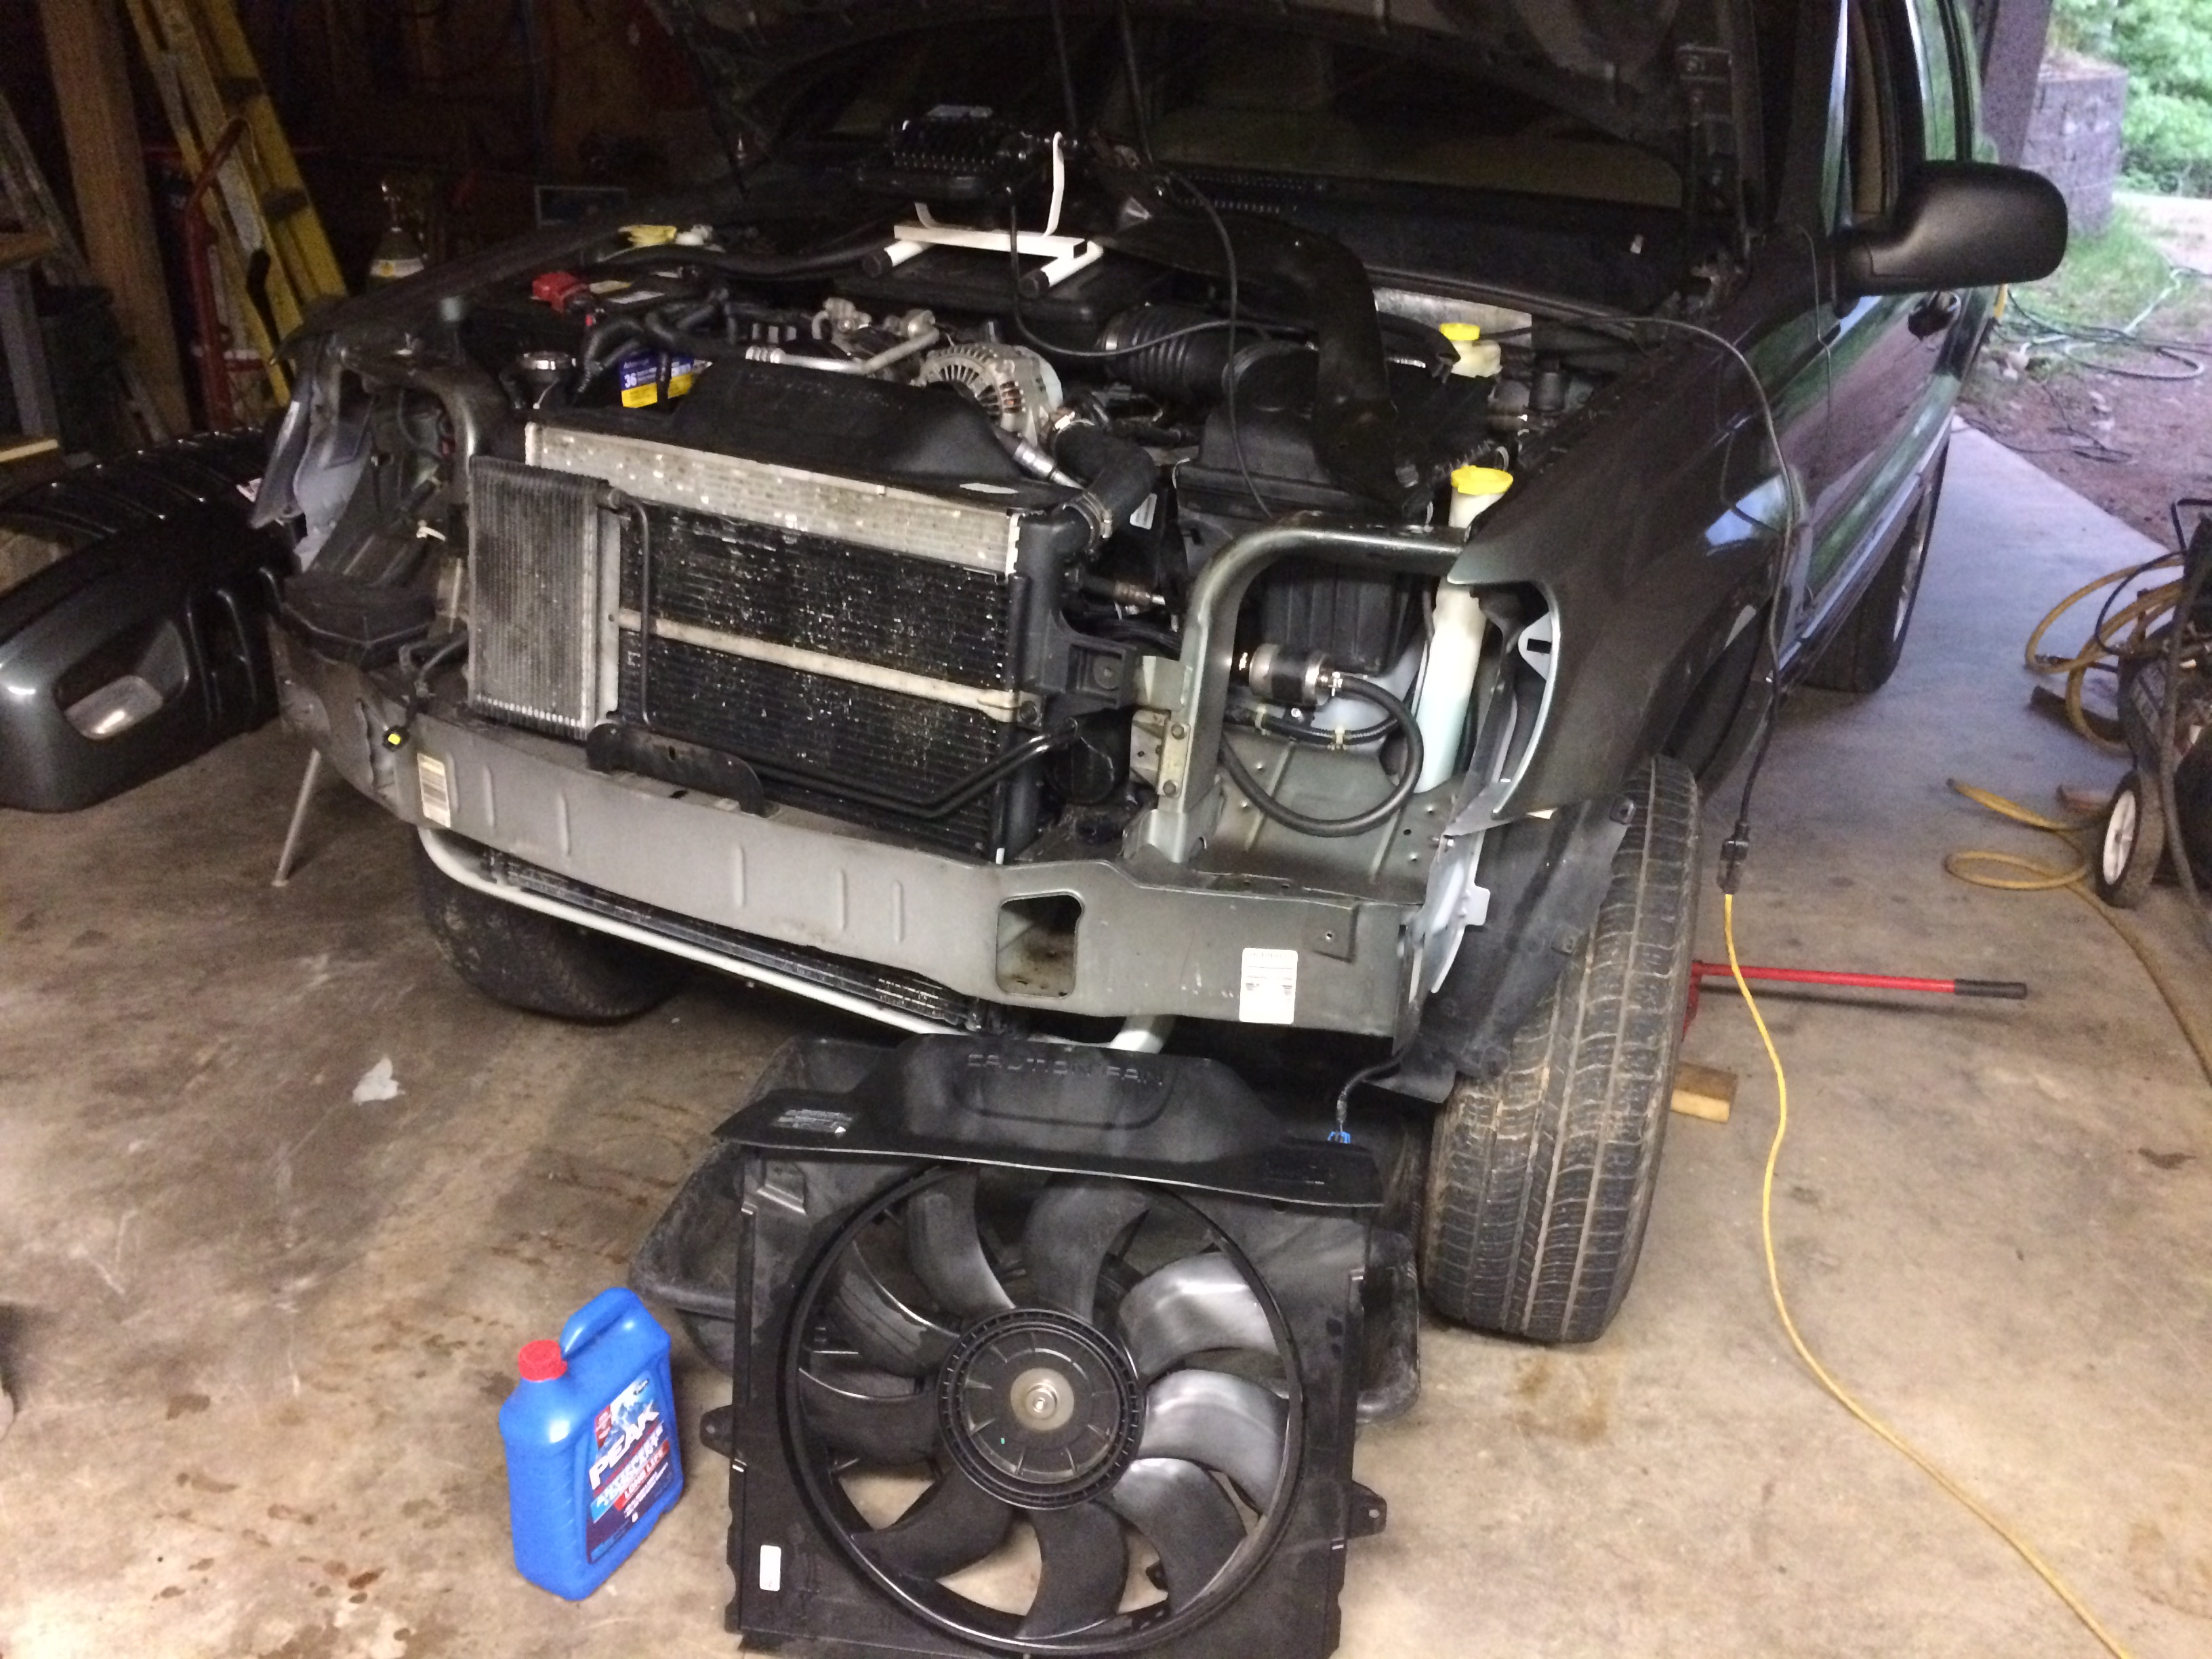
- Replaced radiator hoses and new fluid
- Replaced oil pan, inspected cylinder walls from below
- Replaced PS pump & pulley w/re-man (had problem, first re-man I bought had bad regulator…)
- Replaced hydraulic fan assembly w/new OEM See discussion below.
- Inspected engine mounts, wiring, etc.
- Replaced oil and air filter, filled with 10W30
- Replaced muffler, tail pipe, and exhaust bolts at engine manifold
- Flushed radiator
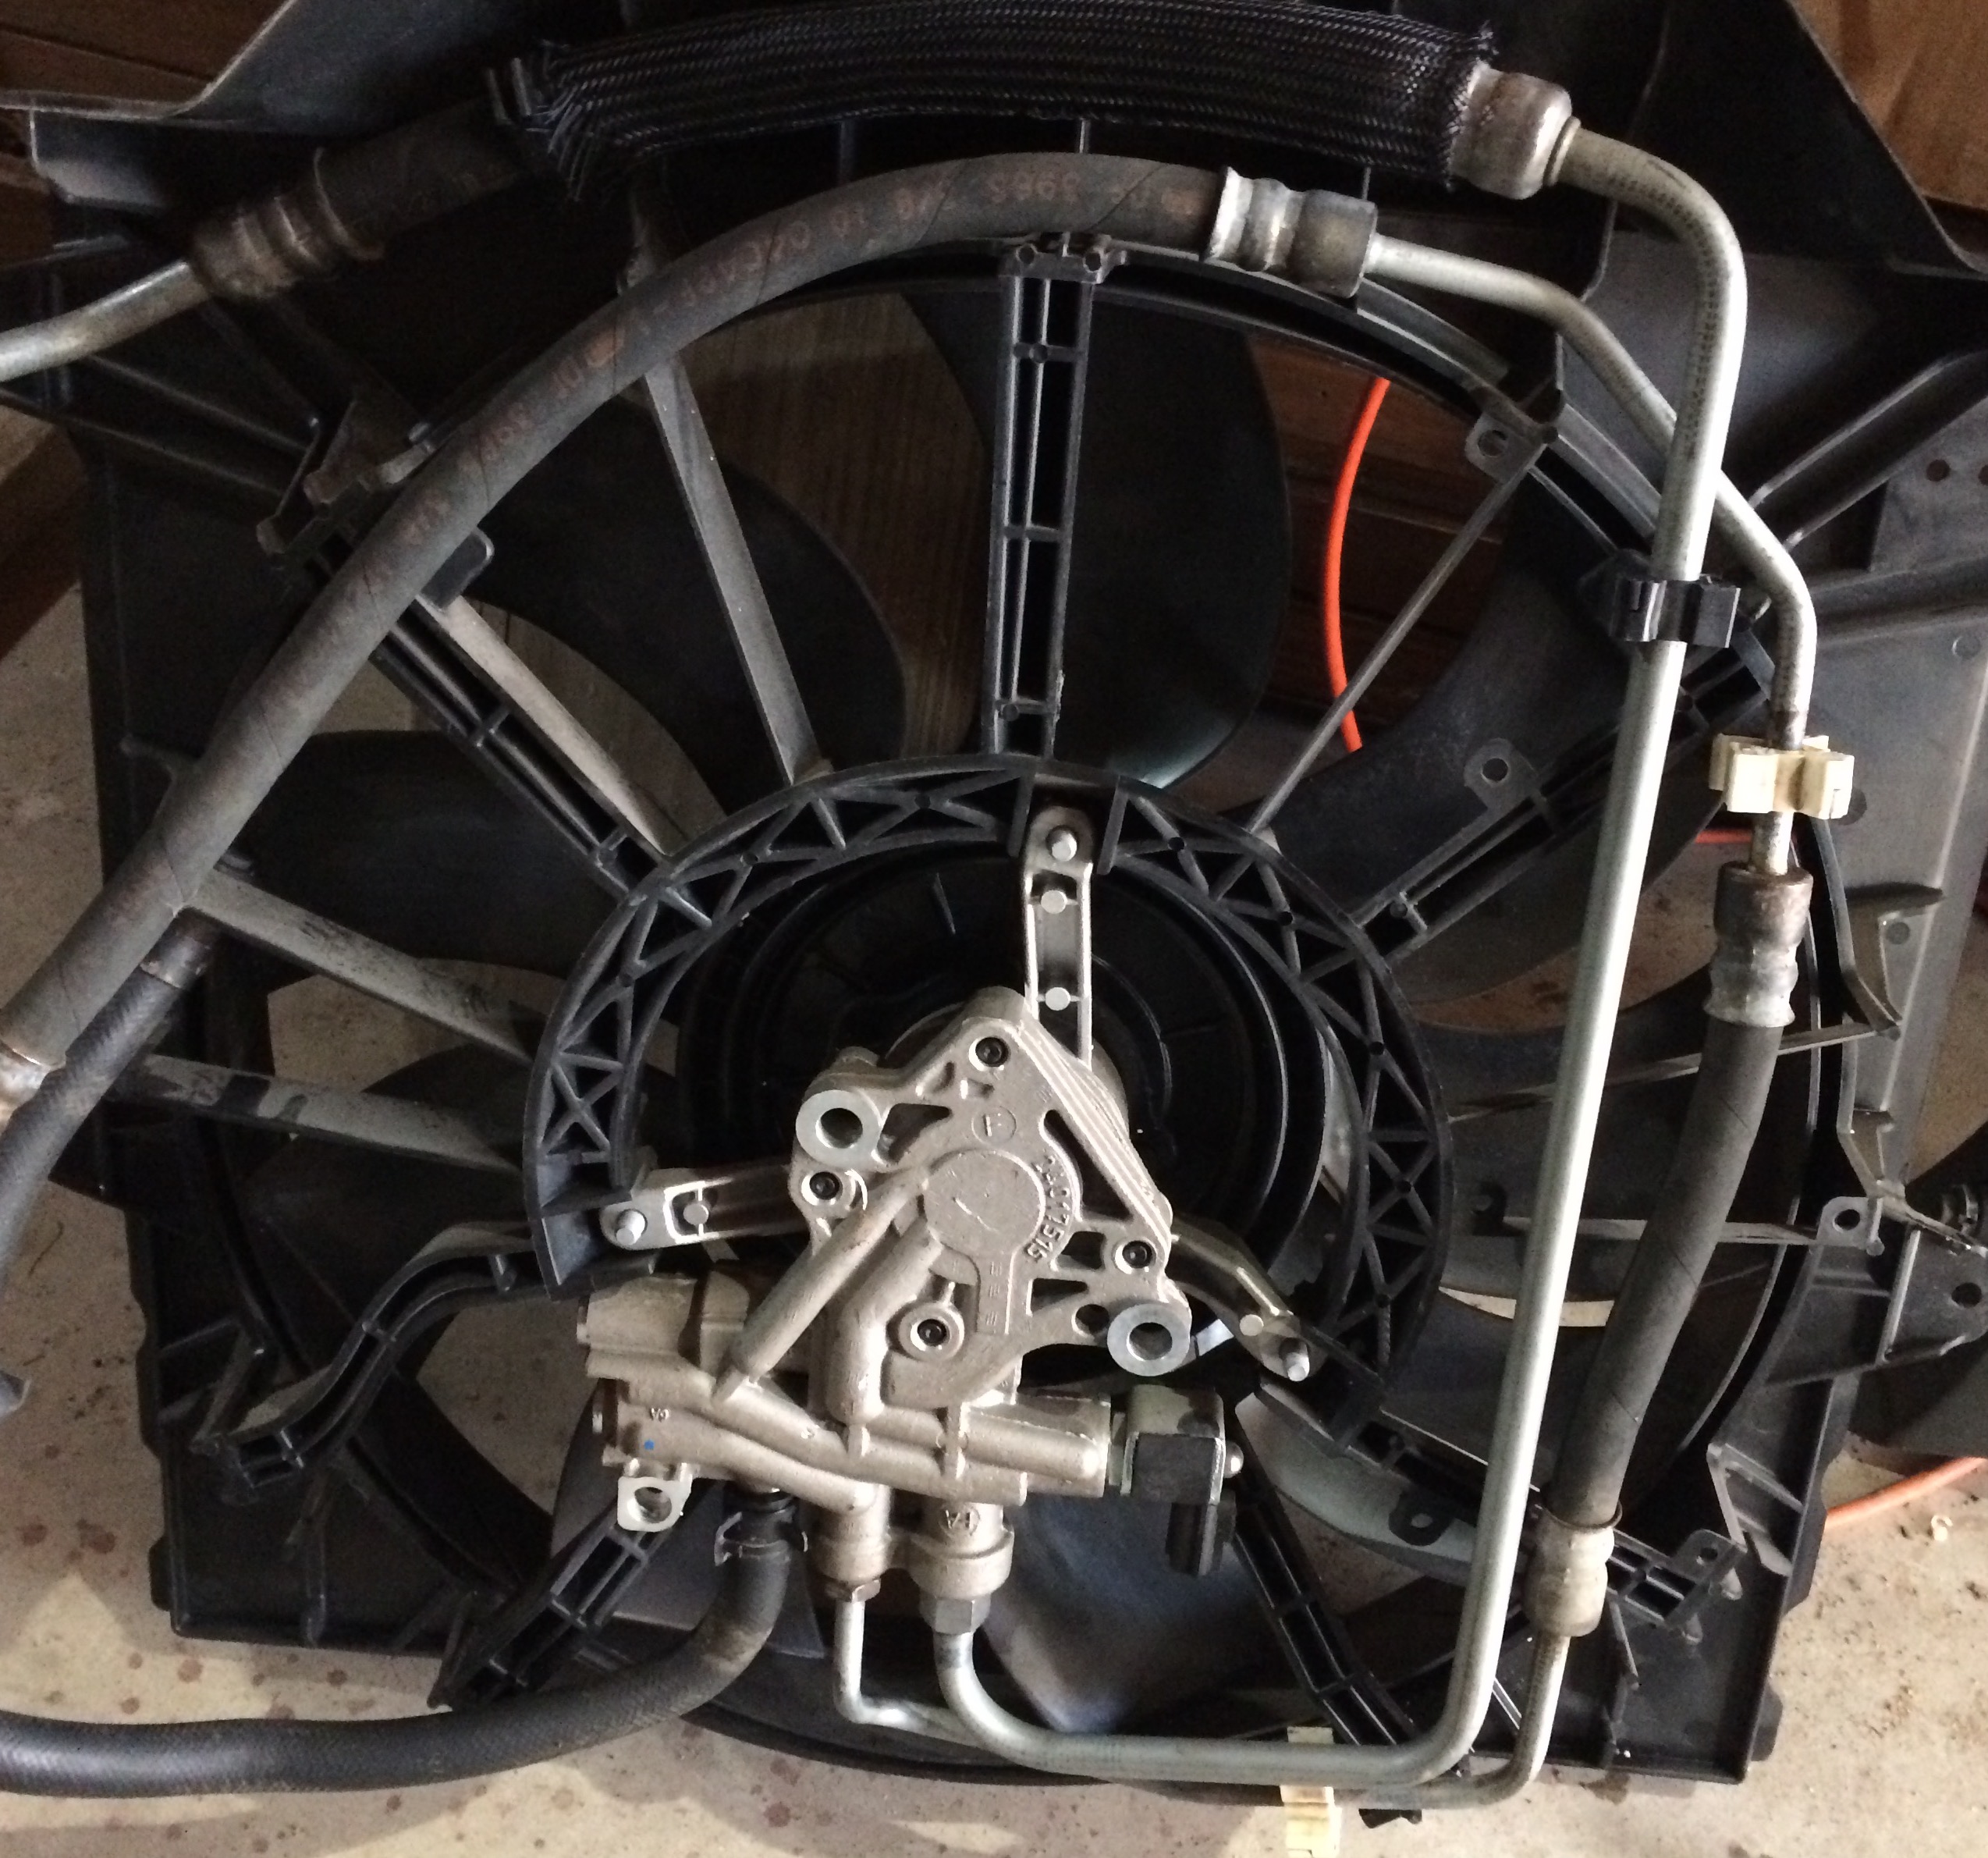

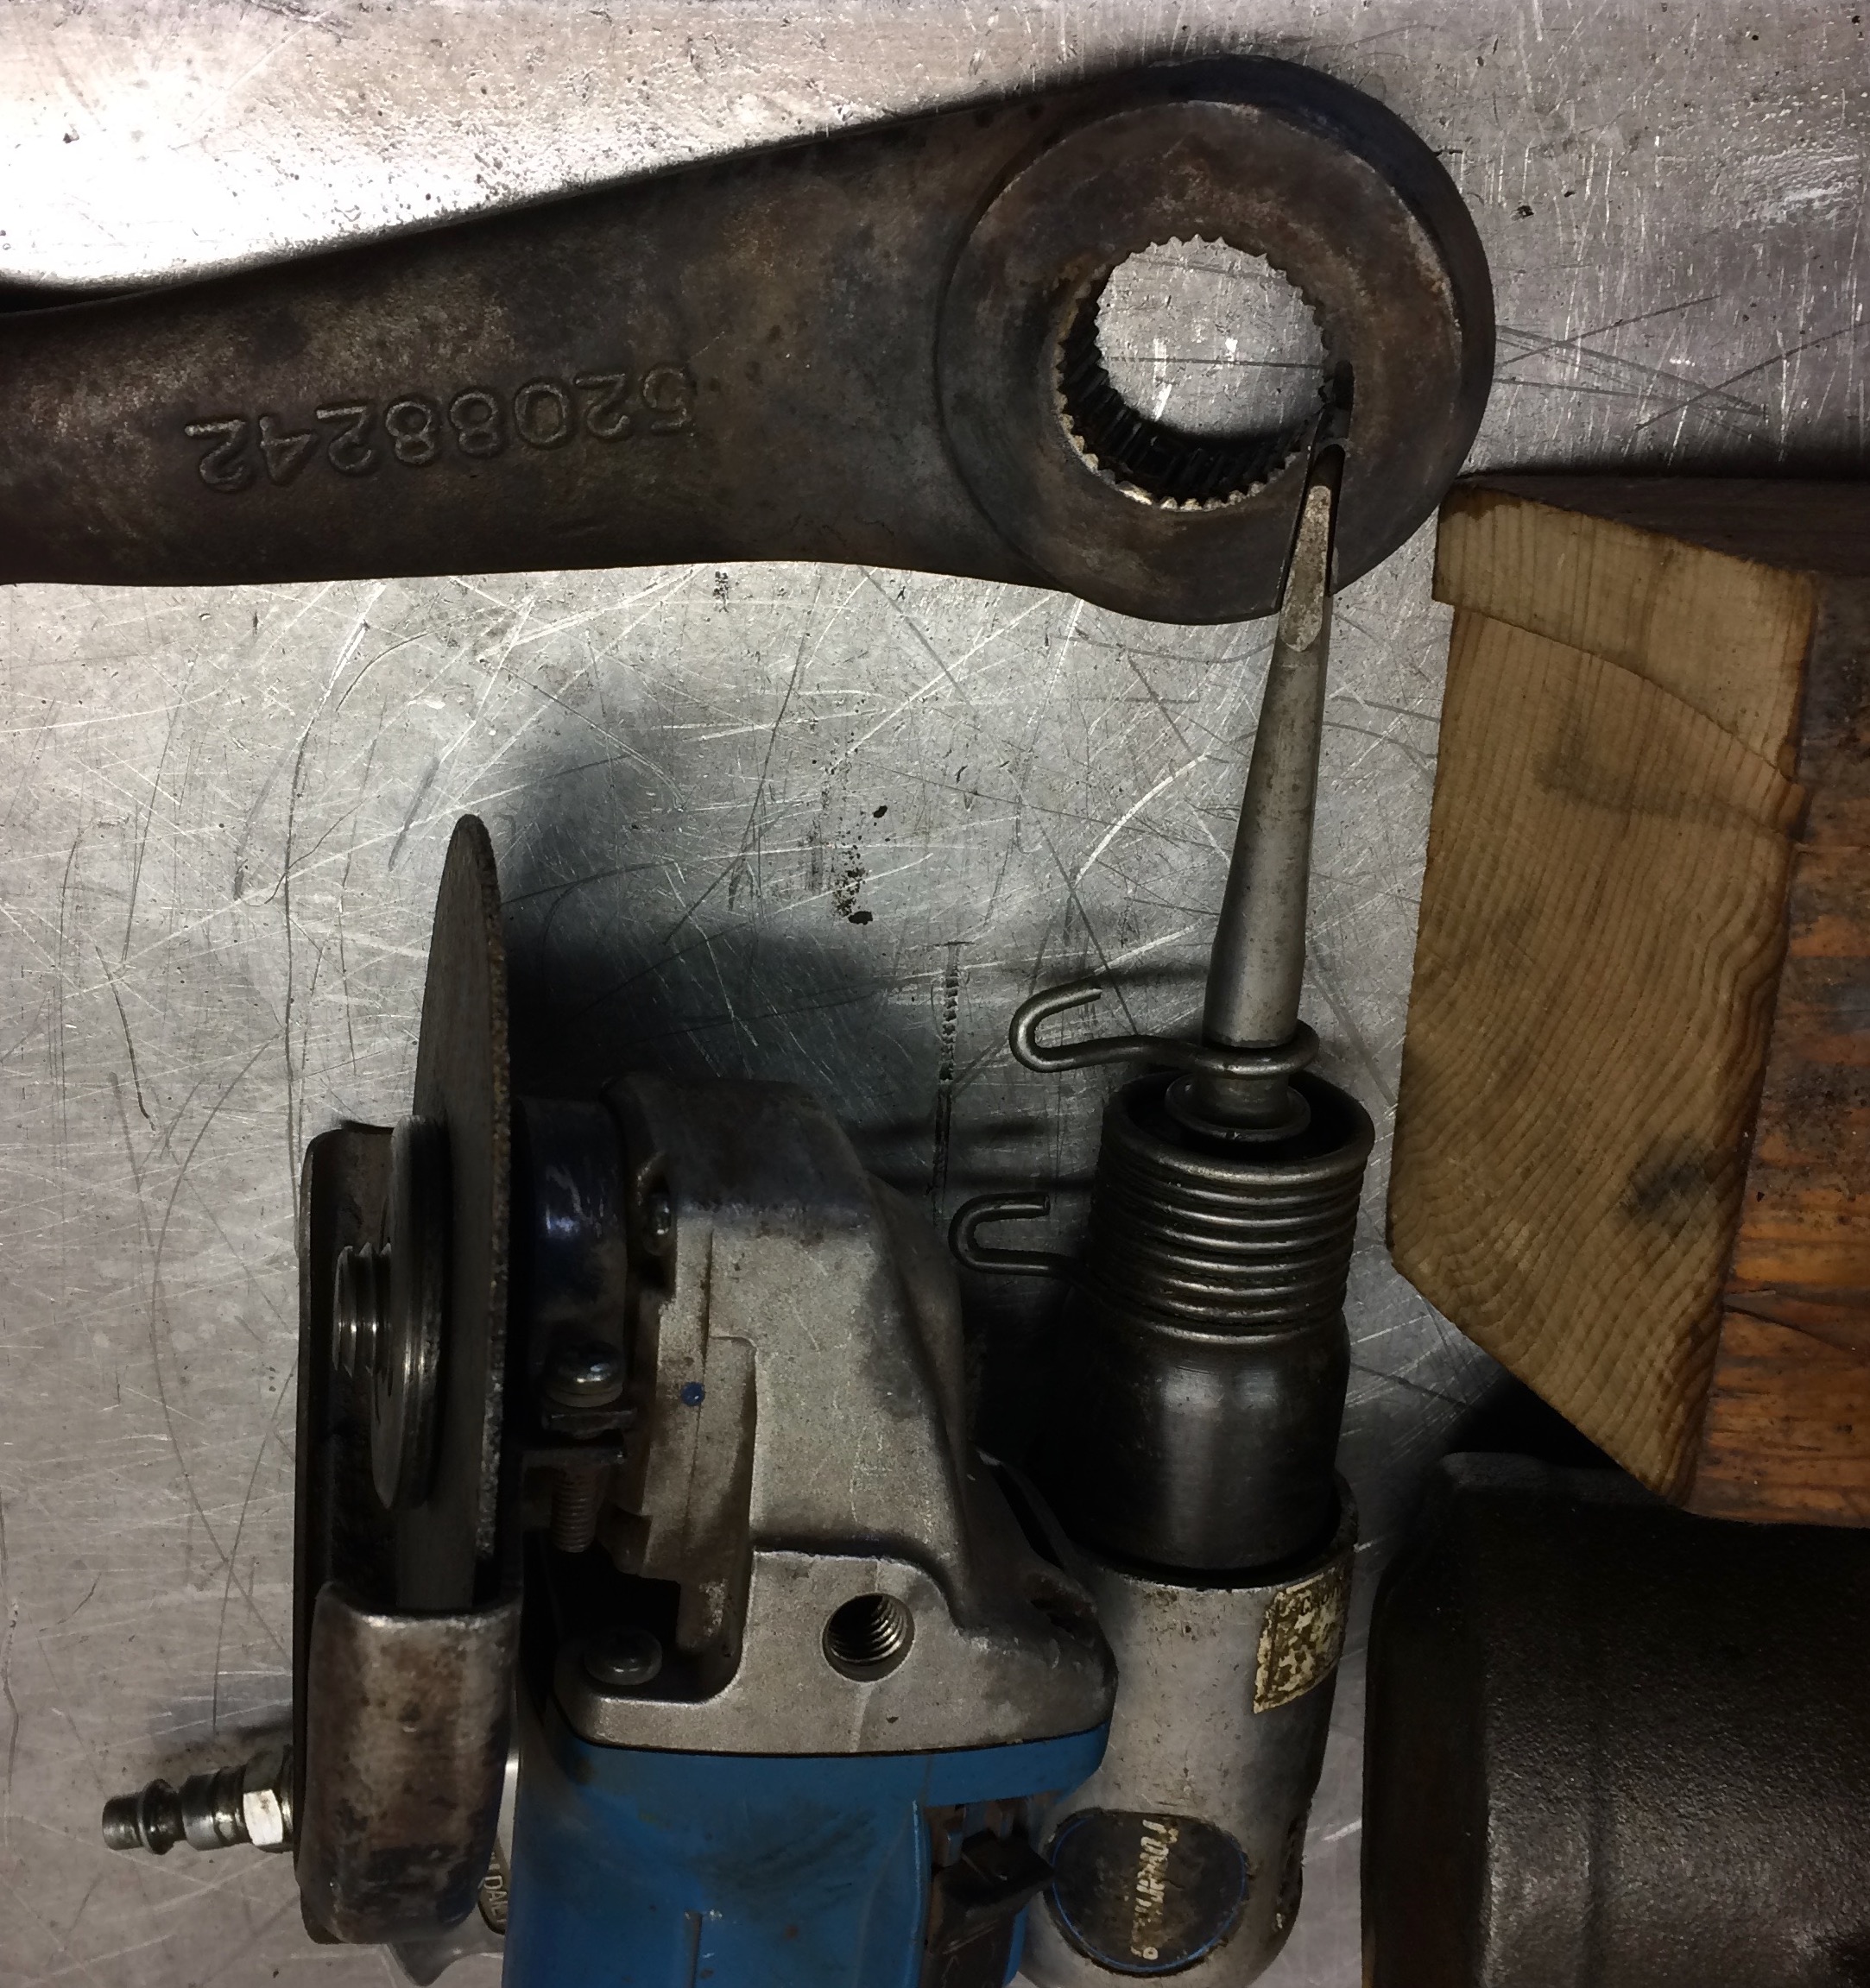
Comments: The hydraulic cooling fan, made by Valeo Corp., on this vehicle is unique, and problematic. If/when it fails, it can overheat and ruin the engine. I like it because it helps with fuel economy, towing capacity, is quiet, etc. I found a NOS MOPAR one on CraigsList by some miracle for $365 from a Jeep dealer that went out of business. They are hard to find even at the dealer list price of $1,460 ($1,104 dealer on-line). Normally the entire gerotor/fan “module” must be replaced when there are problems. If you are very careful, I believe there are three things you might do: 1) After marking all pieces and shafts so you can reassemble exactly and in balance, using a PS pully puller, I suspect you can carefully remove the fan itself, disassemble, clean, inspect, and put a new oil seal in the gerotor motor. (see YouTube videos on this). 2) You can also replace the solenoid valve assembly with one from a different model vehicle at a reasonable price, and 3) you can install a Magnafine filter in the PS fluid loop to prolong its life. For a detailed diagram and details of how this fan works, Google for the PDF of US Patent 6,612,822 .
Transmission
Chrysler 5-45RFE
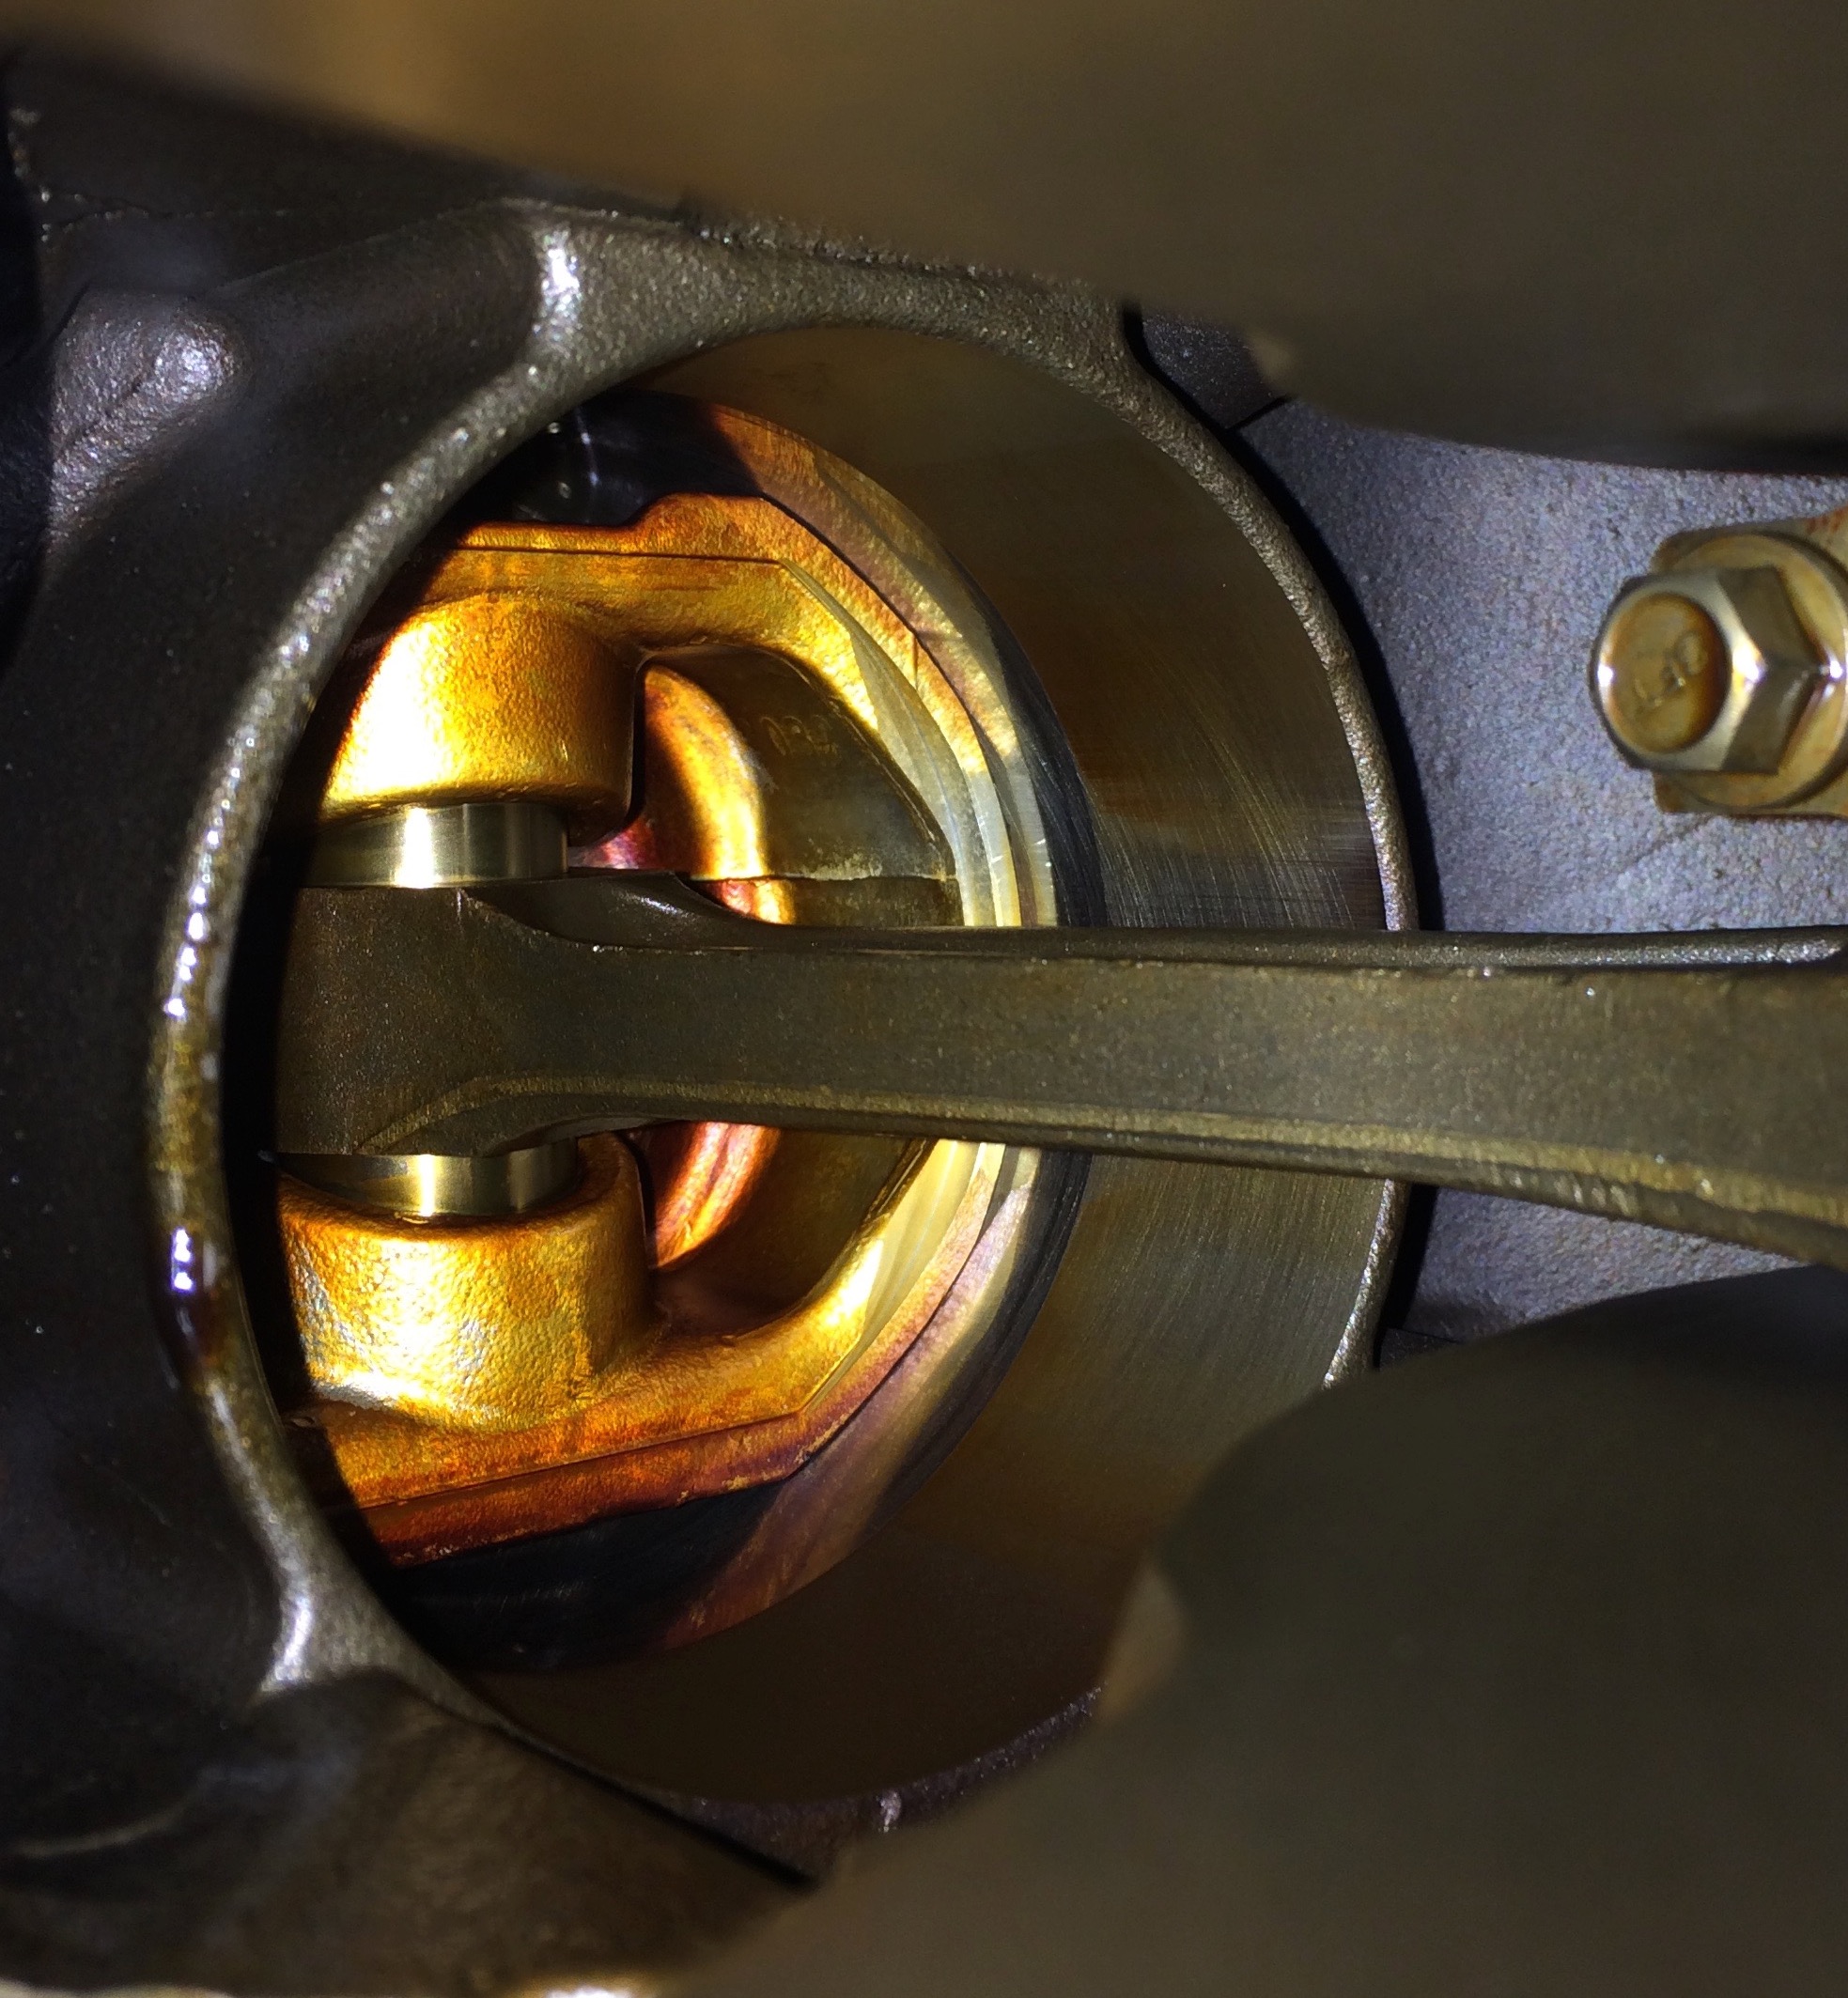
I wanted to learn about automatic transmissions, so I decided to inspect and rebuild the Chrysler 545RFE in this WJ. The 545RFE looks to me like a pretty good transmission, it has two internal filters, is relatively heavy duty, and has also been used on RAM pickup trucks and in London Taxi cabs. I found there are a number of tutorial videos on YouTube covering the 545RFE made by experienced professional technicians showing the process in detail and step-by-step with running comments about what to watch for. You can also find a PDF of the excellent ATRA manual on-line (you want the 545RFE revised, not the older 45RFE edition), which gives detailed instructions for professional rebuilders, specifications, etc., not to mention the actual Chrysler WJ workshop manual. There are also many on-line after market parts suppliers with helpful diagrams. Unlike some older automatic transmissions, I found the 545RFE to be relatively easy to work on. However, you must be very careful, meticulously clean, never force anything, have the right tools (several types of snap ring pliers, a dial indicator, micrometer, .001″ or .00075” mylar to measure bearing clearance, etc.) and take your time (figure a week to a month, depending on parts shipping delays). Here is what I did:
- Teardown and inspect – no problems seen during teardown, looked in excellent shape, very small amount of iron particles held by sump magnet, probably never rebuilt as internal filter was 2002 dated.
- Replaced some bushings unnecessarily. I had to develop a method of measuring, w/reproducibility, bushing clearances to +/- .00075”. I found using thin mylar shims (or even paper) inserted between bearing and shaft worked well. Measured clearance of Chinese/Indian aftermarket bushings was very very sloppy, well beyond the worn ones in the transmission at teardown. US made Durabond ones were not much tighter (rule of thumb proper clearance s/b typically .0015” per inch of shaft diameter, and/or as specified by OEM factory documents). In one case I had to replace a good reaction annulus gear that I had foolishly pressed the old bushing out of. Ended up buying a new MOPAR OEM annulus assembly in order to get the factory fitted/reamed bushing fit. Lesson learned: Never re-bush, unless it is well beyond factory limits. You can not just press in replacement aftermarket bushings. You may have to use factory OEM assemblies which have been precision reamed/fitted at the OEM factory after the bushing blank has been pressed in.
- Checked for design changes (5-45RFE has had a long production run, there have been some running changes, such the No. 10 Torrington thrust bearing changed thickness, and newer valve body & solenoid designs.)
- Replaced all thrust roller bearings (Torrington)
- Replaced all ball bearings with NHK or Timken
- Rebuilt w/MOPAR OEM master kit that included all frictions, steels, seals, filters, identical to originals, etc.
- Replaced clutch pistons that had molded seal with new MOPAR OEM.
- Checked and measured all clutch pistons for proper travel with low pressure air and dial indicator on bench
- Checked all passages and clutches once installed in case for proper operation using low pressure air injected at pump flange
- Replaced valve body and solenoid complete with new OEM body assembly obtained from CL listing (may not have been necessary)
- Inspected and upgraded new valve body and pump with Transgo kit
- Checked valve body with low pressure air for proper function
- Worked to get output and input end-play correct. Decided I needed different shims (is a select fit). Purchased kits, ended up after some work, back at original select fit shims! Got both input and output end-play correct to spec.
- Replaced torque converter with MOPAR factory re-man
- Flushed cooler and pipes, replaced hoses


Lessons learned: I made several mistakes, like unnecessarily trying to replace some bushings with aftermarket, and damaging one of the new thrust bearings during assembly. These mistakes cost me around $200 of parts and quite a bit of time. Probably better to buy a re-man transmission from a quality re-manufacturing firm, who also does dyno testing, has custom bushings and can ream them correctly to factory specs, has real engineers on staff, etc. unless you intend to use your new knowledge re-build several. (For example, see: Transmission Authority)
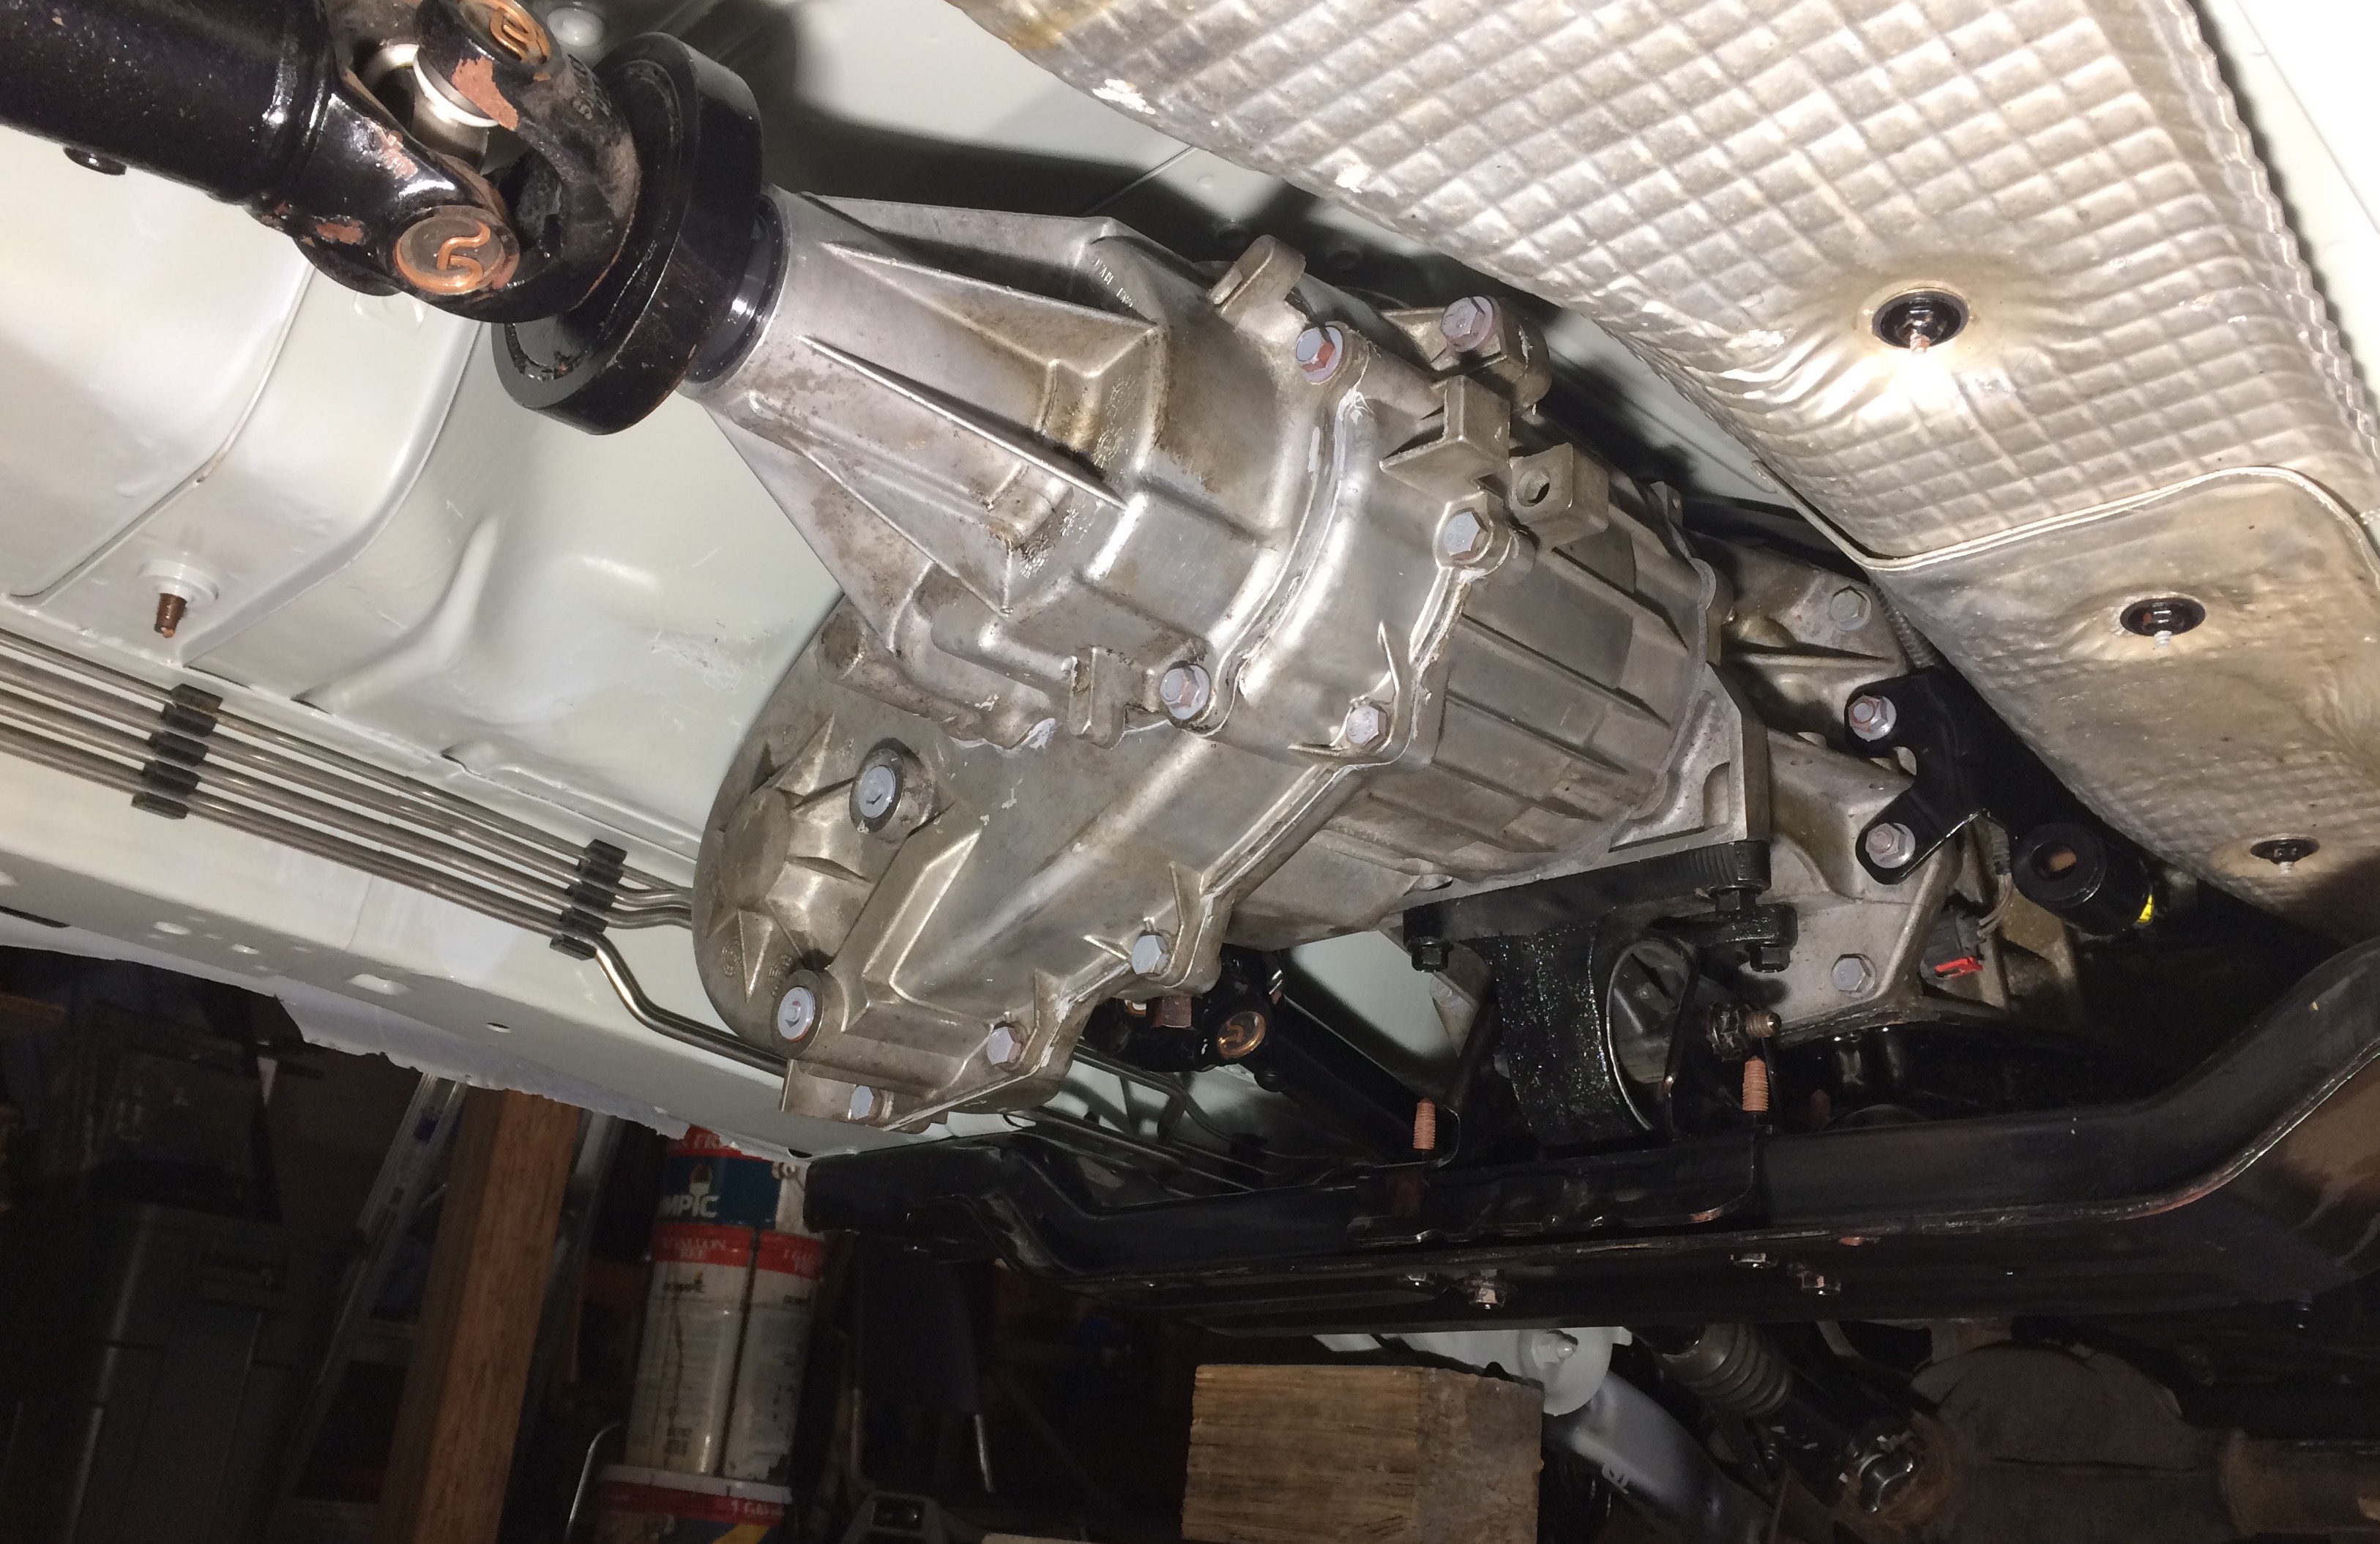
Tansfercase
New Process NP/NV247
- Tore down, found no problems. Fairly clean interior, small amount of fine metal residue on magnet.
- Rebuilt with aftermarket bearing and seal kit, that had good Nachi ball bearings, as well as rollers, seals, gaskets, etc.
- Replaced both drive chain sprockets with MOPAR NP/NV OEM (did not really need replacing)
- Replaced drive chain with OEM quality BorgWarner with two blue links.
- Replaced the tail bushing (not really needed in my case).
- Carefully rinsed the interior of the Viscous Coupler with mineral spirits, then with the special Chrysler NV247 fluid.
- Filled with MOPAR NV247 fluid after installation
Comments: Had a small problem with some silicon seal (Permatex from NAPA)… small bits in it were already cured, and caused a case leak, had to reseal. Must have been out-of-date on their shelf, or overheated during shipping.
Steering
- Replaced damper
- Rebuild & inspect Saginaw box w/new seals (was actually fine)
- Replaced outlet hose
- Flushed cooler
- Added Magnafine filter in PS loop to help preserve hydraulic fan gerotor
- Clean & inspect tie-rod ends, forced in a little grease by hand
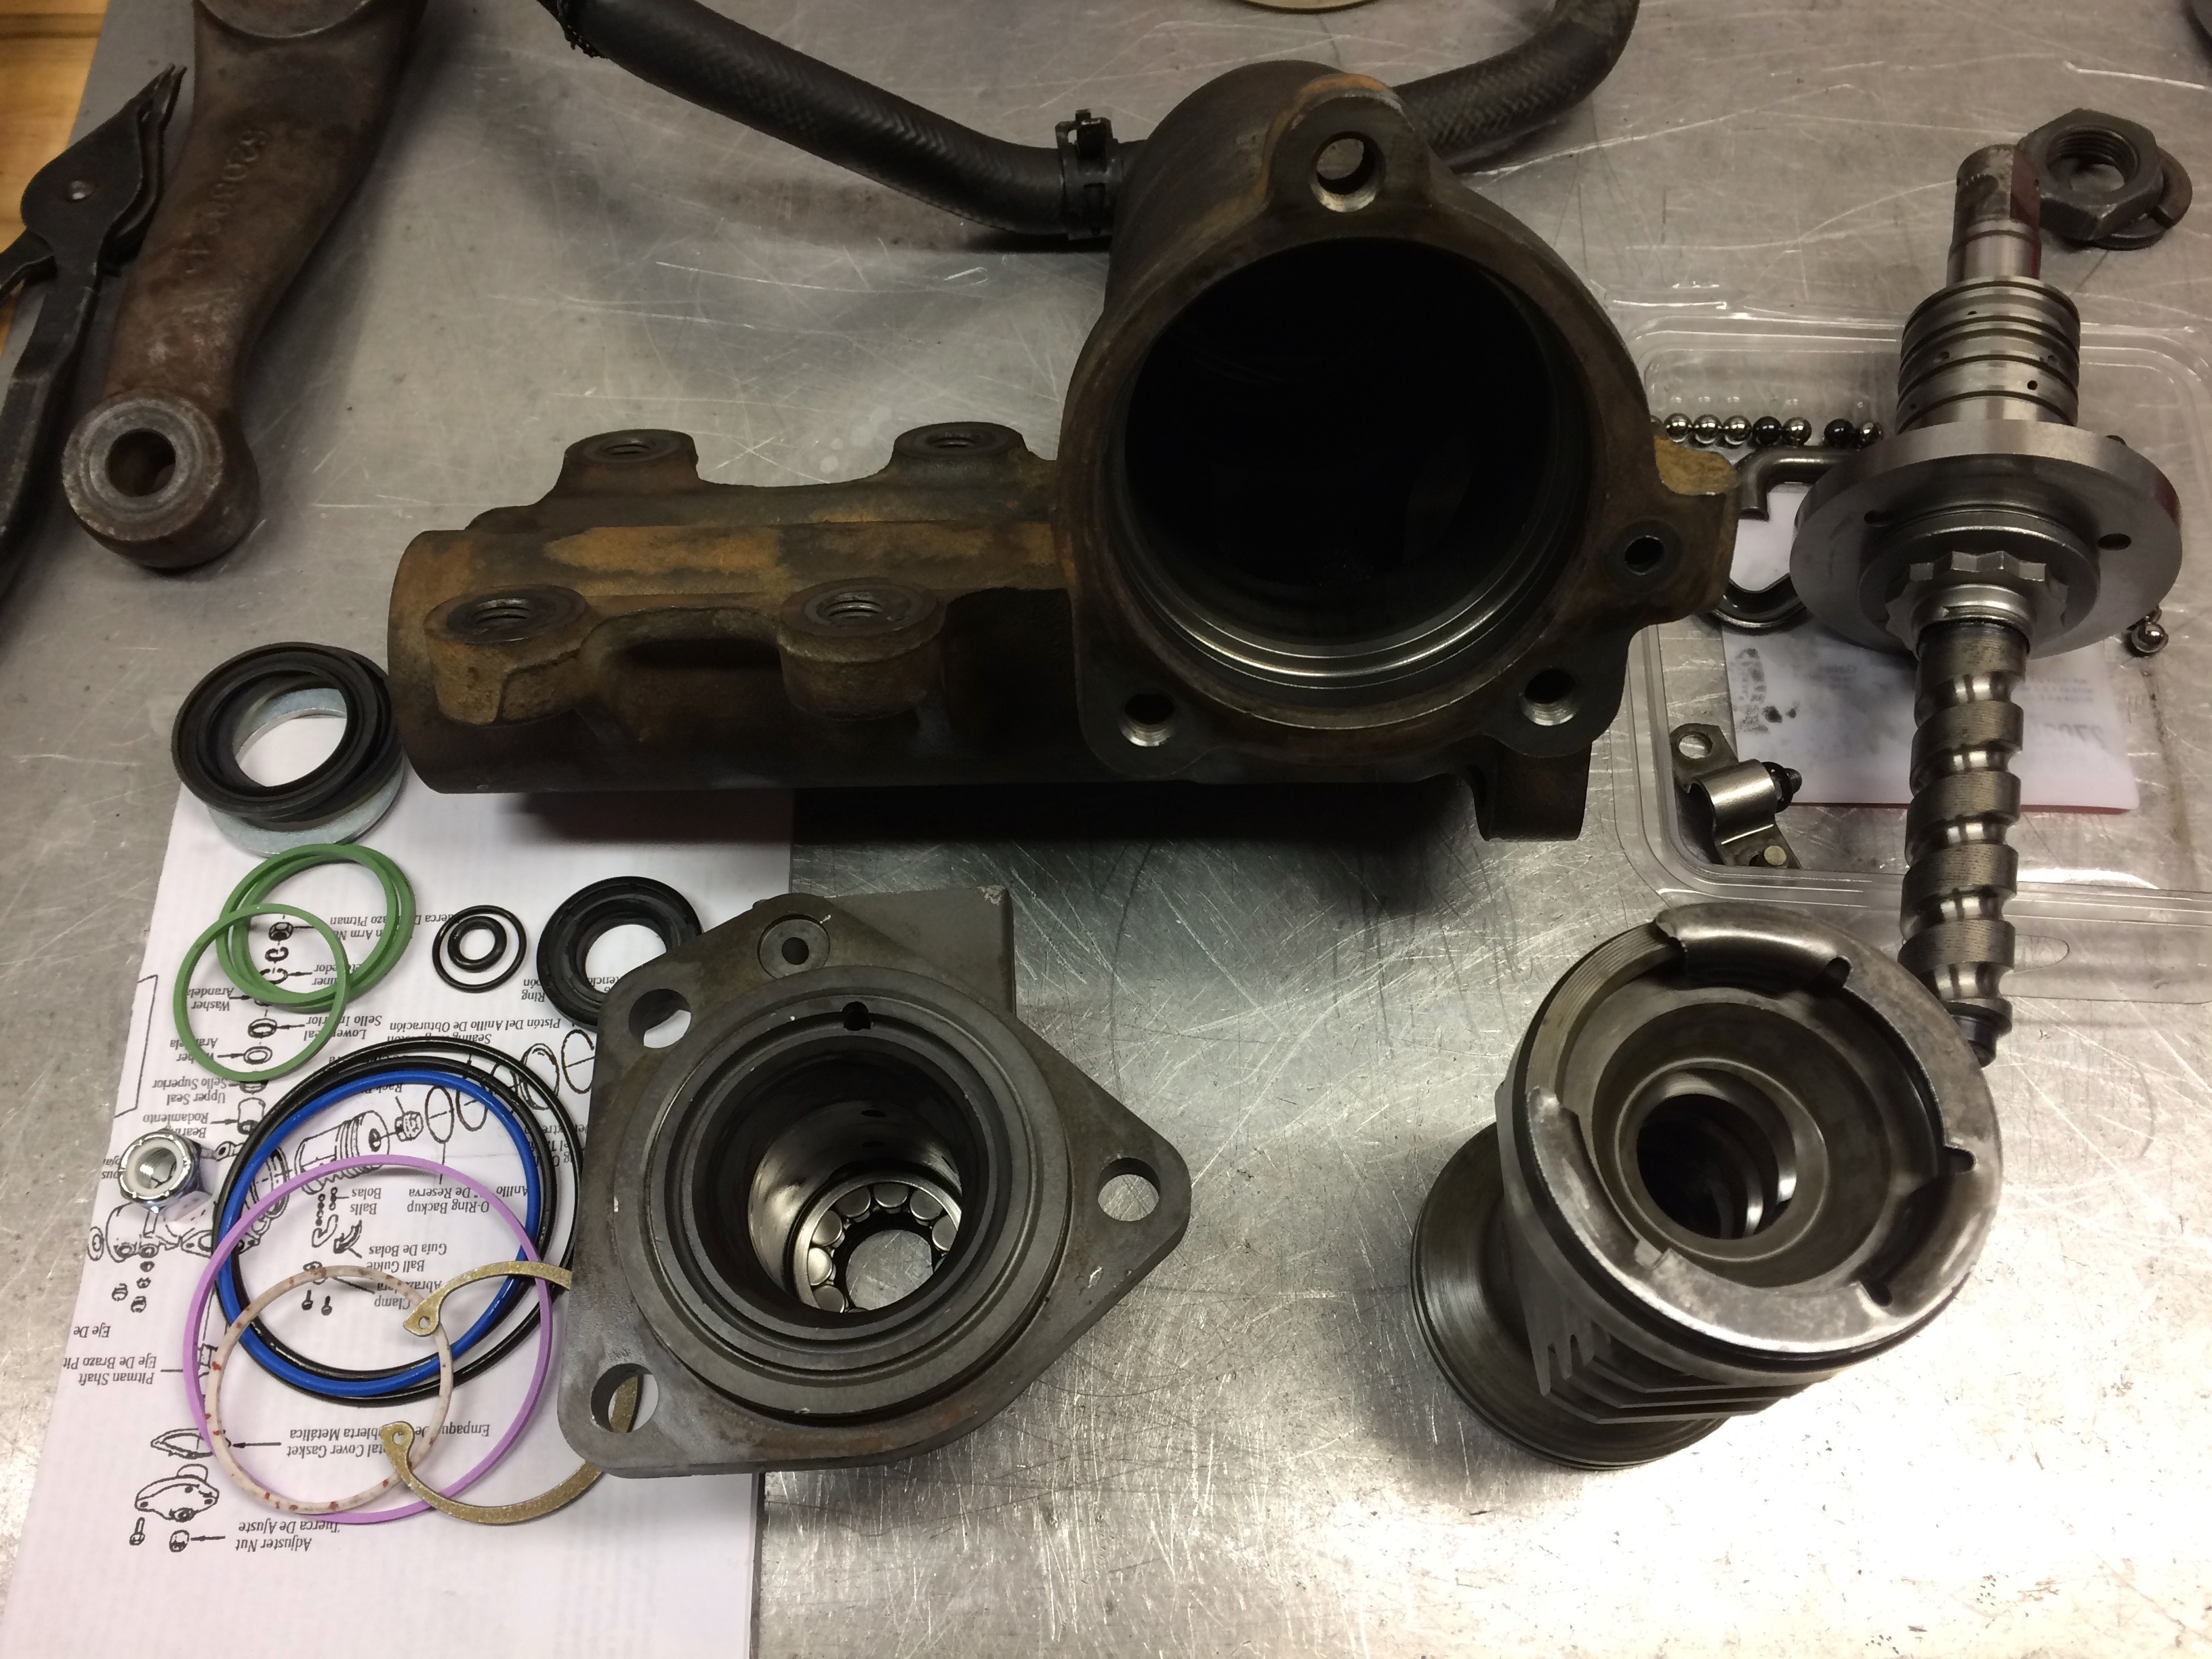


Comments: Had one problem, the Lares re-man pump I purchased had a bad pressure regulator I think. Drove me nuts, as I assumed the Lares pump was tested and good… but hydraulic cooling fan would not step up to high speed. Changed everything but the pump, reinstalled original working hydraulic fan, tore down and rebuilt steering gear, removed Maganafine filter I had added, made a vacuum hook-up to purge all air out of PS fluid, etc. Nothing helped. Finally out of exasperation, went to NAPA and got another re-man pump. Installed, and everything worked fine. Arrrrg. Lost $60 on the Lares pump as had to turn in core to NAPA, another $30 worth of PS fluid on the floor, and a week of frustrating debugging. Oh well. Par for auto repair I guess when you don’t have factory tools to measure pressure, etc.
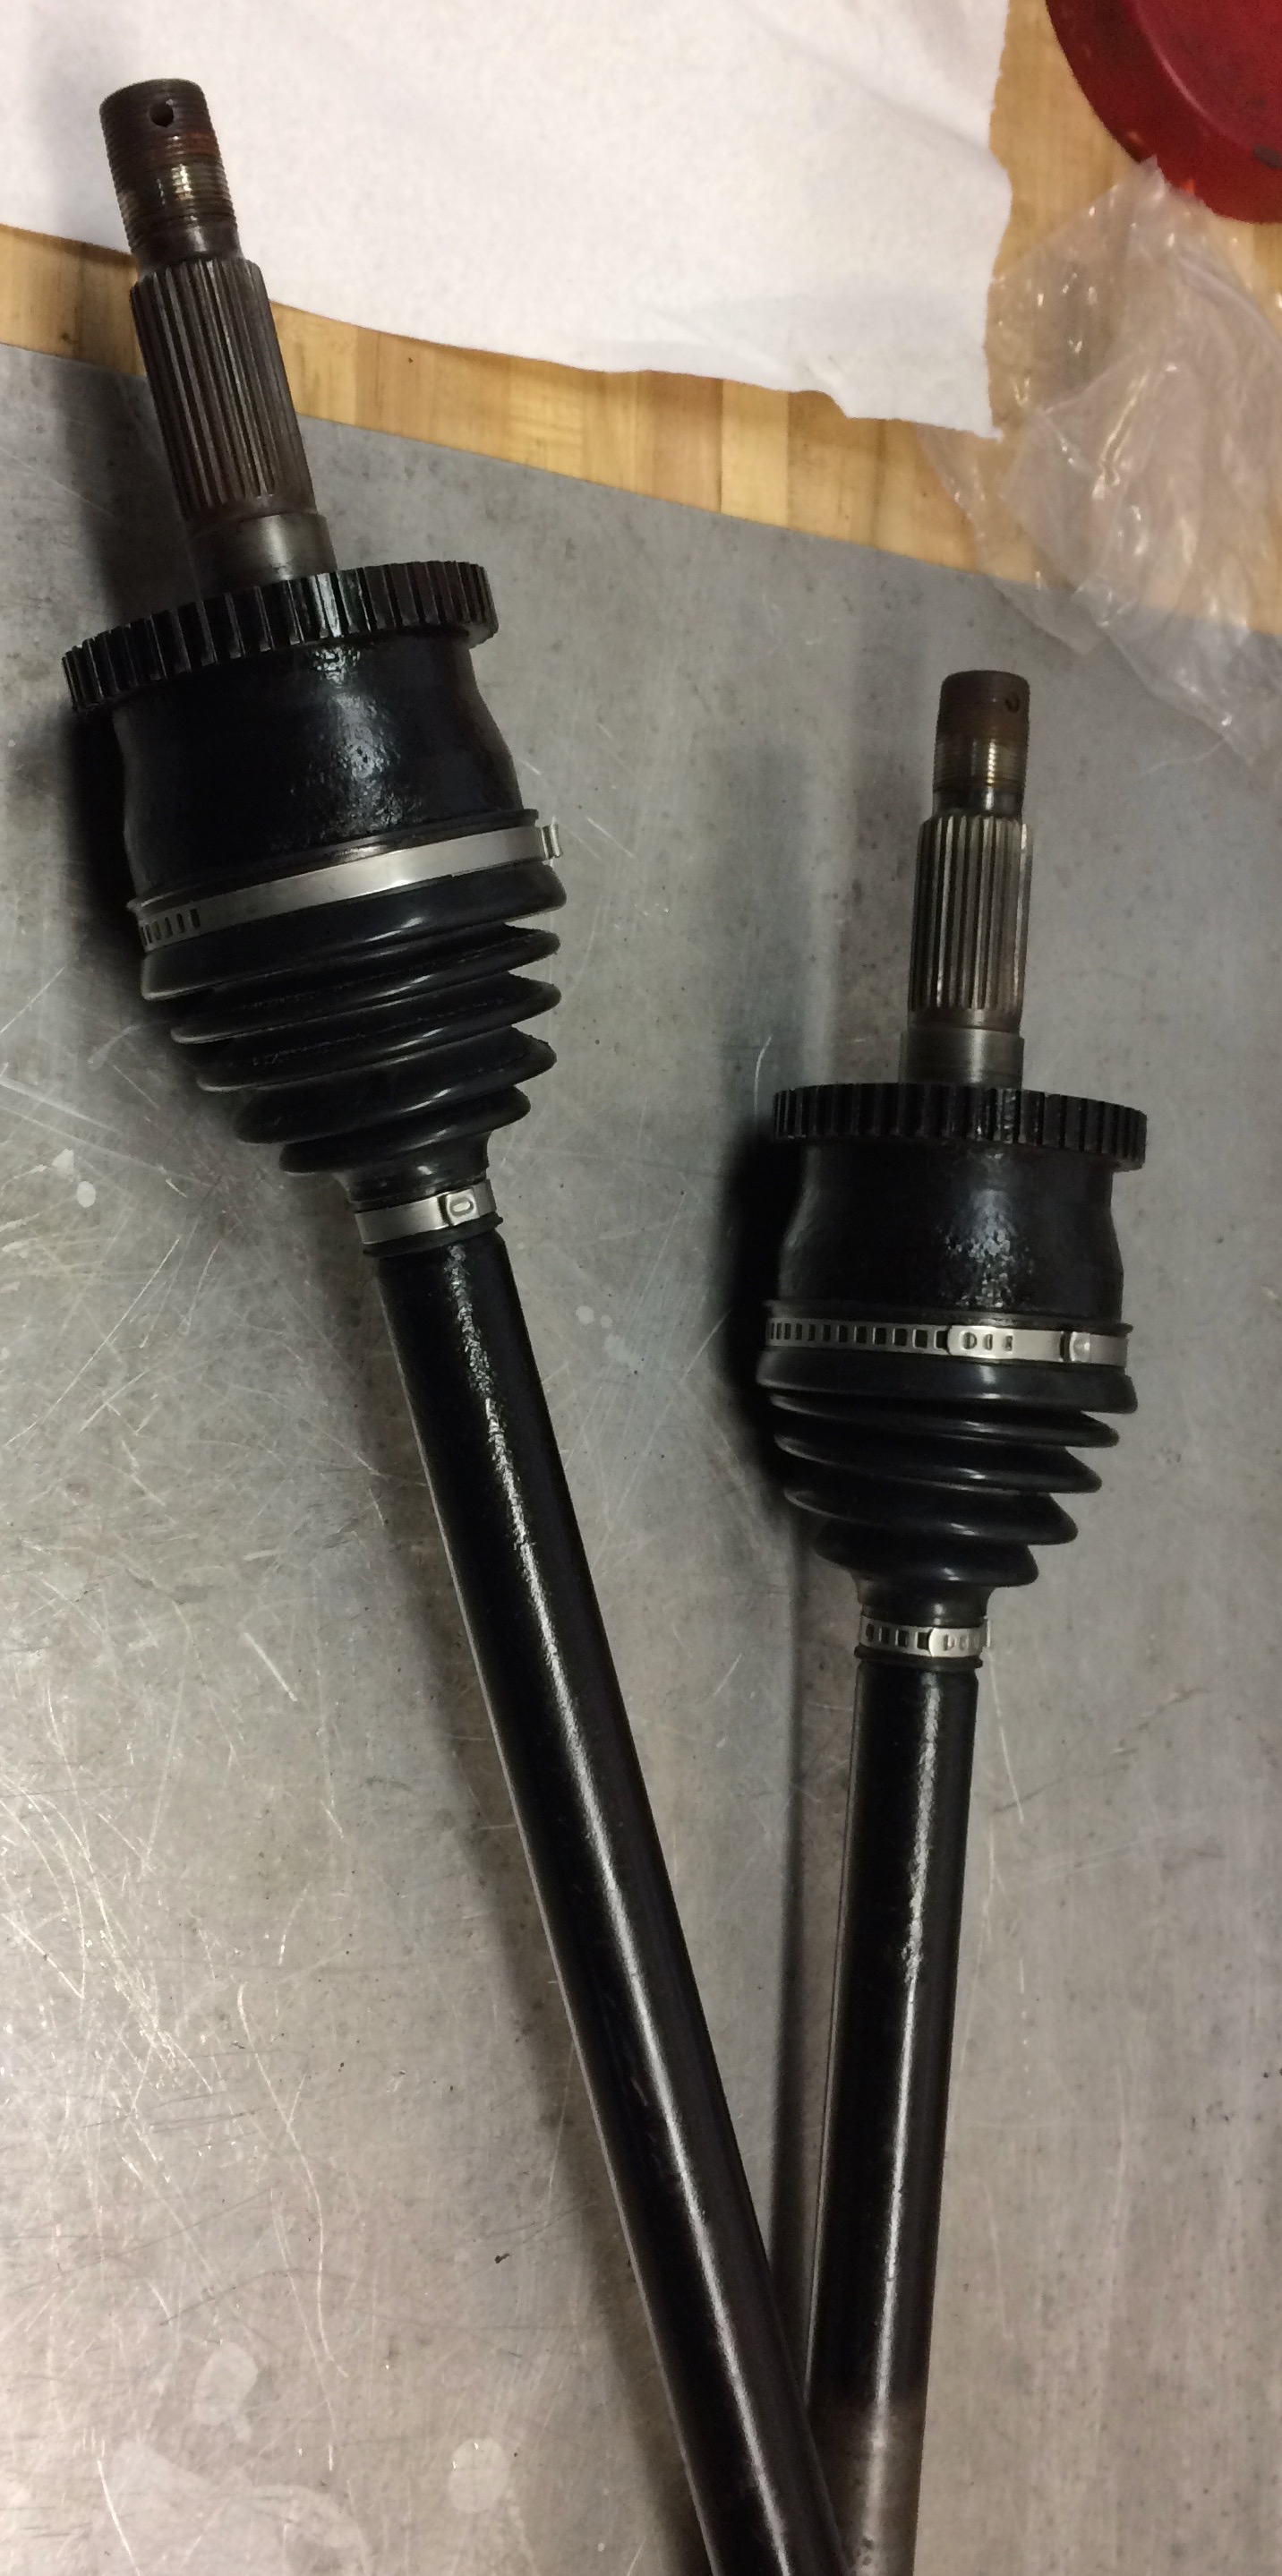
Drive shafts
- Clean and paint
- Replaced U joints
- Replaced CV coupling ball w/kit


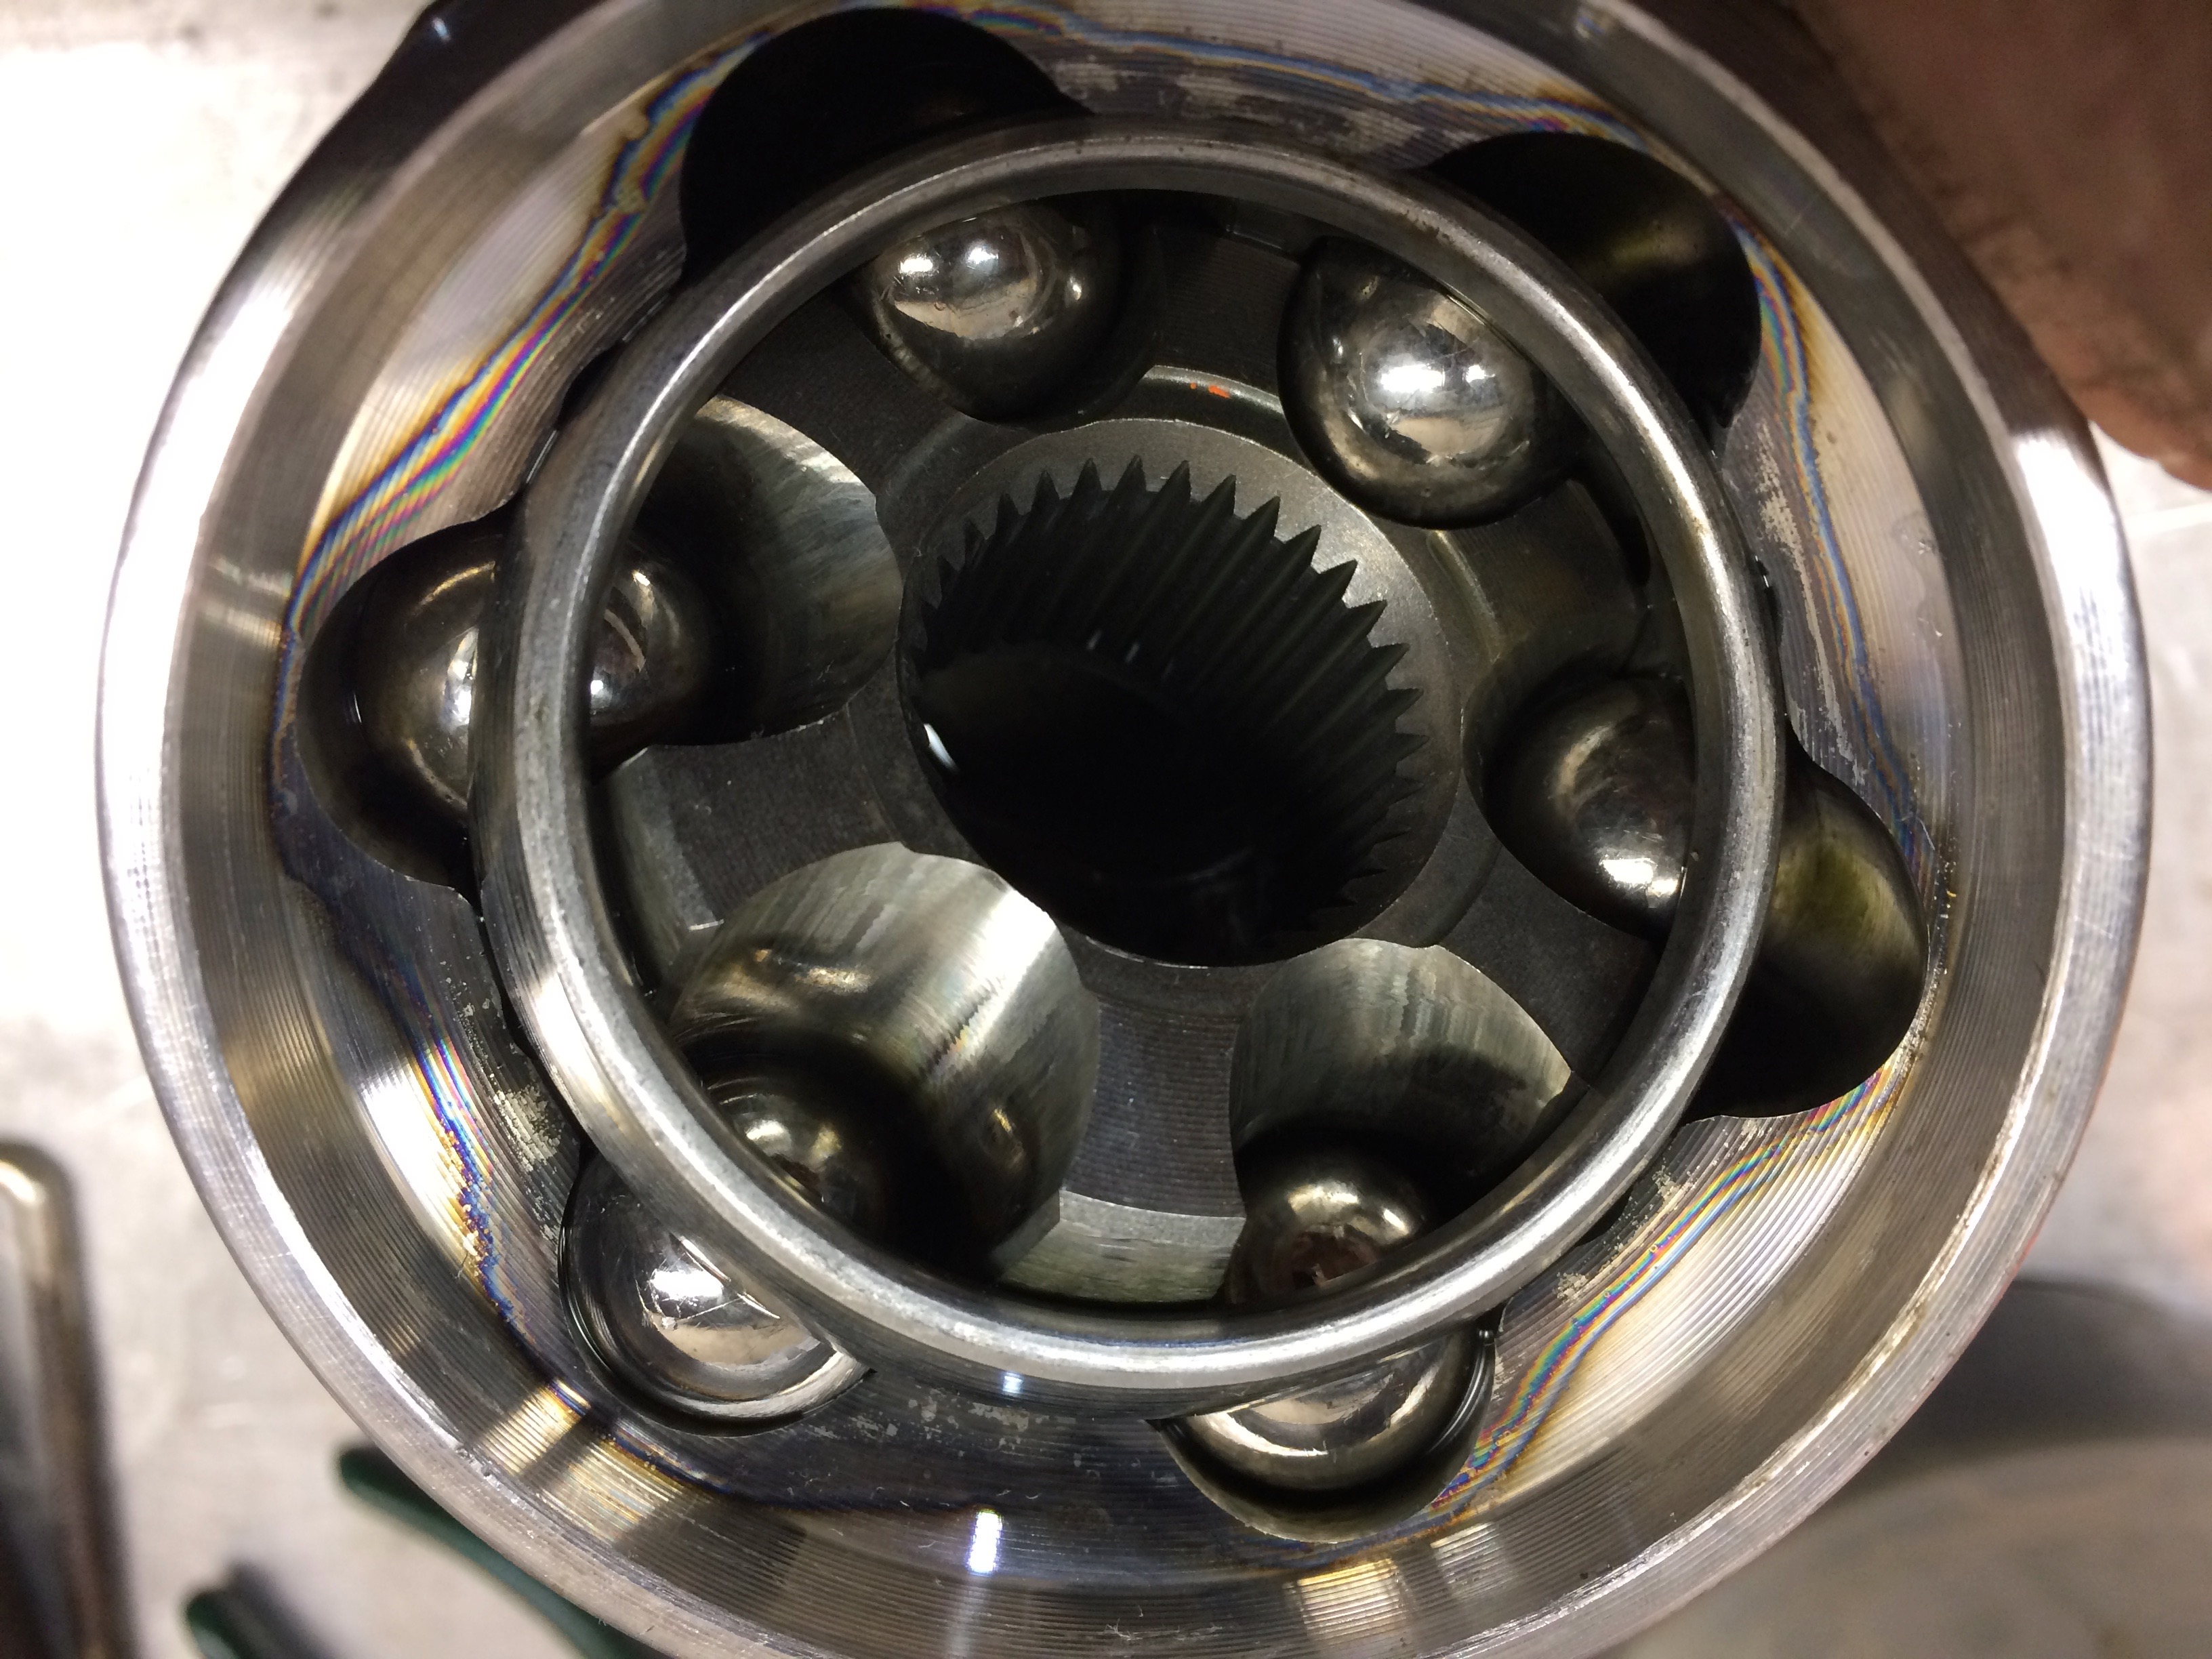
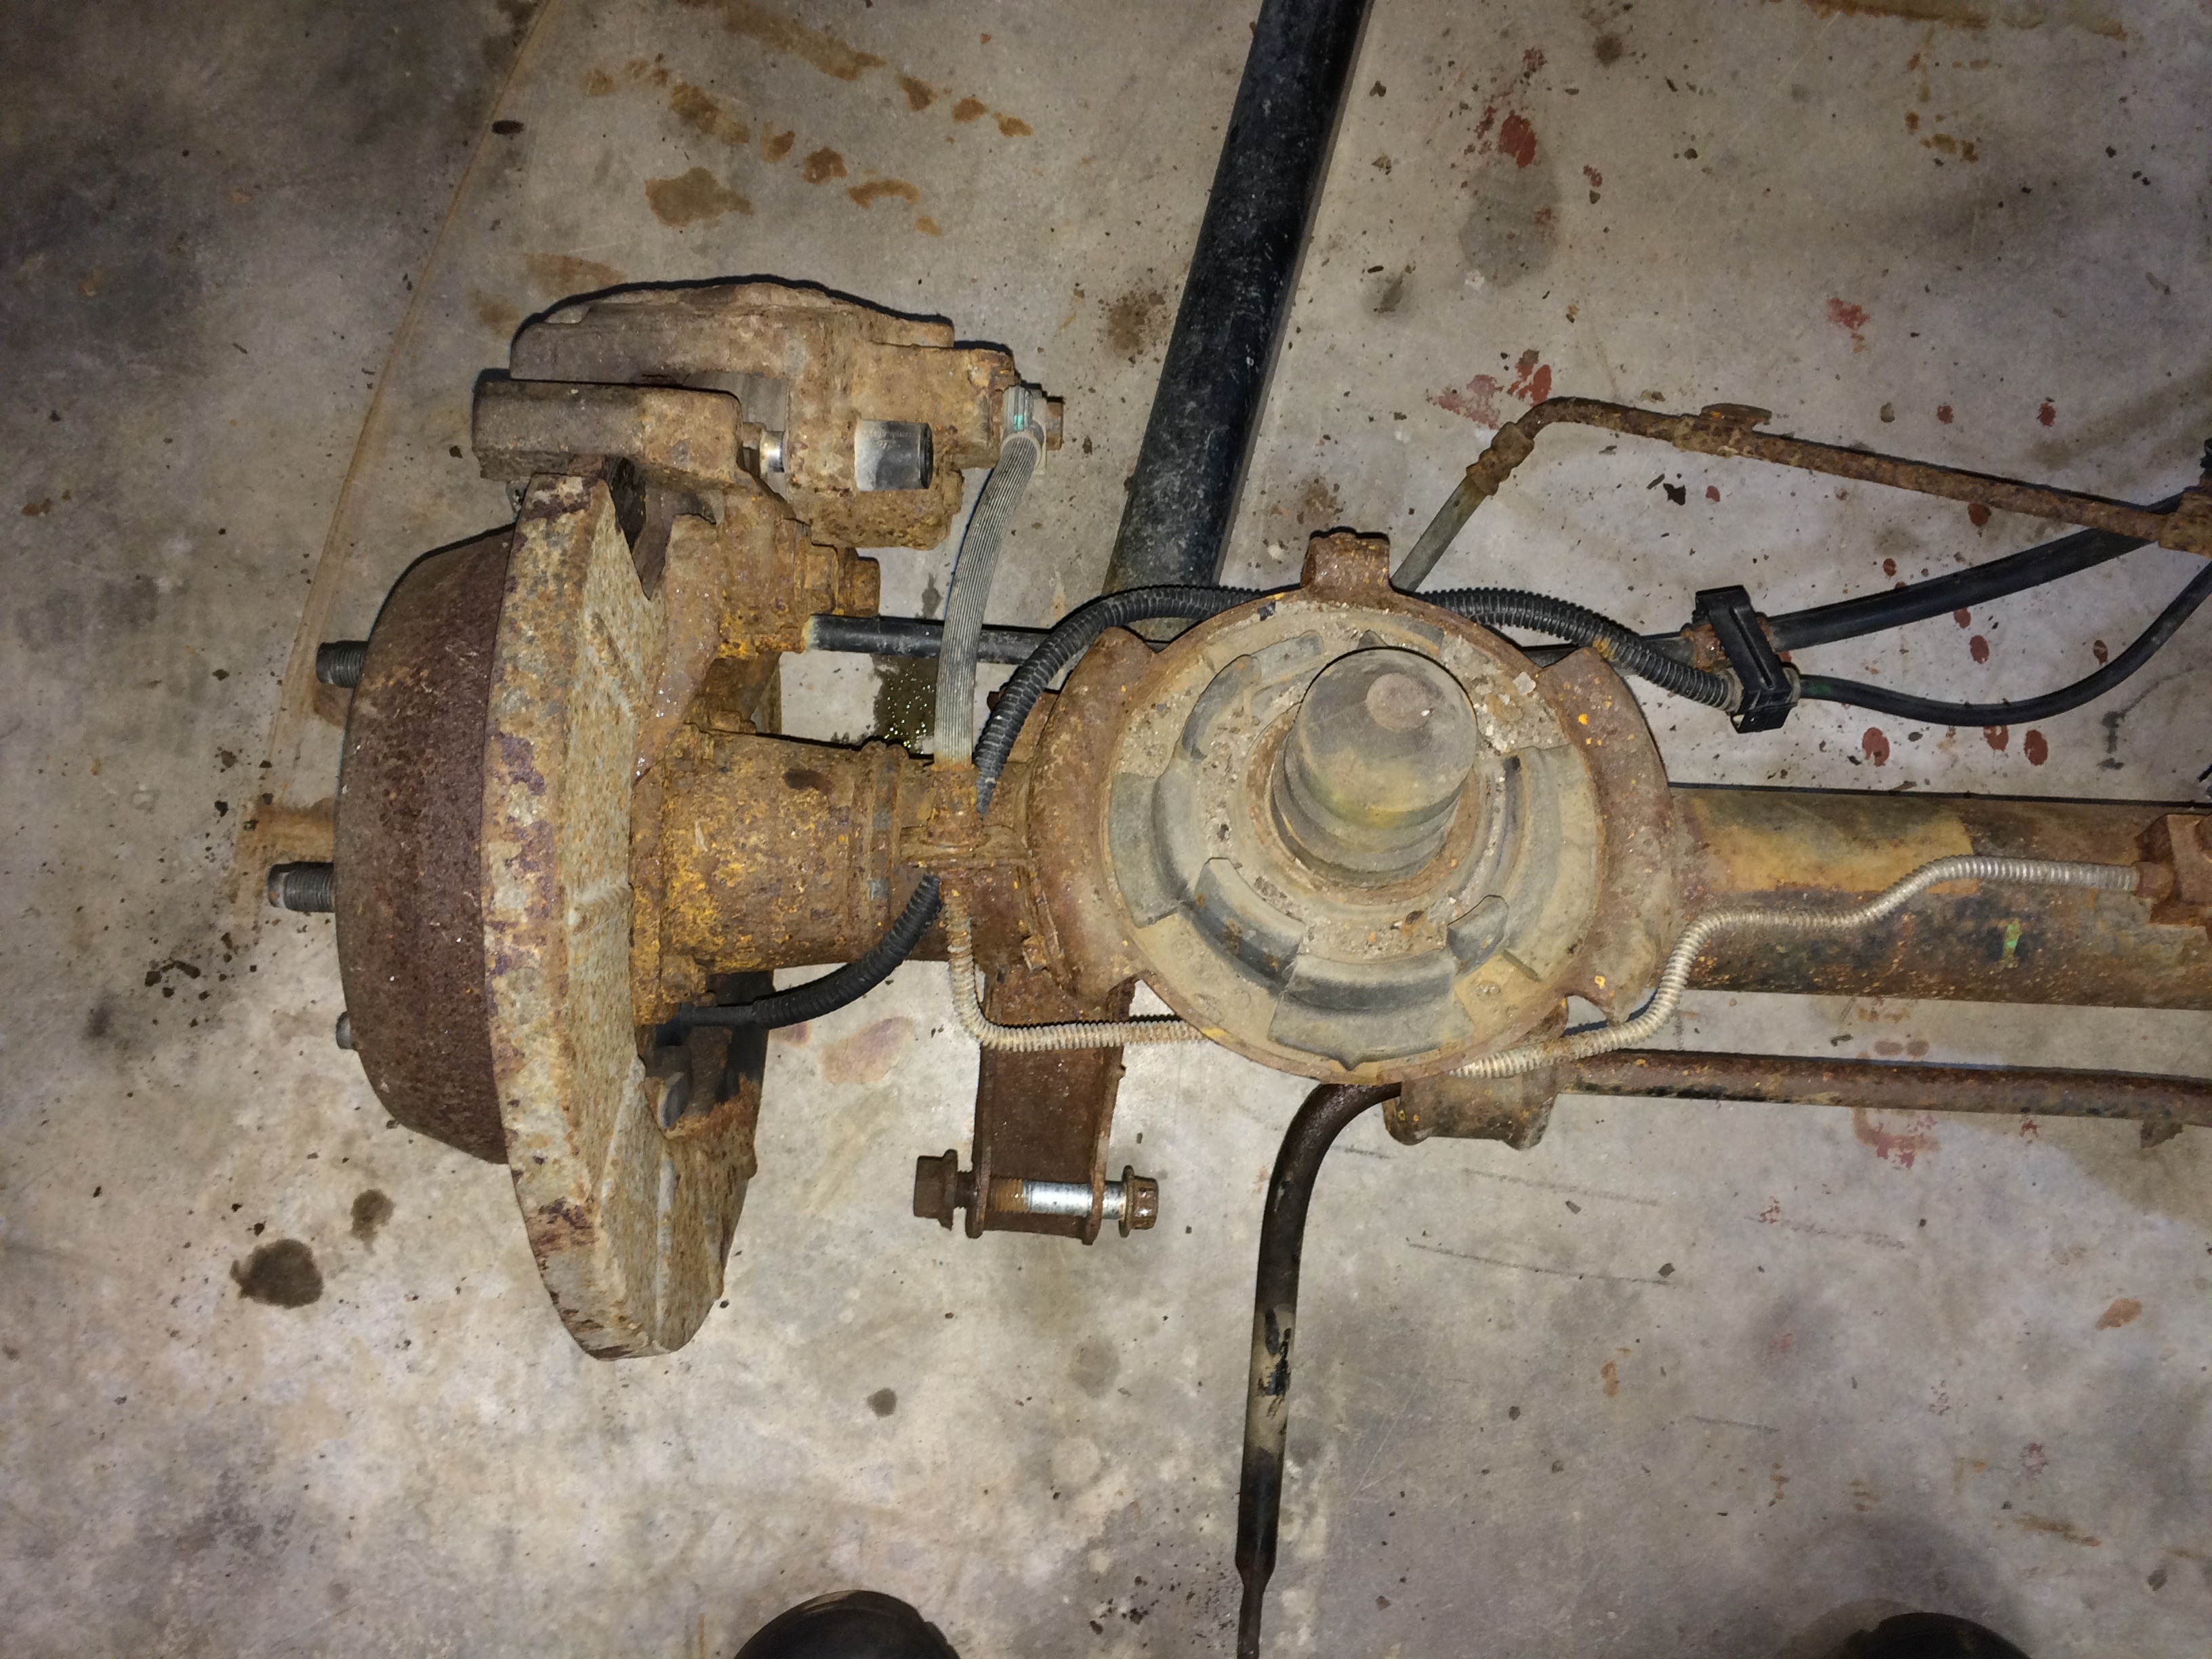
Front axle
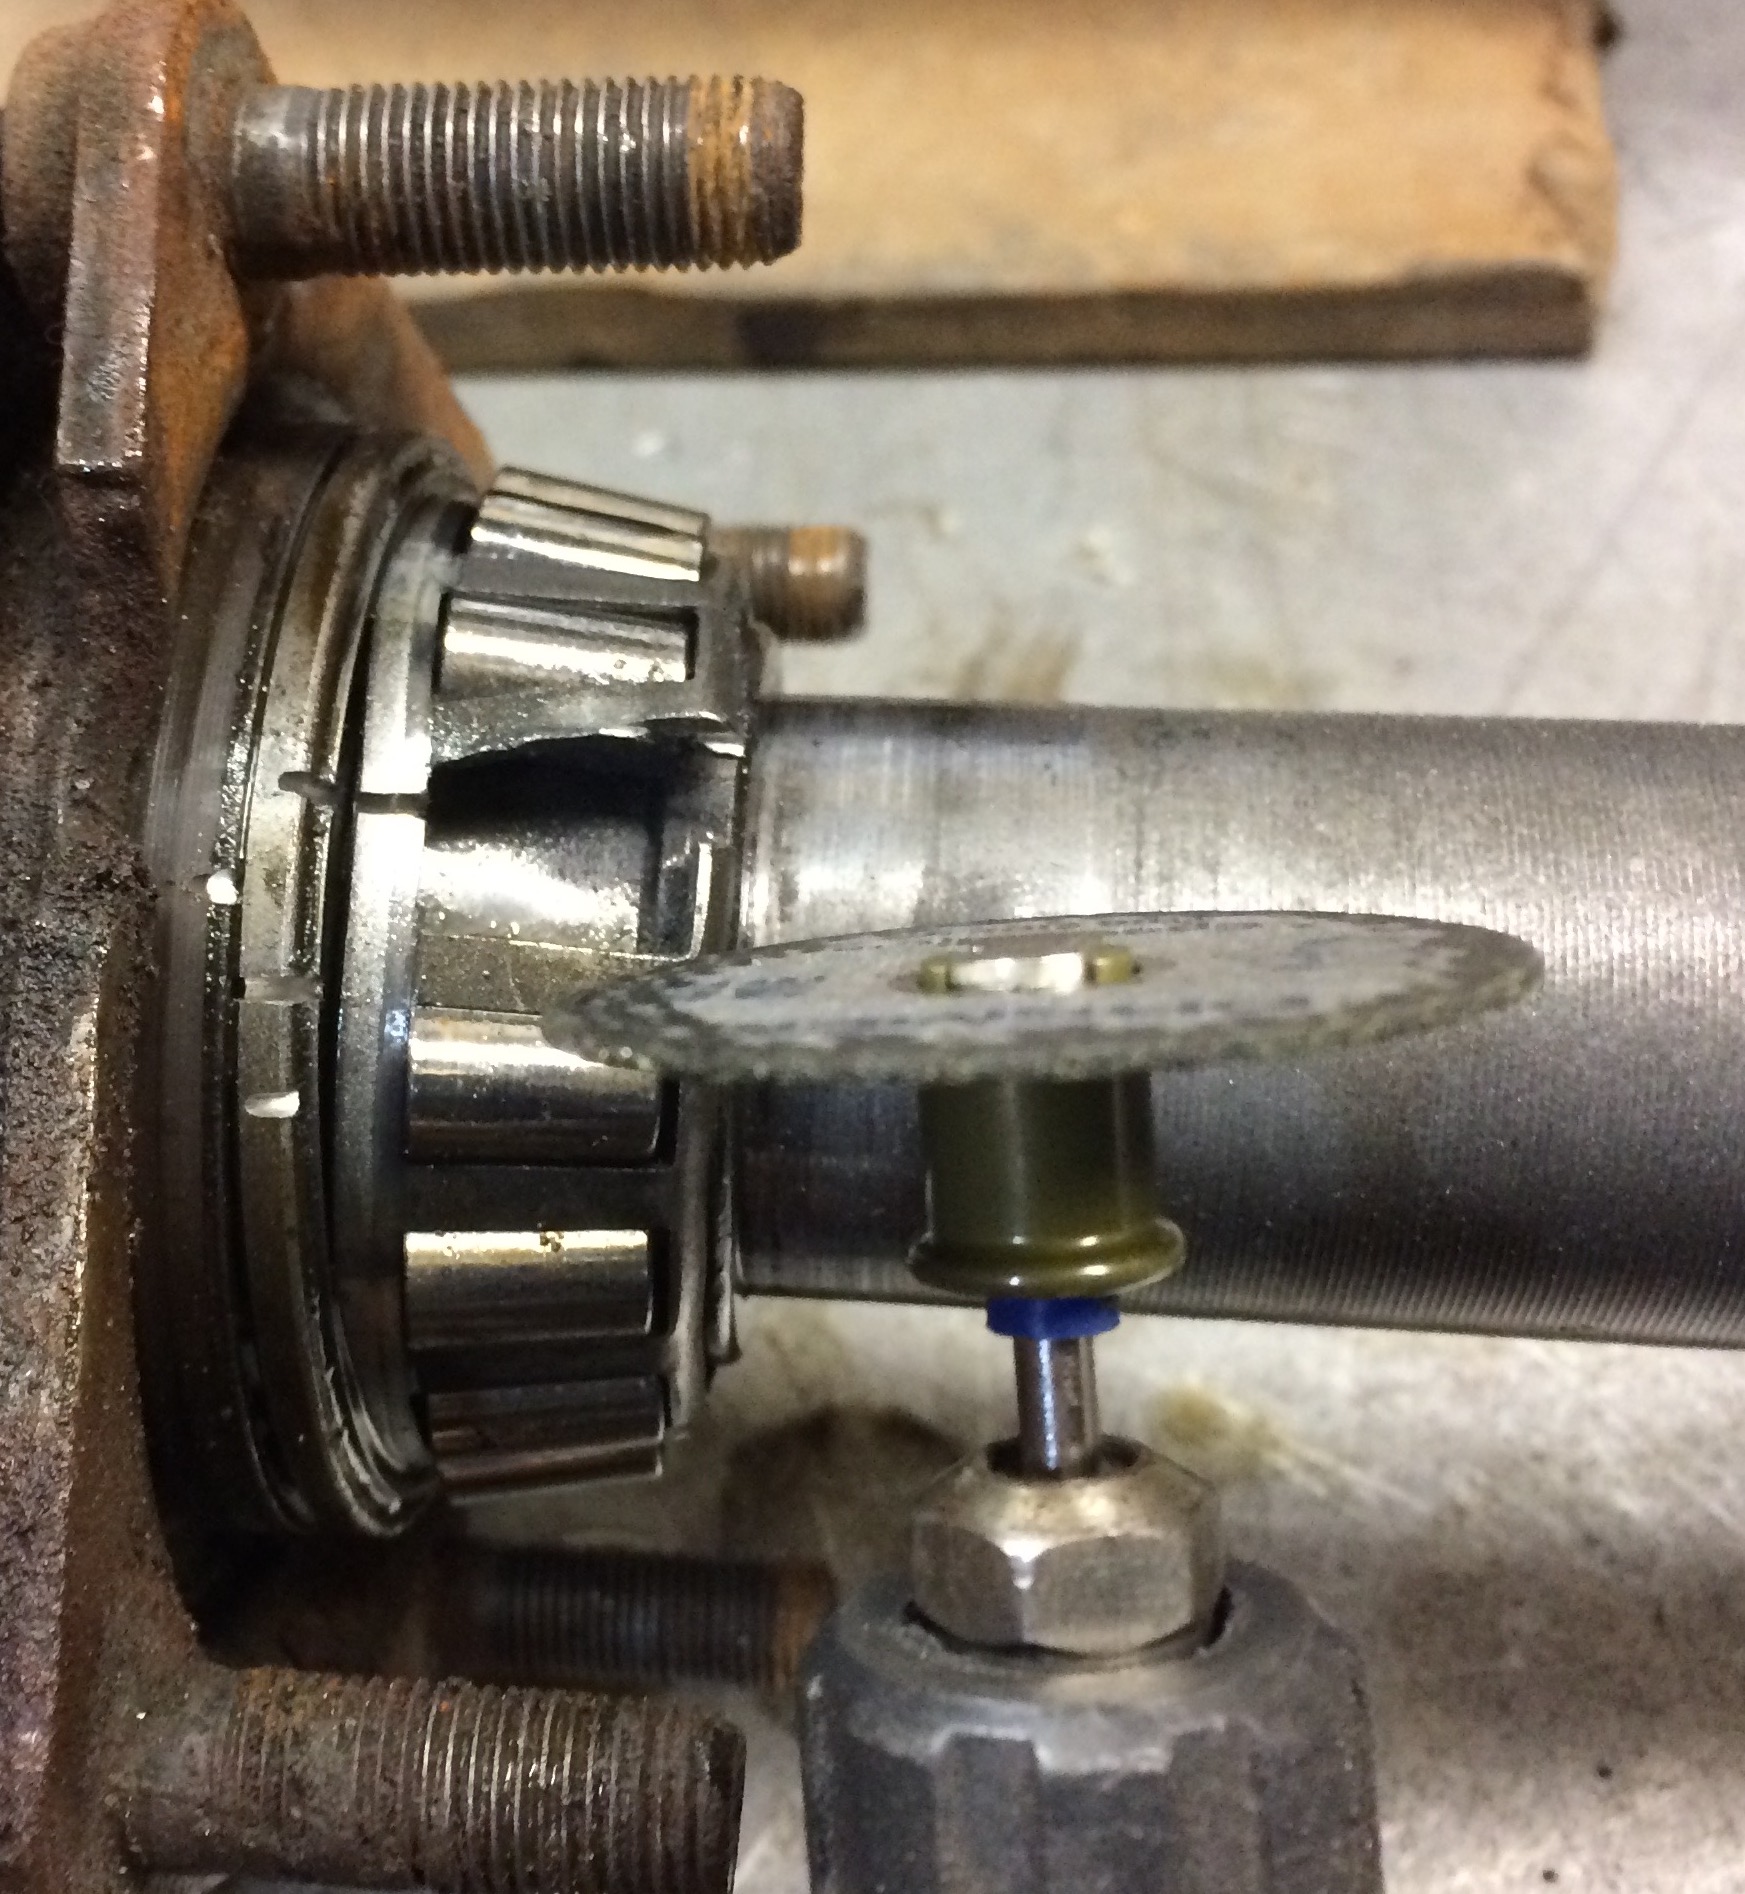
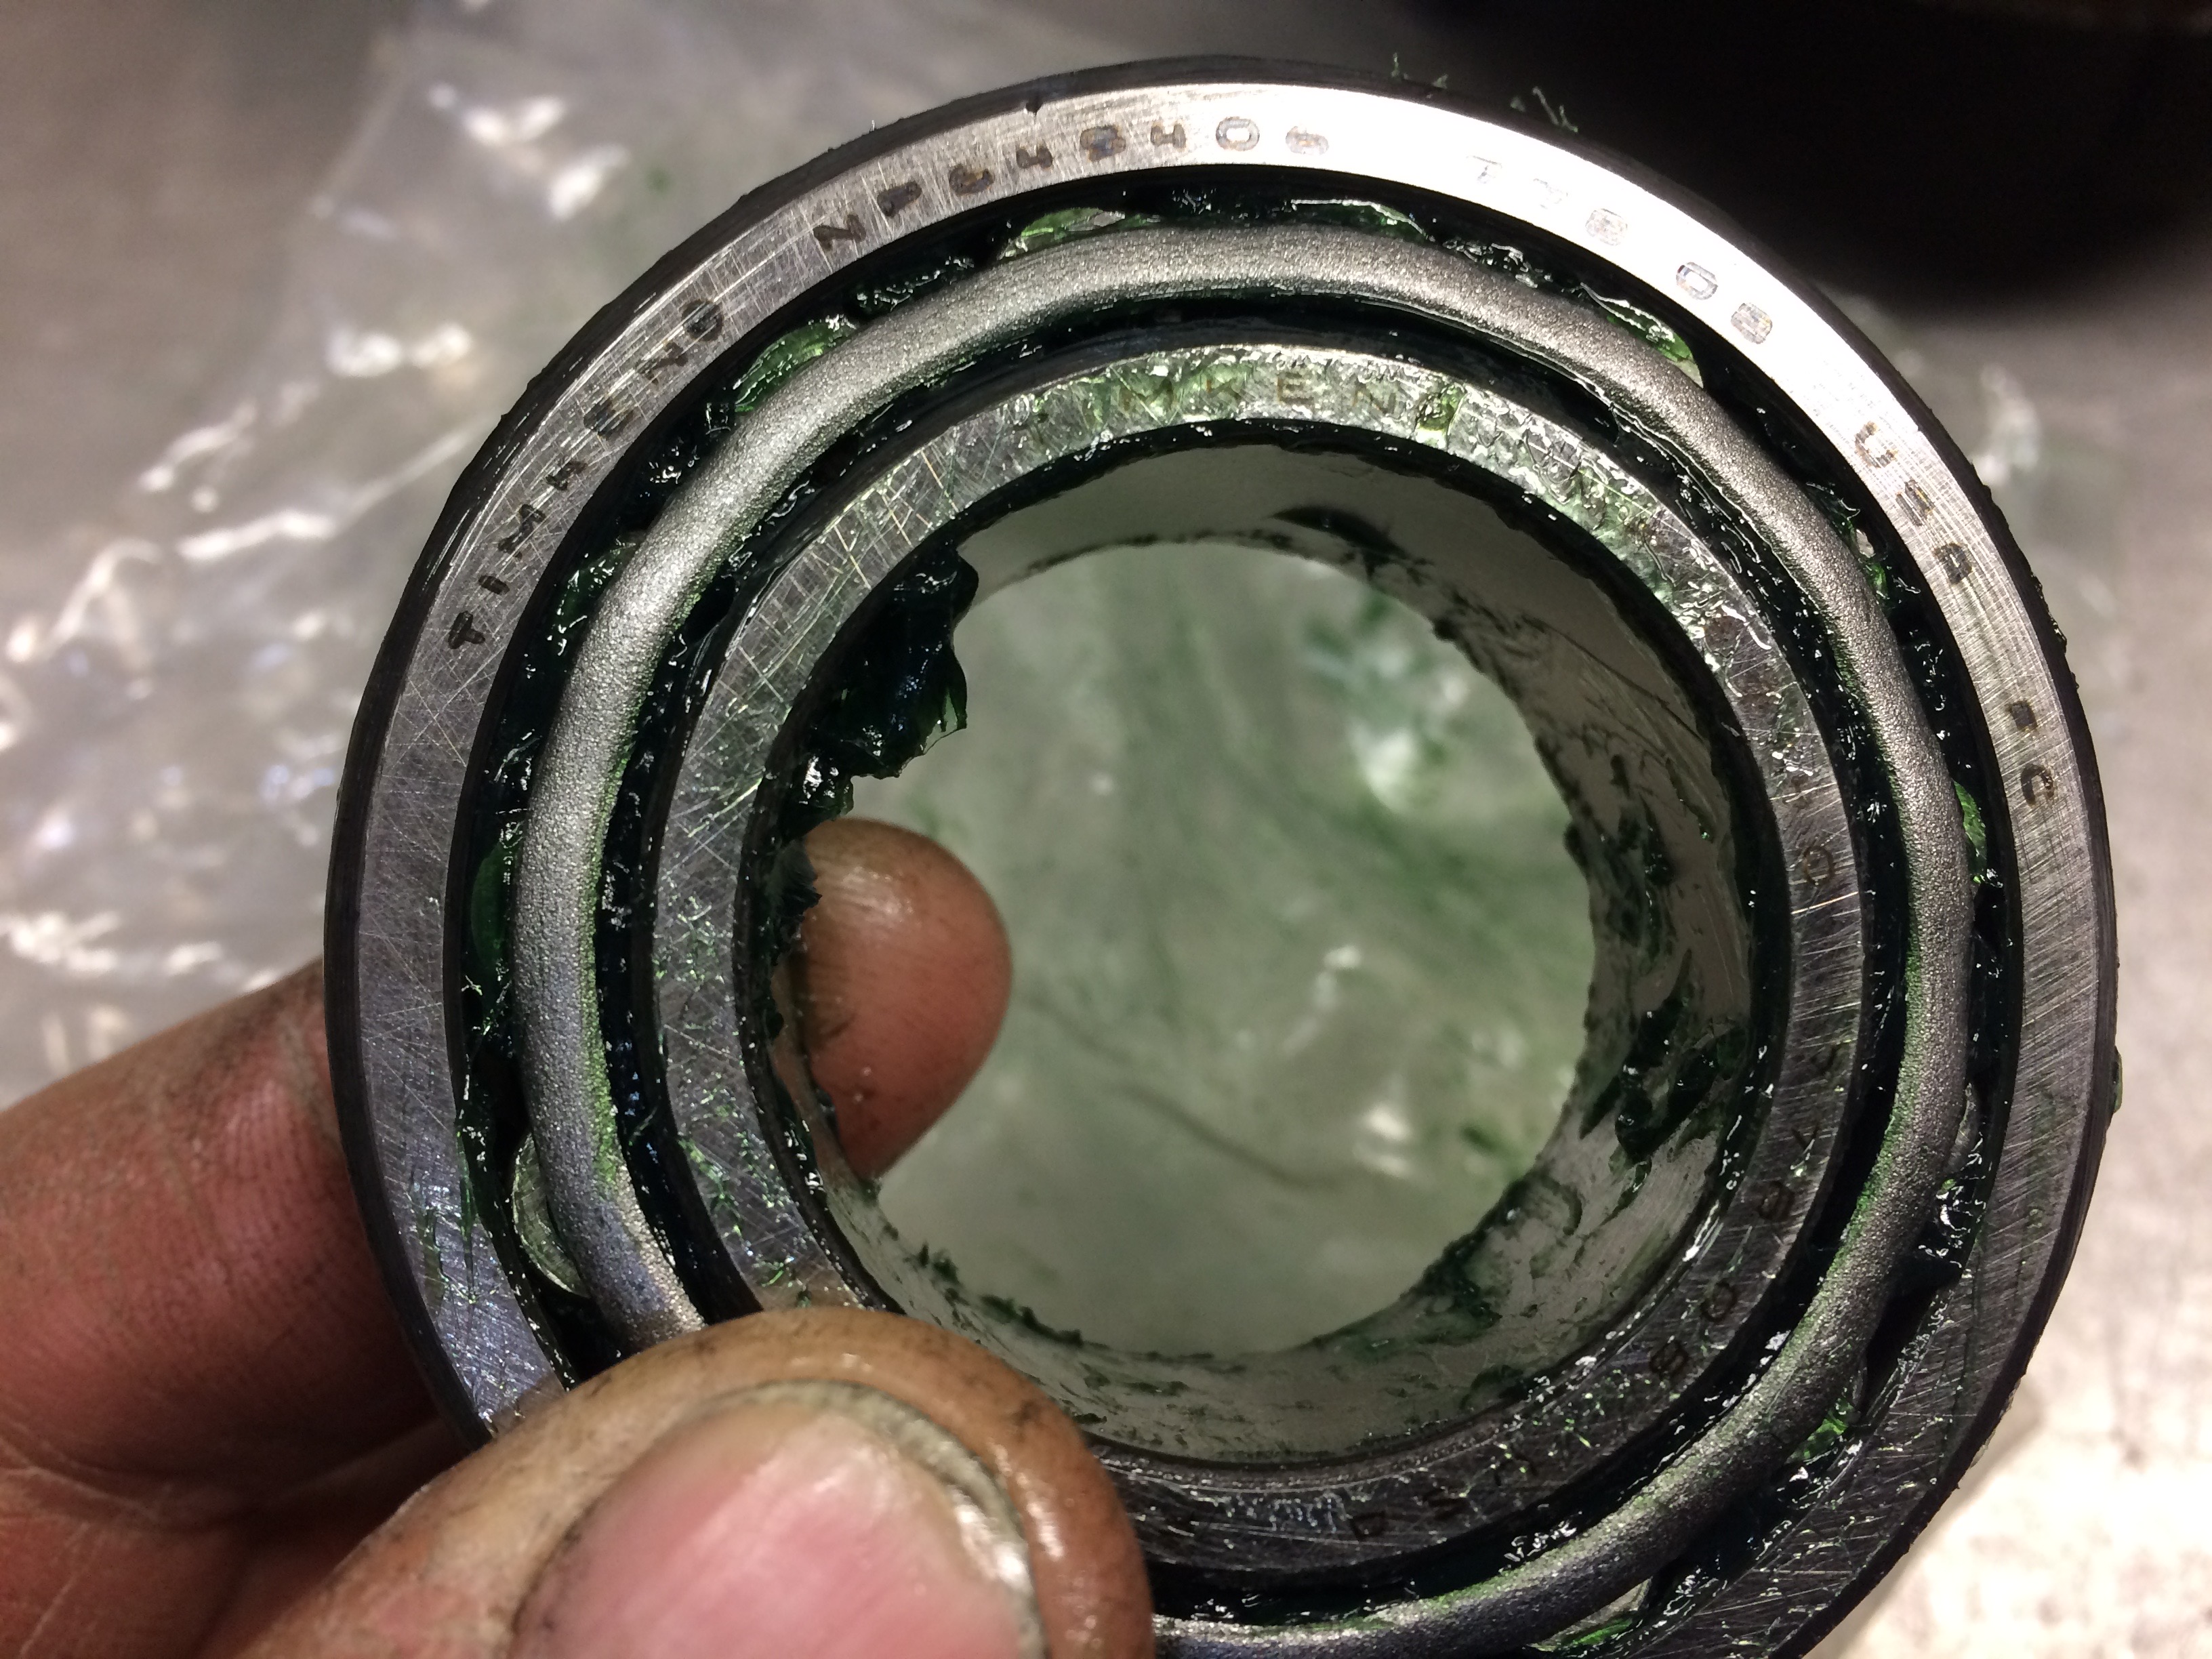
- Replaced wheel bearing hub assemblies with Timkens
- Clean, inspect, re-lub and reboot axle CV joints (made the special crimping tool after pictures)
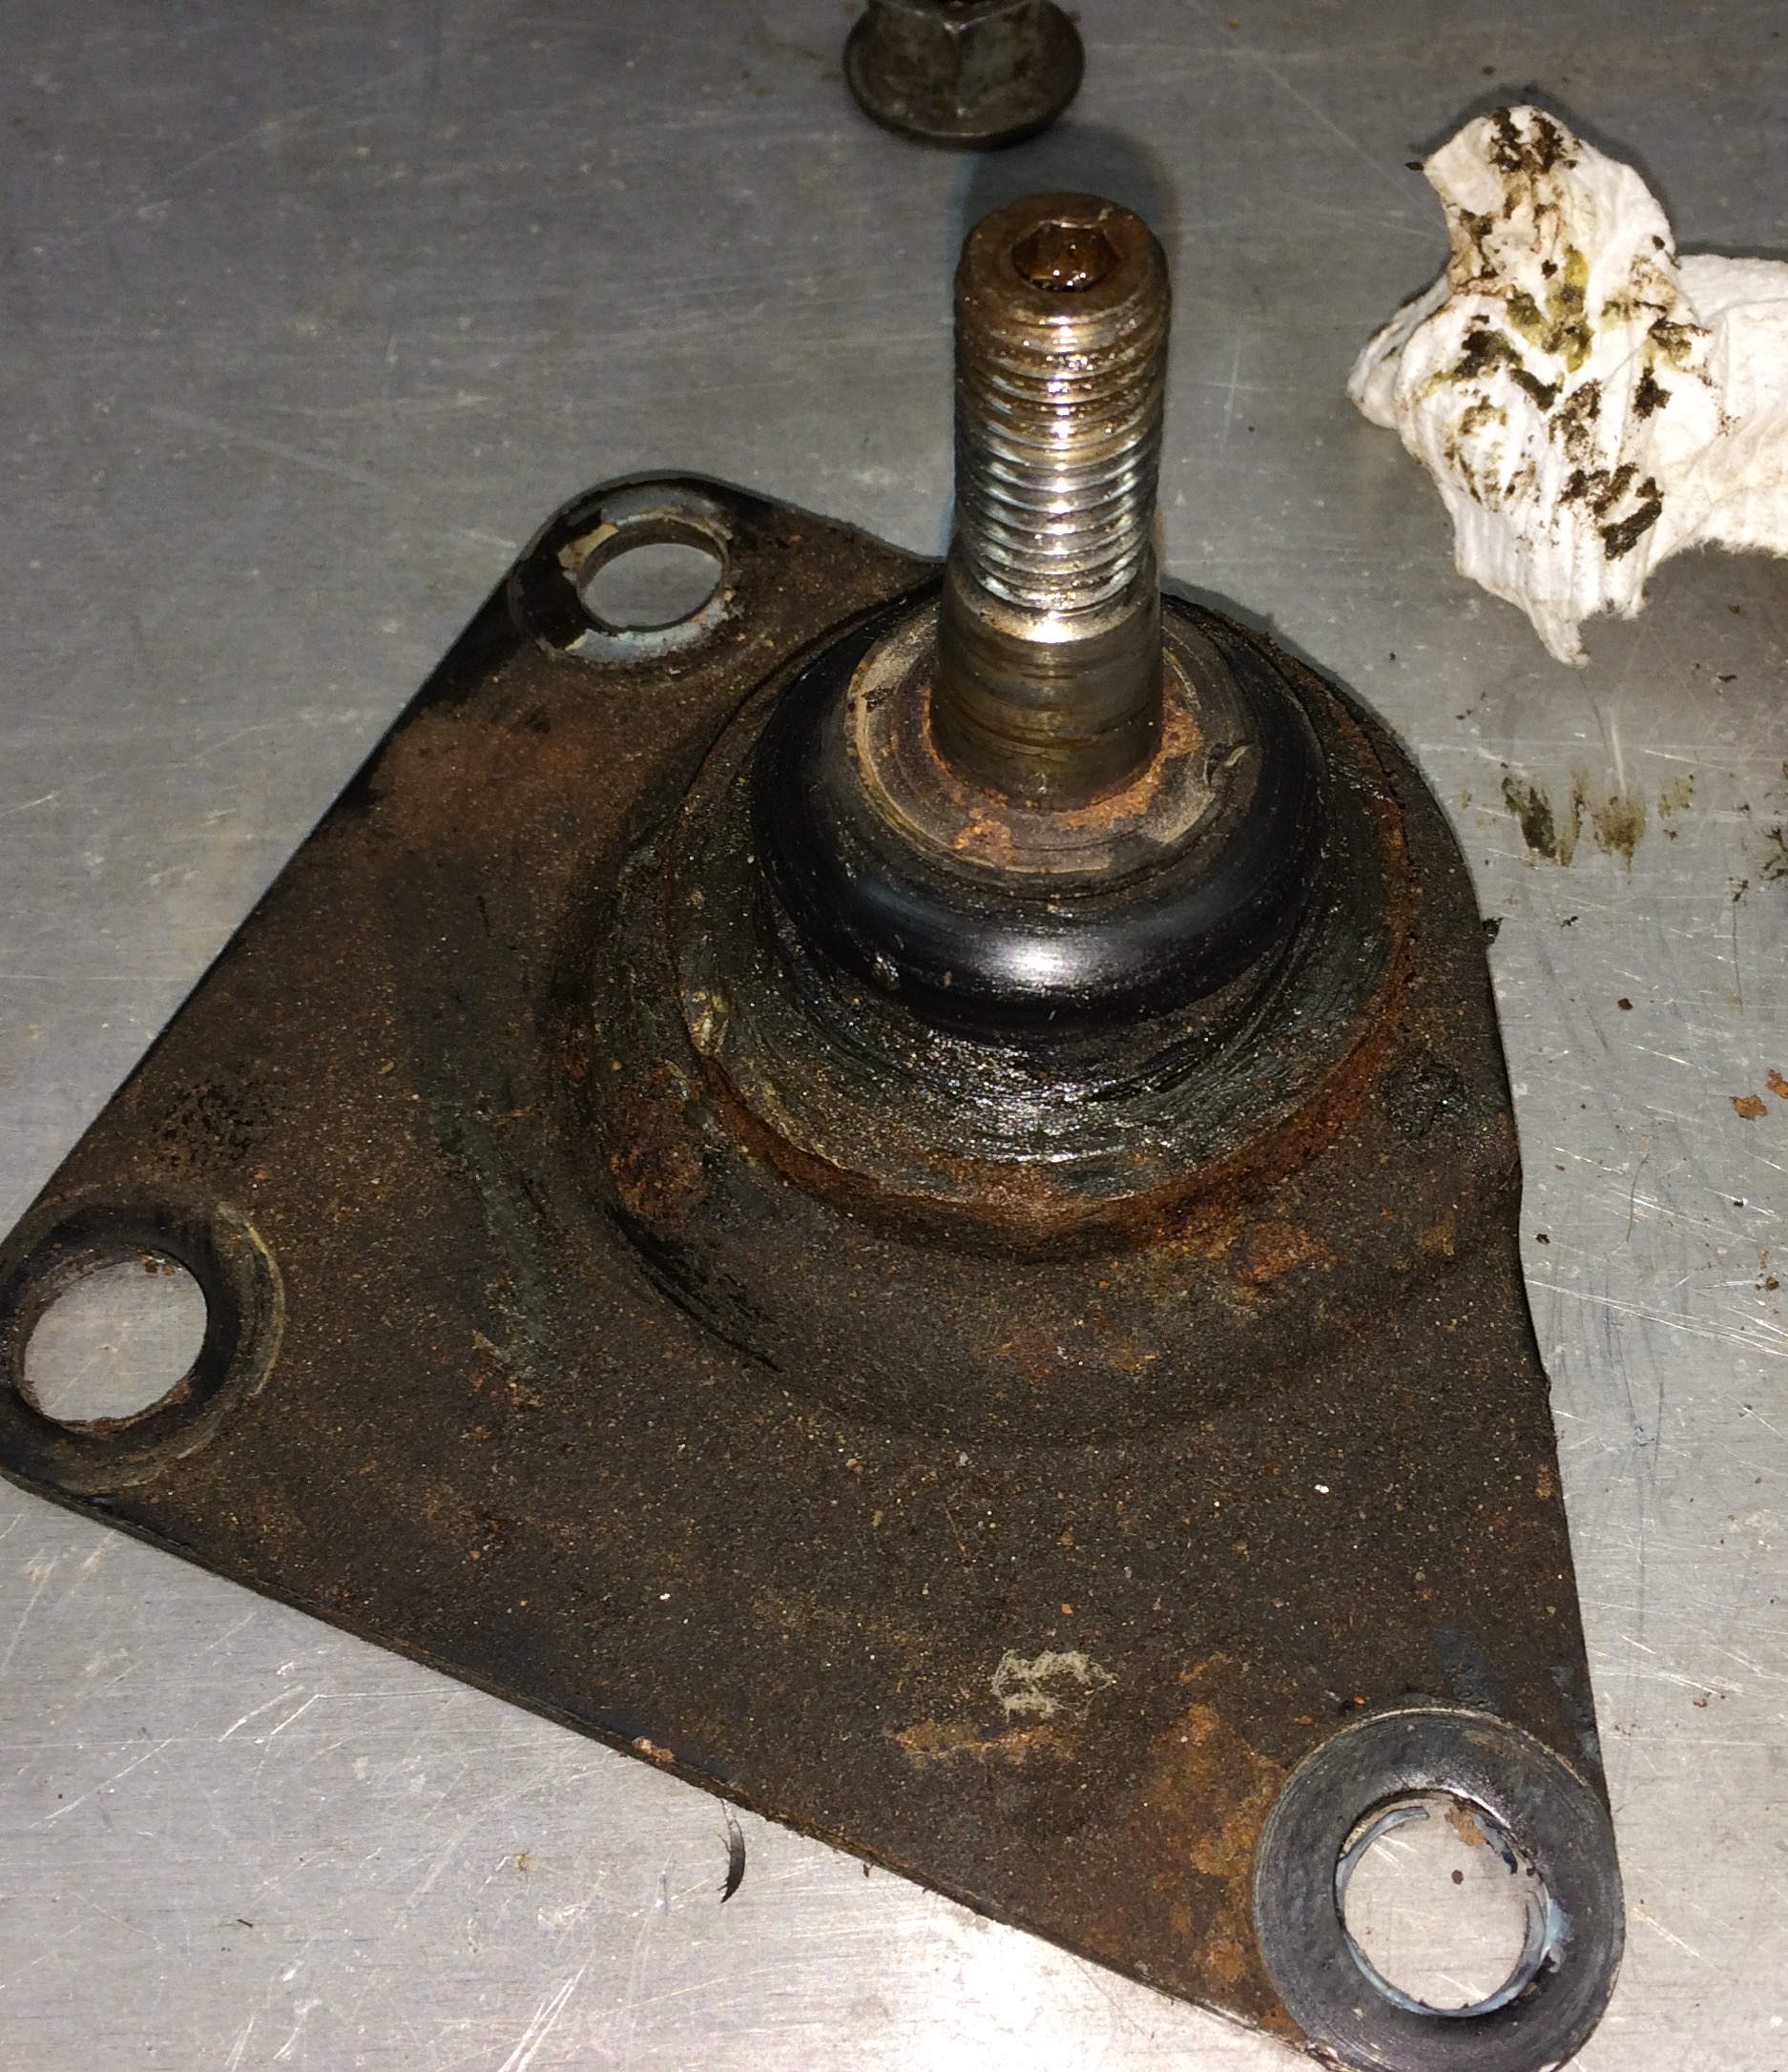
- Inspect ball joints, greased uppers that have zerks
- Replaced fluid with correct gear oil and Chrysler Vari-Lok additive
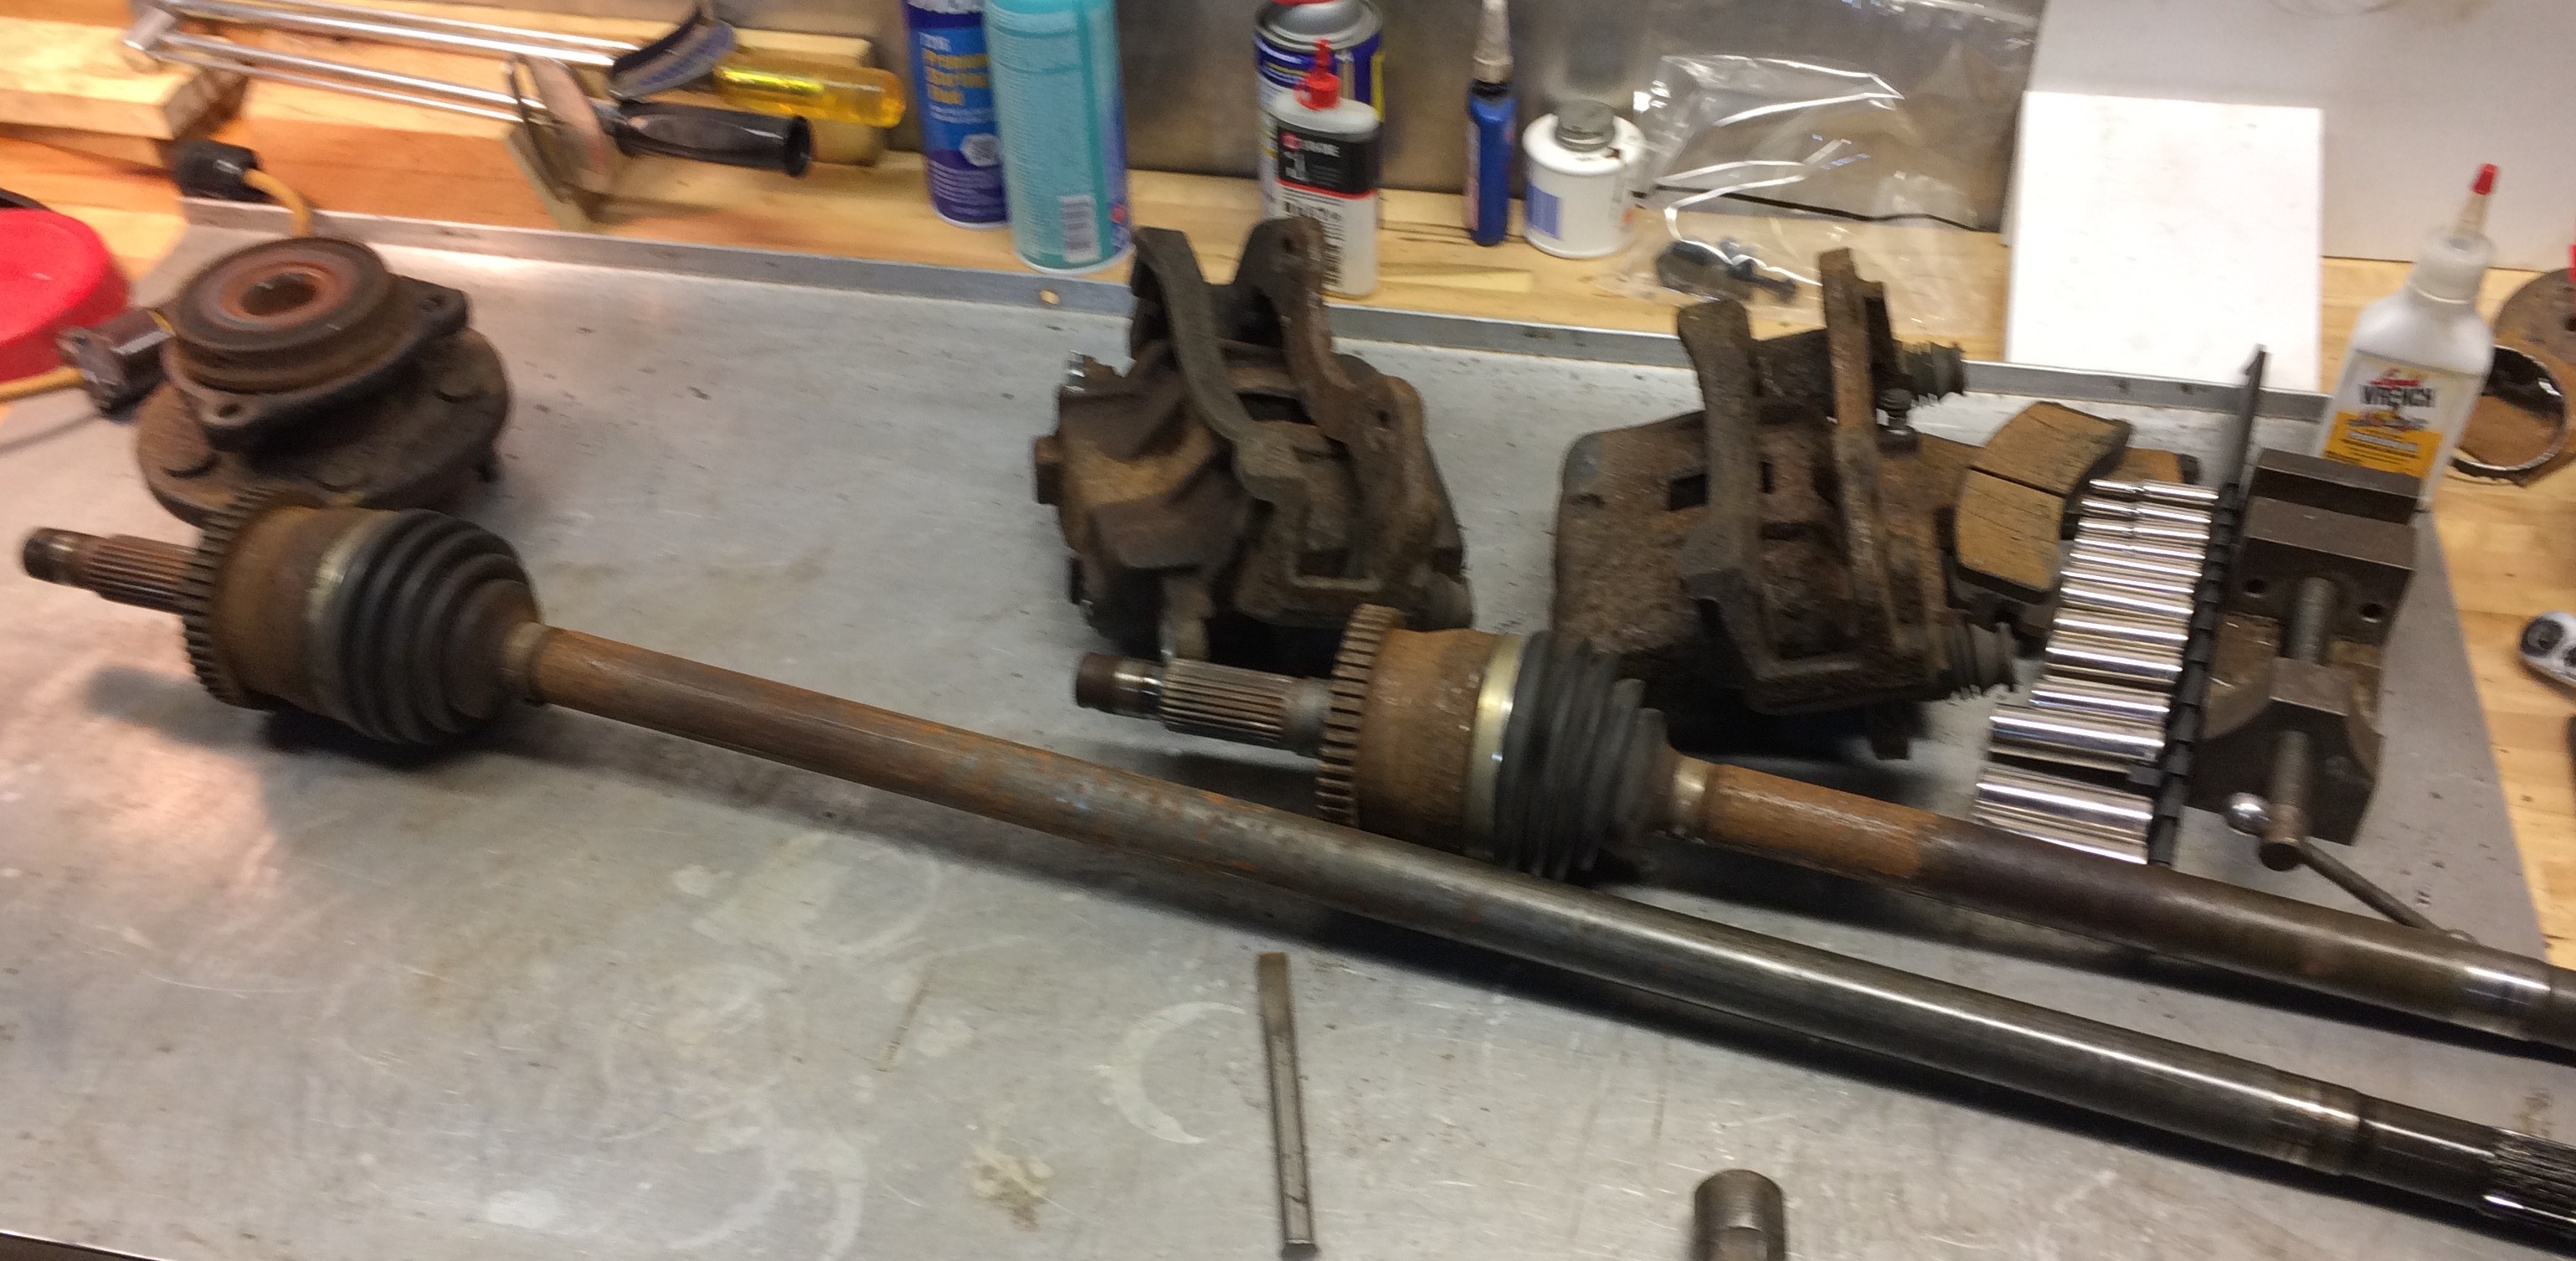
Rear axle
- Replaced wheel bearings and seals
- Clean and paint
- Cleaned and painted backing plates, lubricated parking brake parts
- Lubricated parking brake cables with Teflon lube
- Cleaned/wiped diff interior of goo and particles
- Replaced fluid with correct gear oil and Chrysler Vari-Lok additive
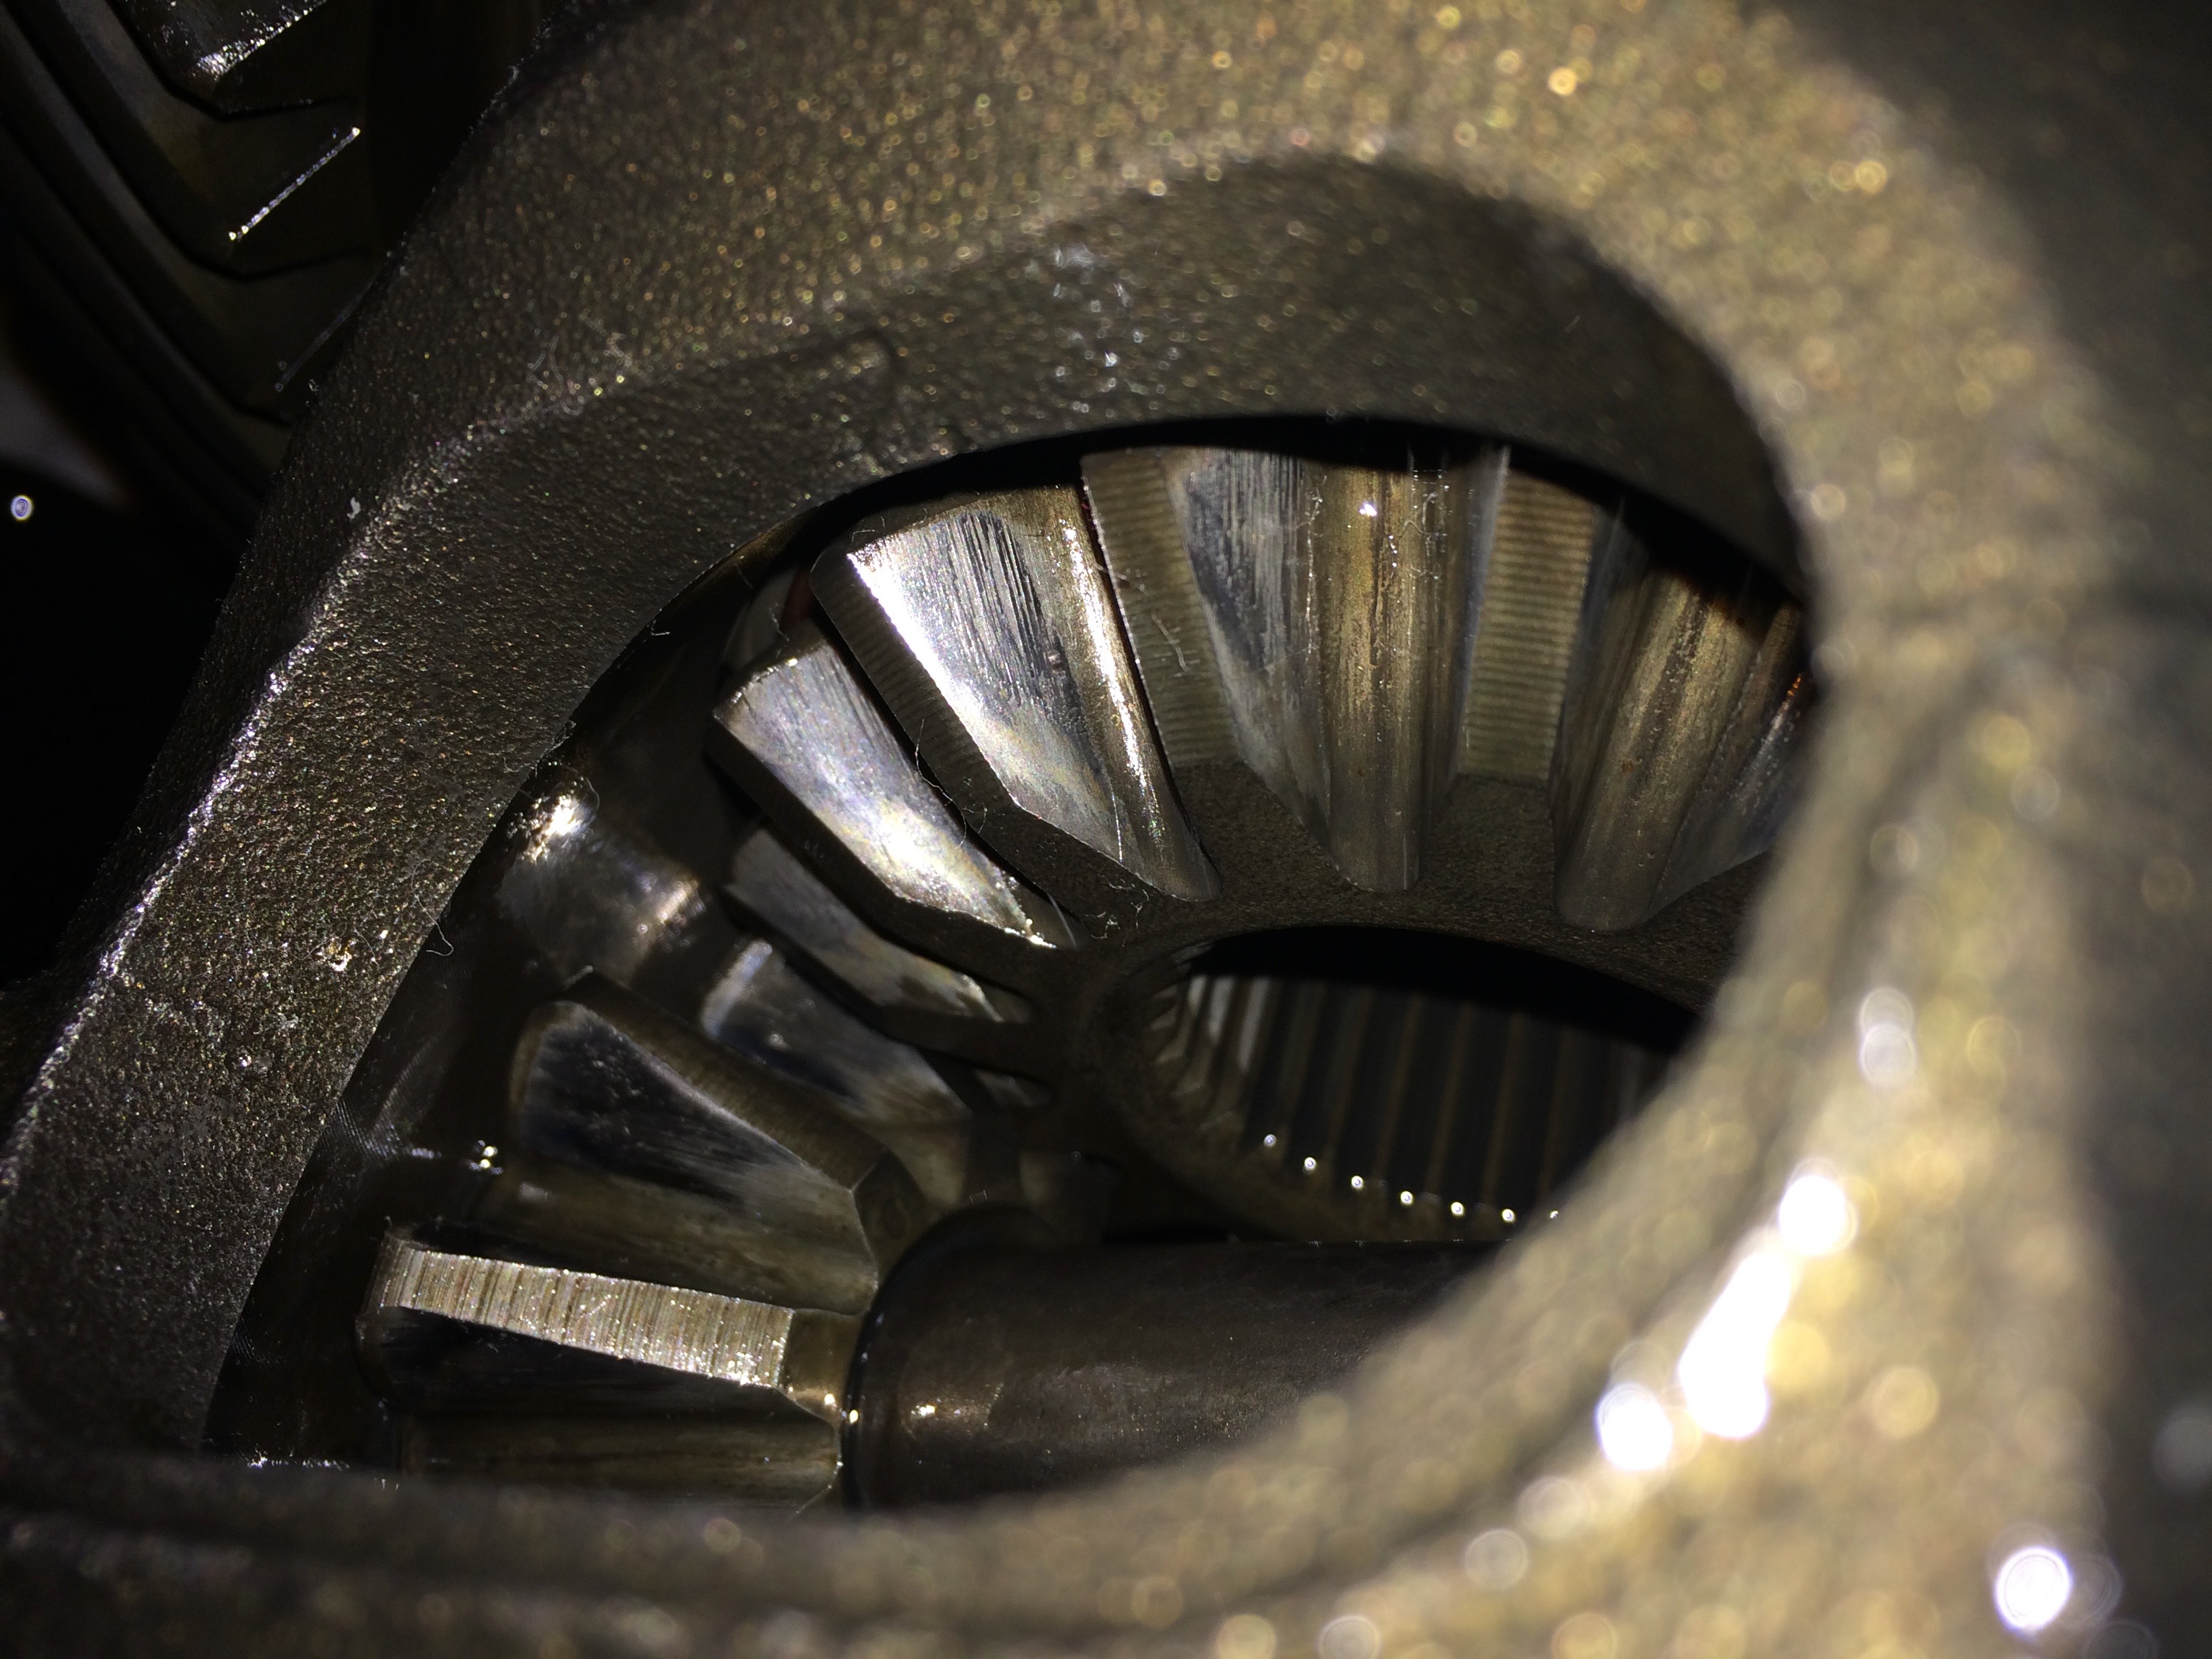


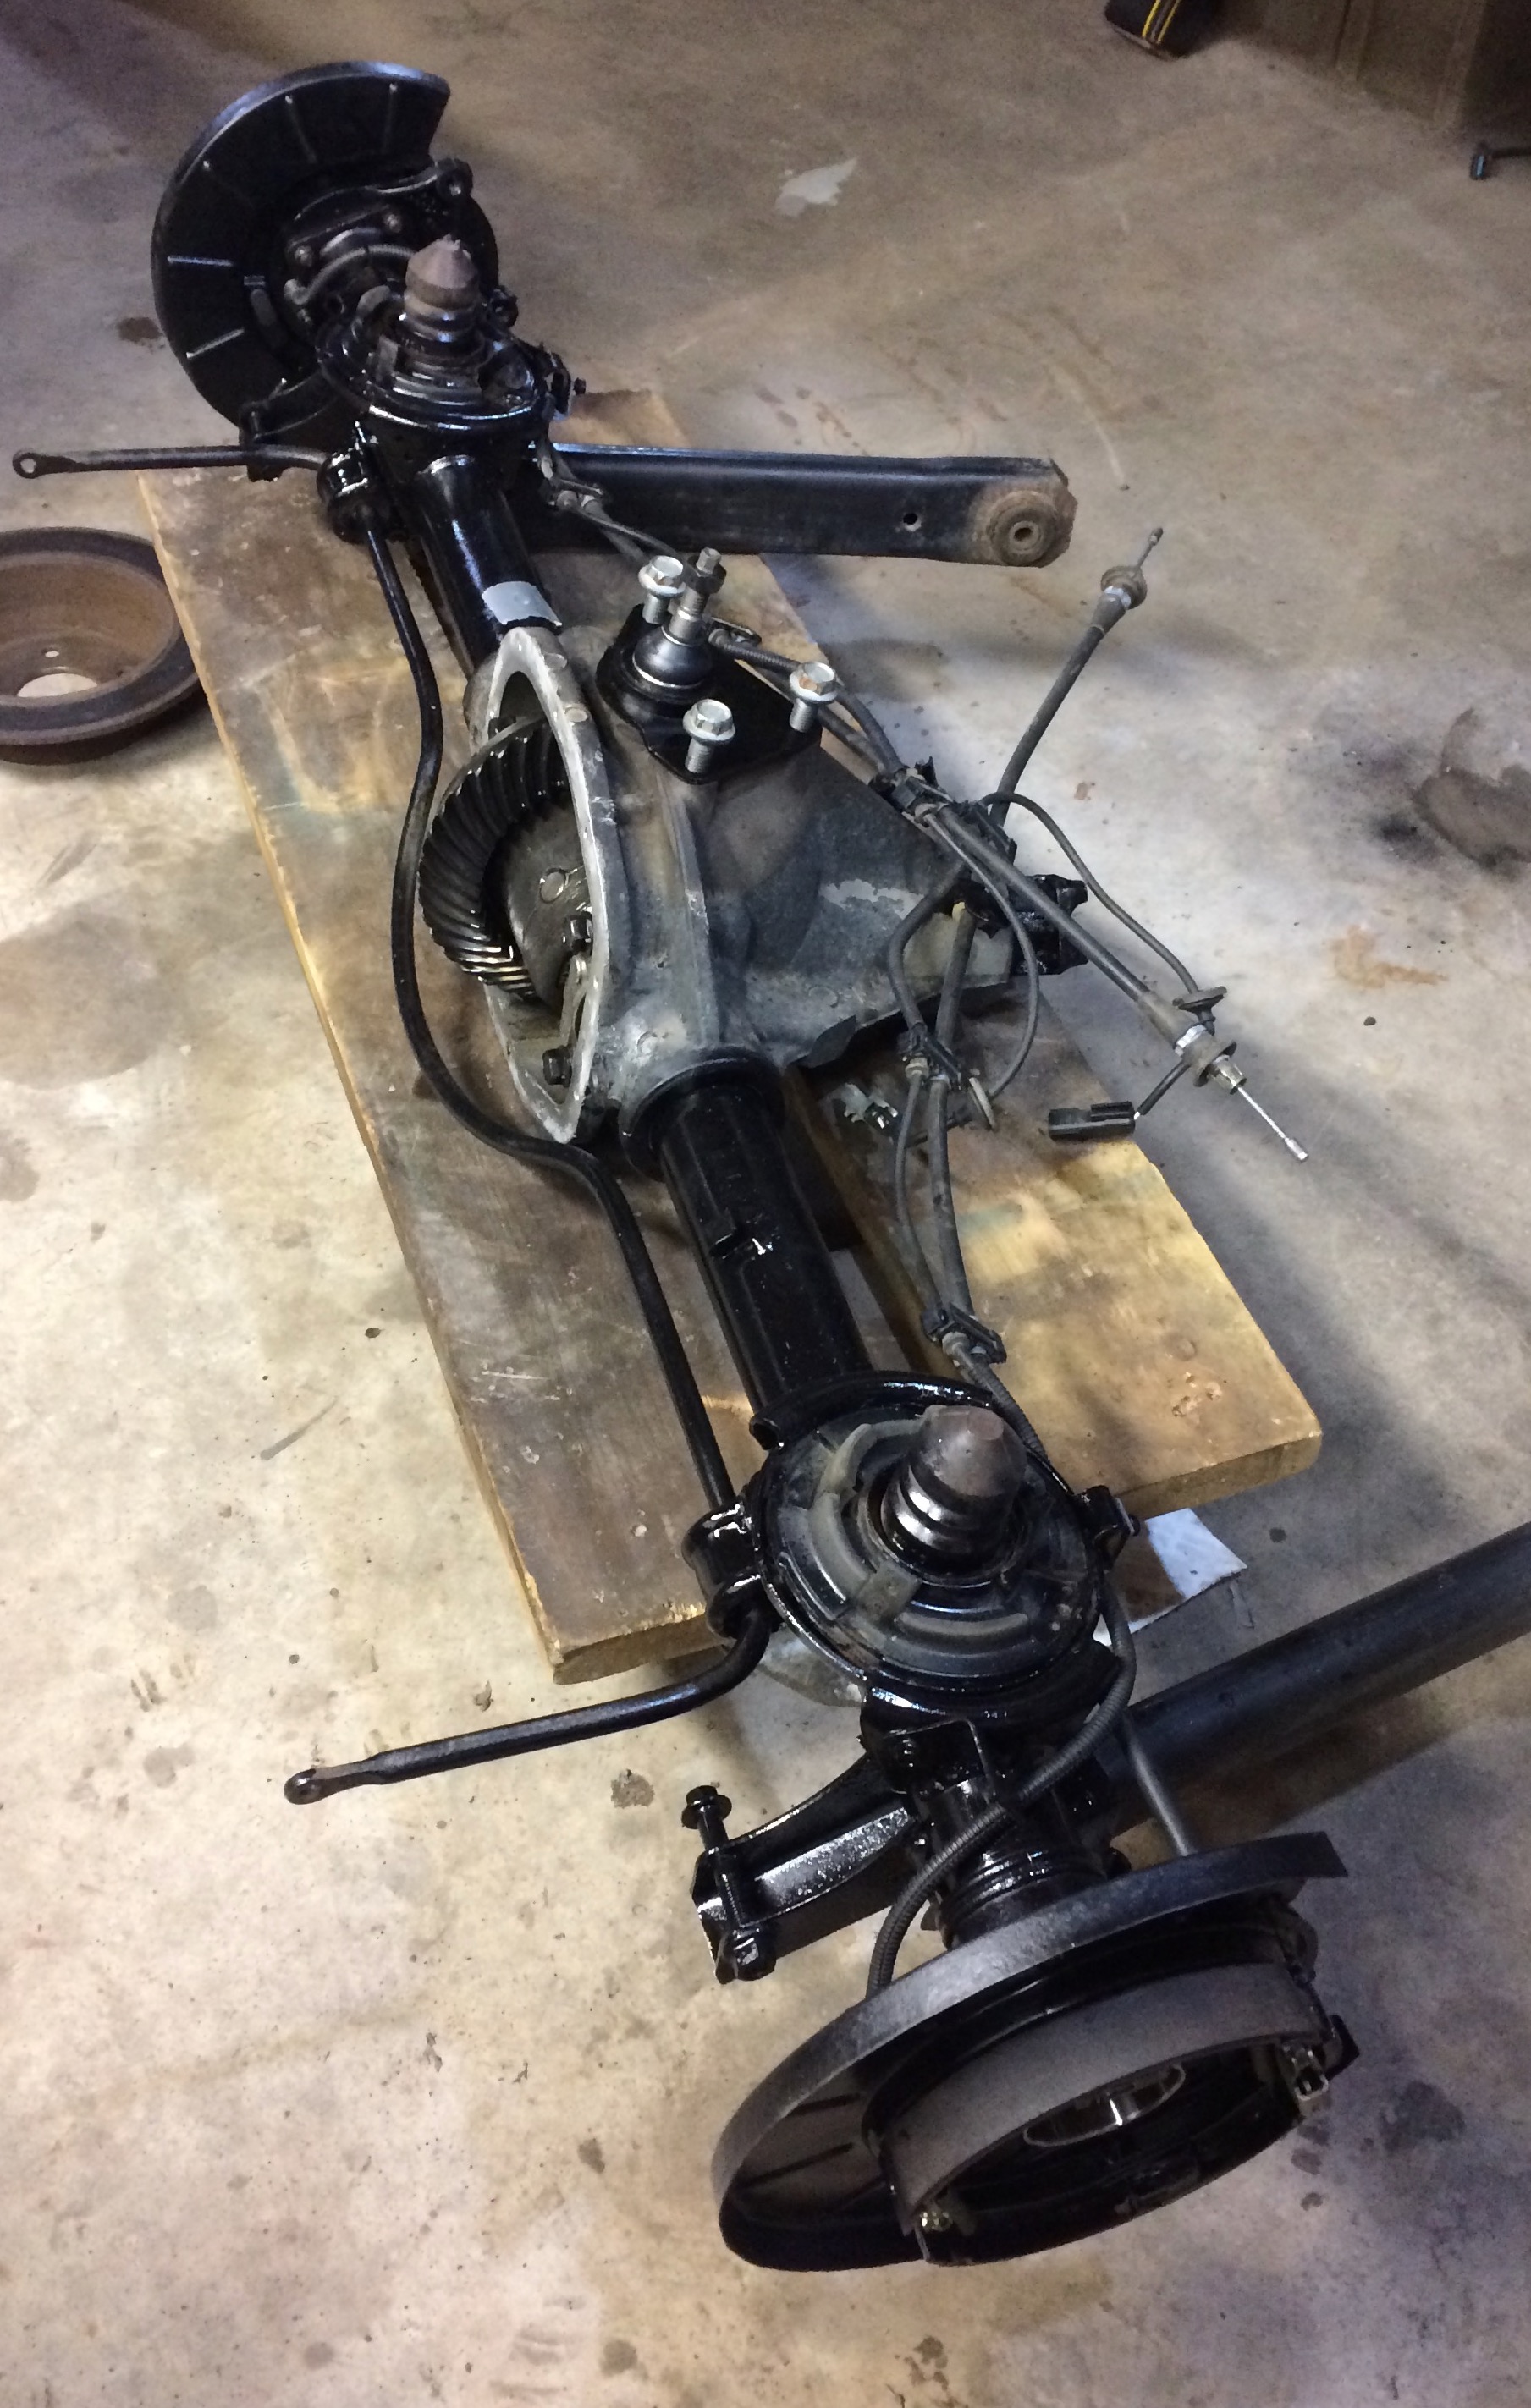
Observation: Was not happy with the slight scoring of the rear end gear surfaces, or the cut on one axle shaft. I suspect someone in replacing a bearing, cut into the axle, and also pushed grit into the Vari-Lok (Dana/Spicer calls it a Hydra-Lok) limited slip differential when they re-inserted the axle. Decided since serviceable Vari-Lok WJ rear axles are not hard to find, I would just wait for this one to fail, if ever. Very impressed with the Dana/Spicer gerotor design of the Vari-Lok/Hydra-Lok AWD system. I don’t think the gerotor wears out in normal use.
Brakes
- Replaced all brake lines with aftermarket stainless steel
- Replaced all brake hoses
- Rebuilt all calipers w/new seals and phenolic pistons
- Replaced all pads
- Fill with new DOT-3, purge ABS using Solus scanner tool
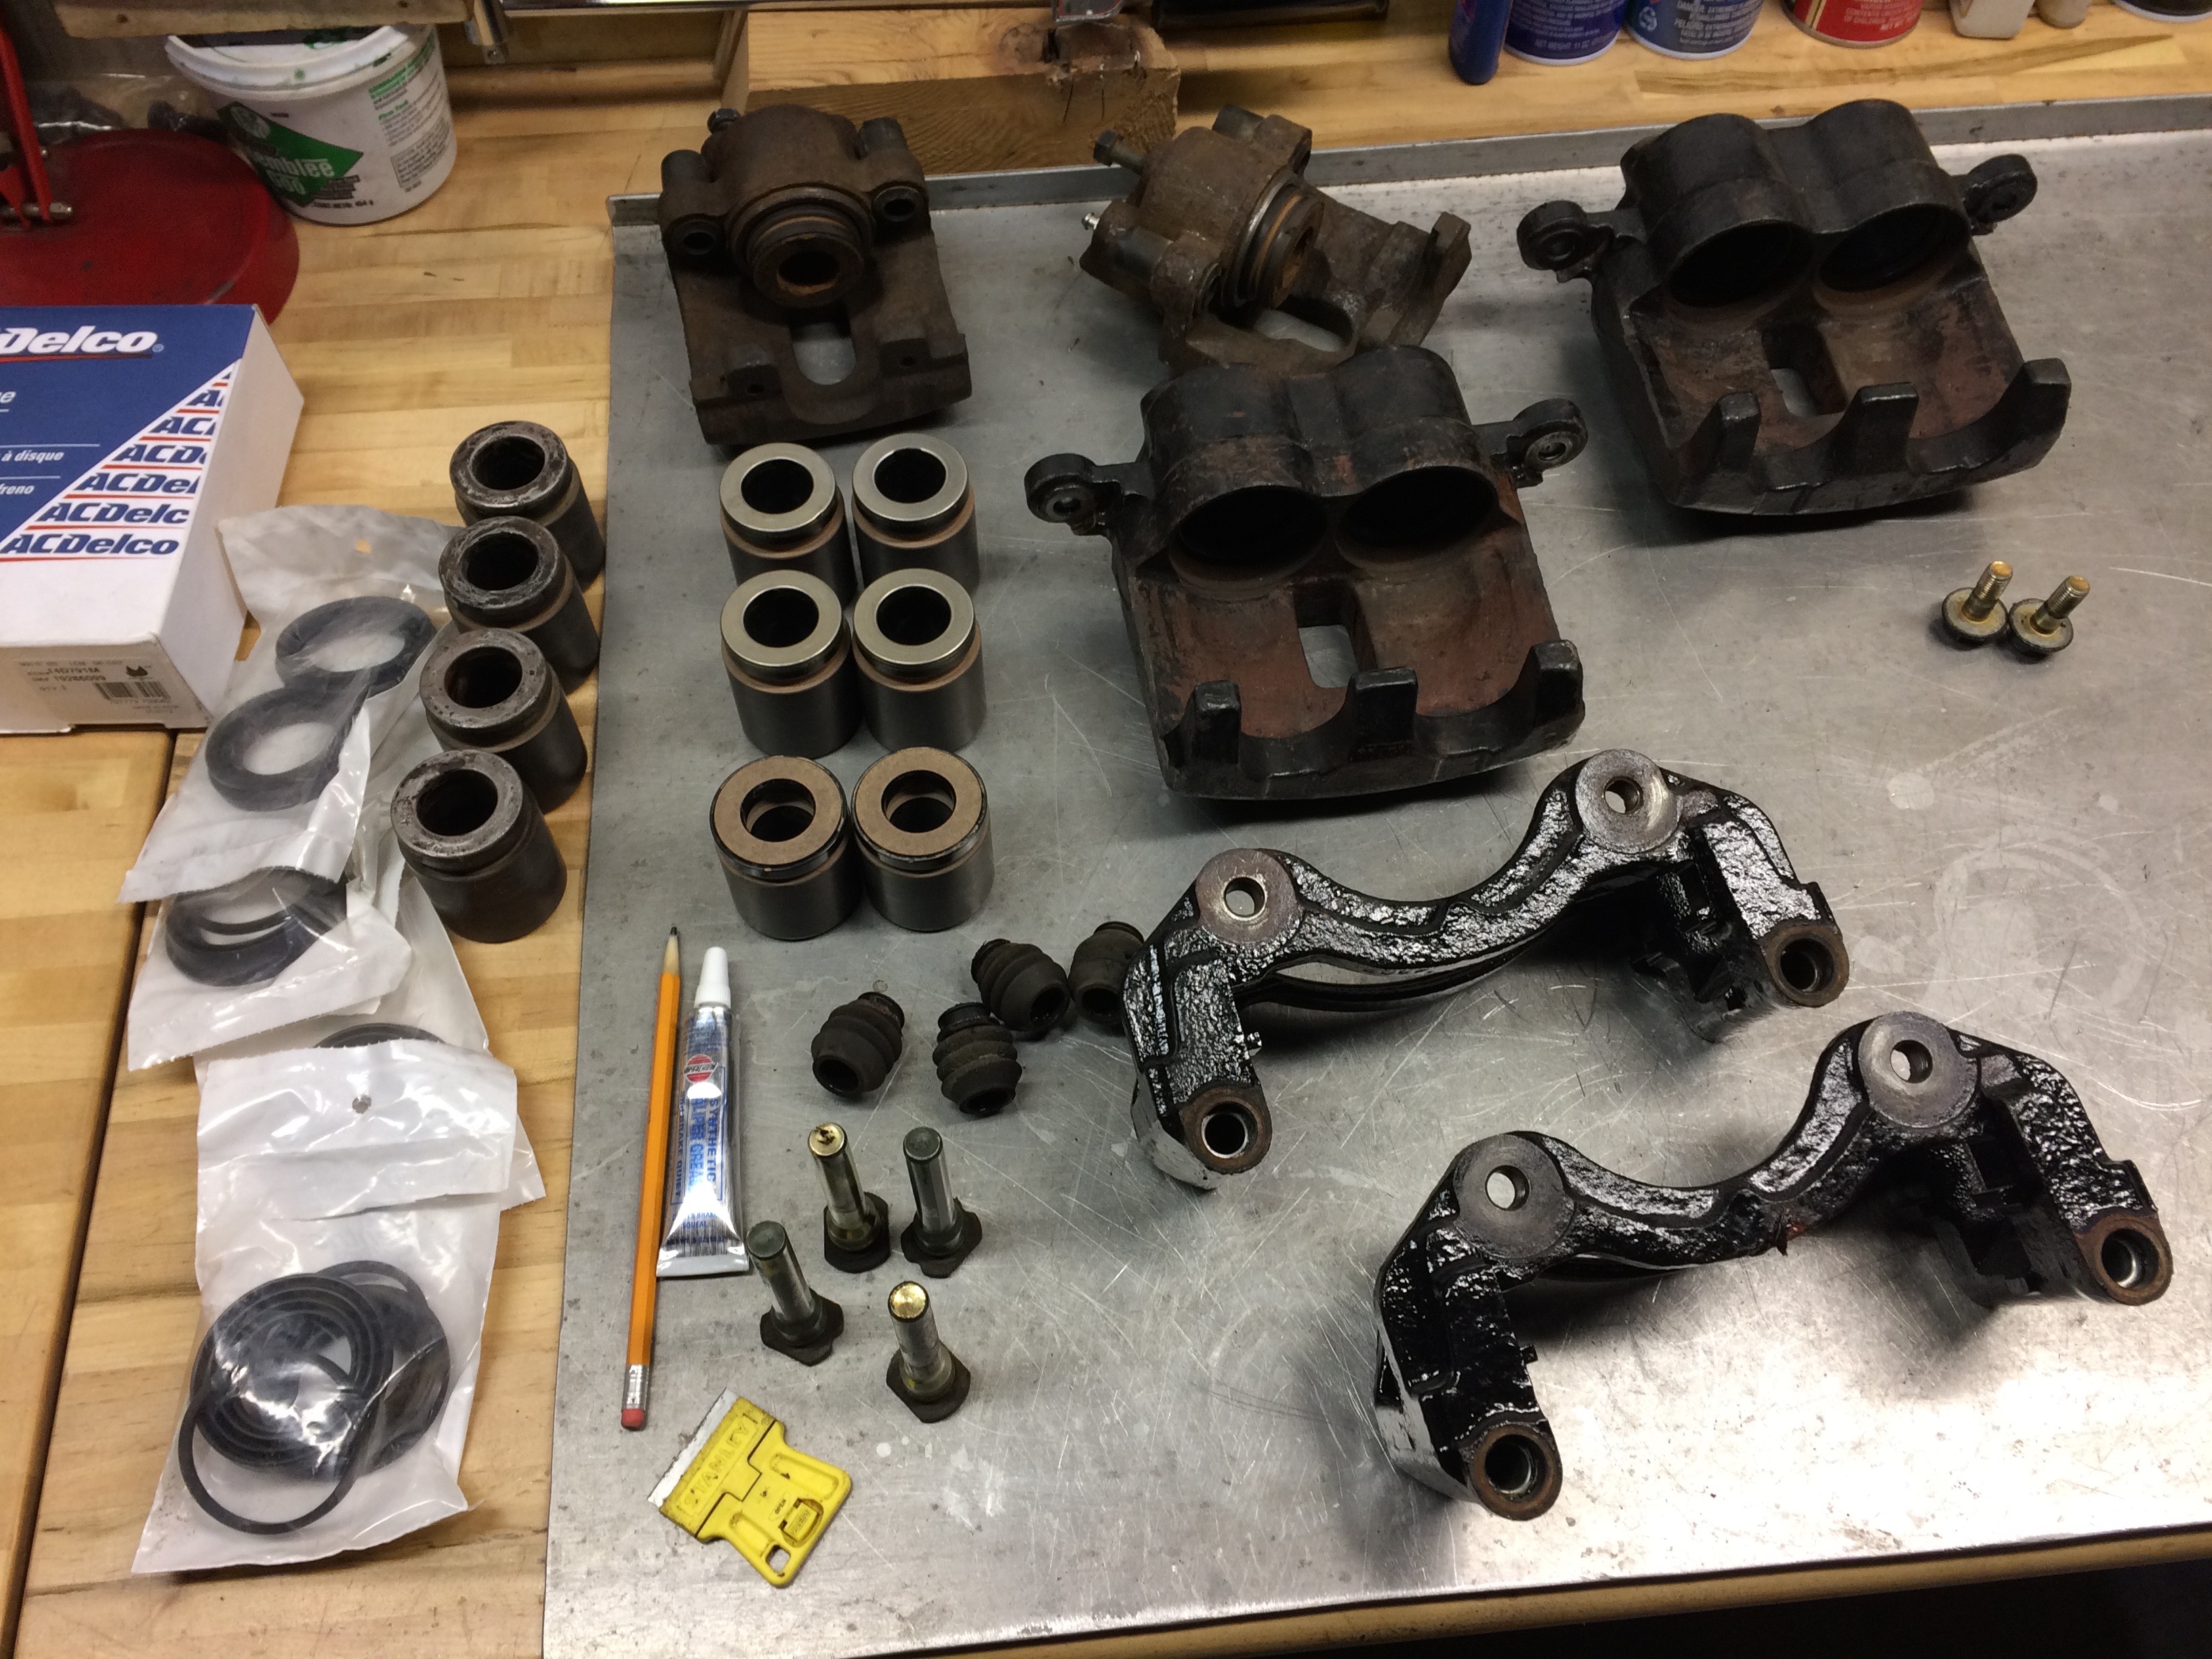
Lessons learned: Would buy re-man calipers next time… doing rebuild yourself does not save much, since you need to replace phenolic pistons, bleeders, seals, anyway. Had to carefully drill out one broken off bleeder.
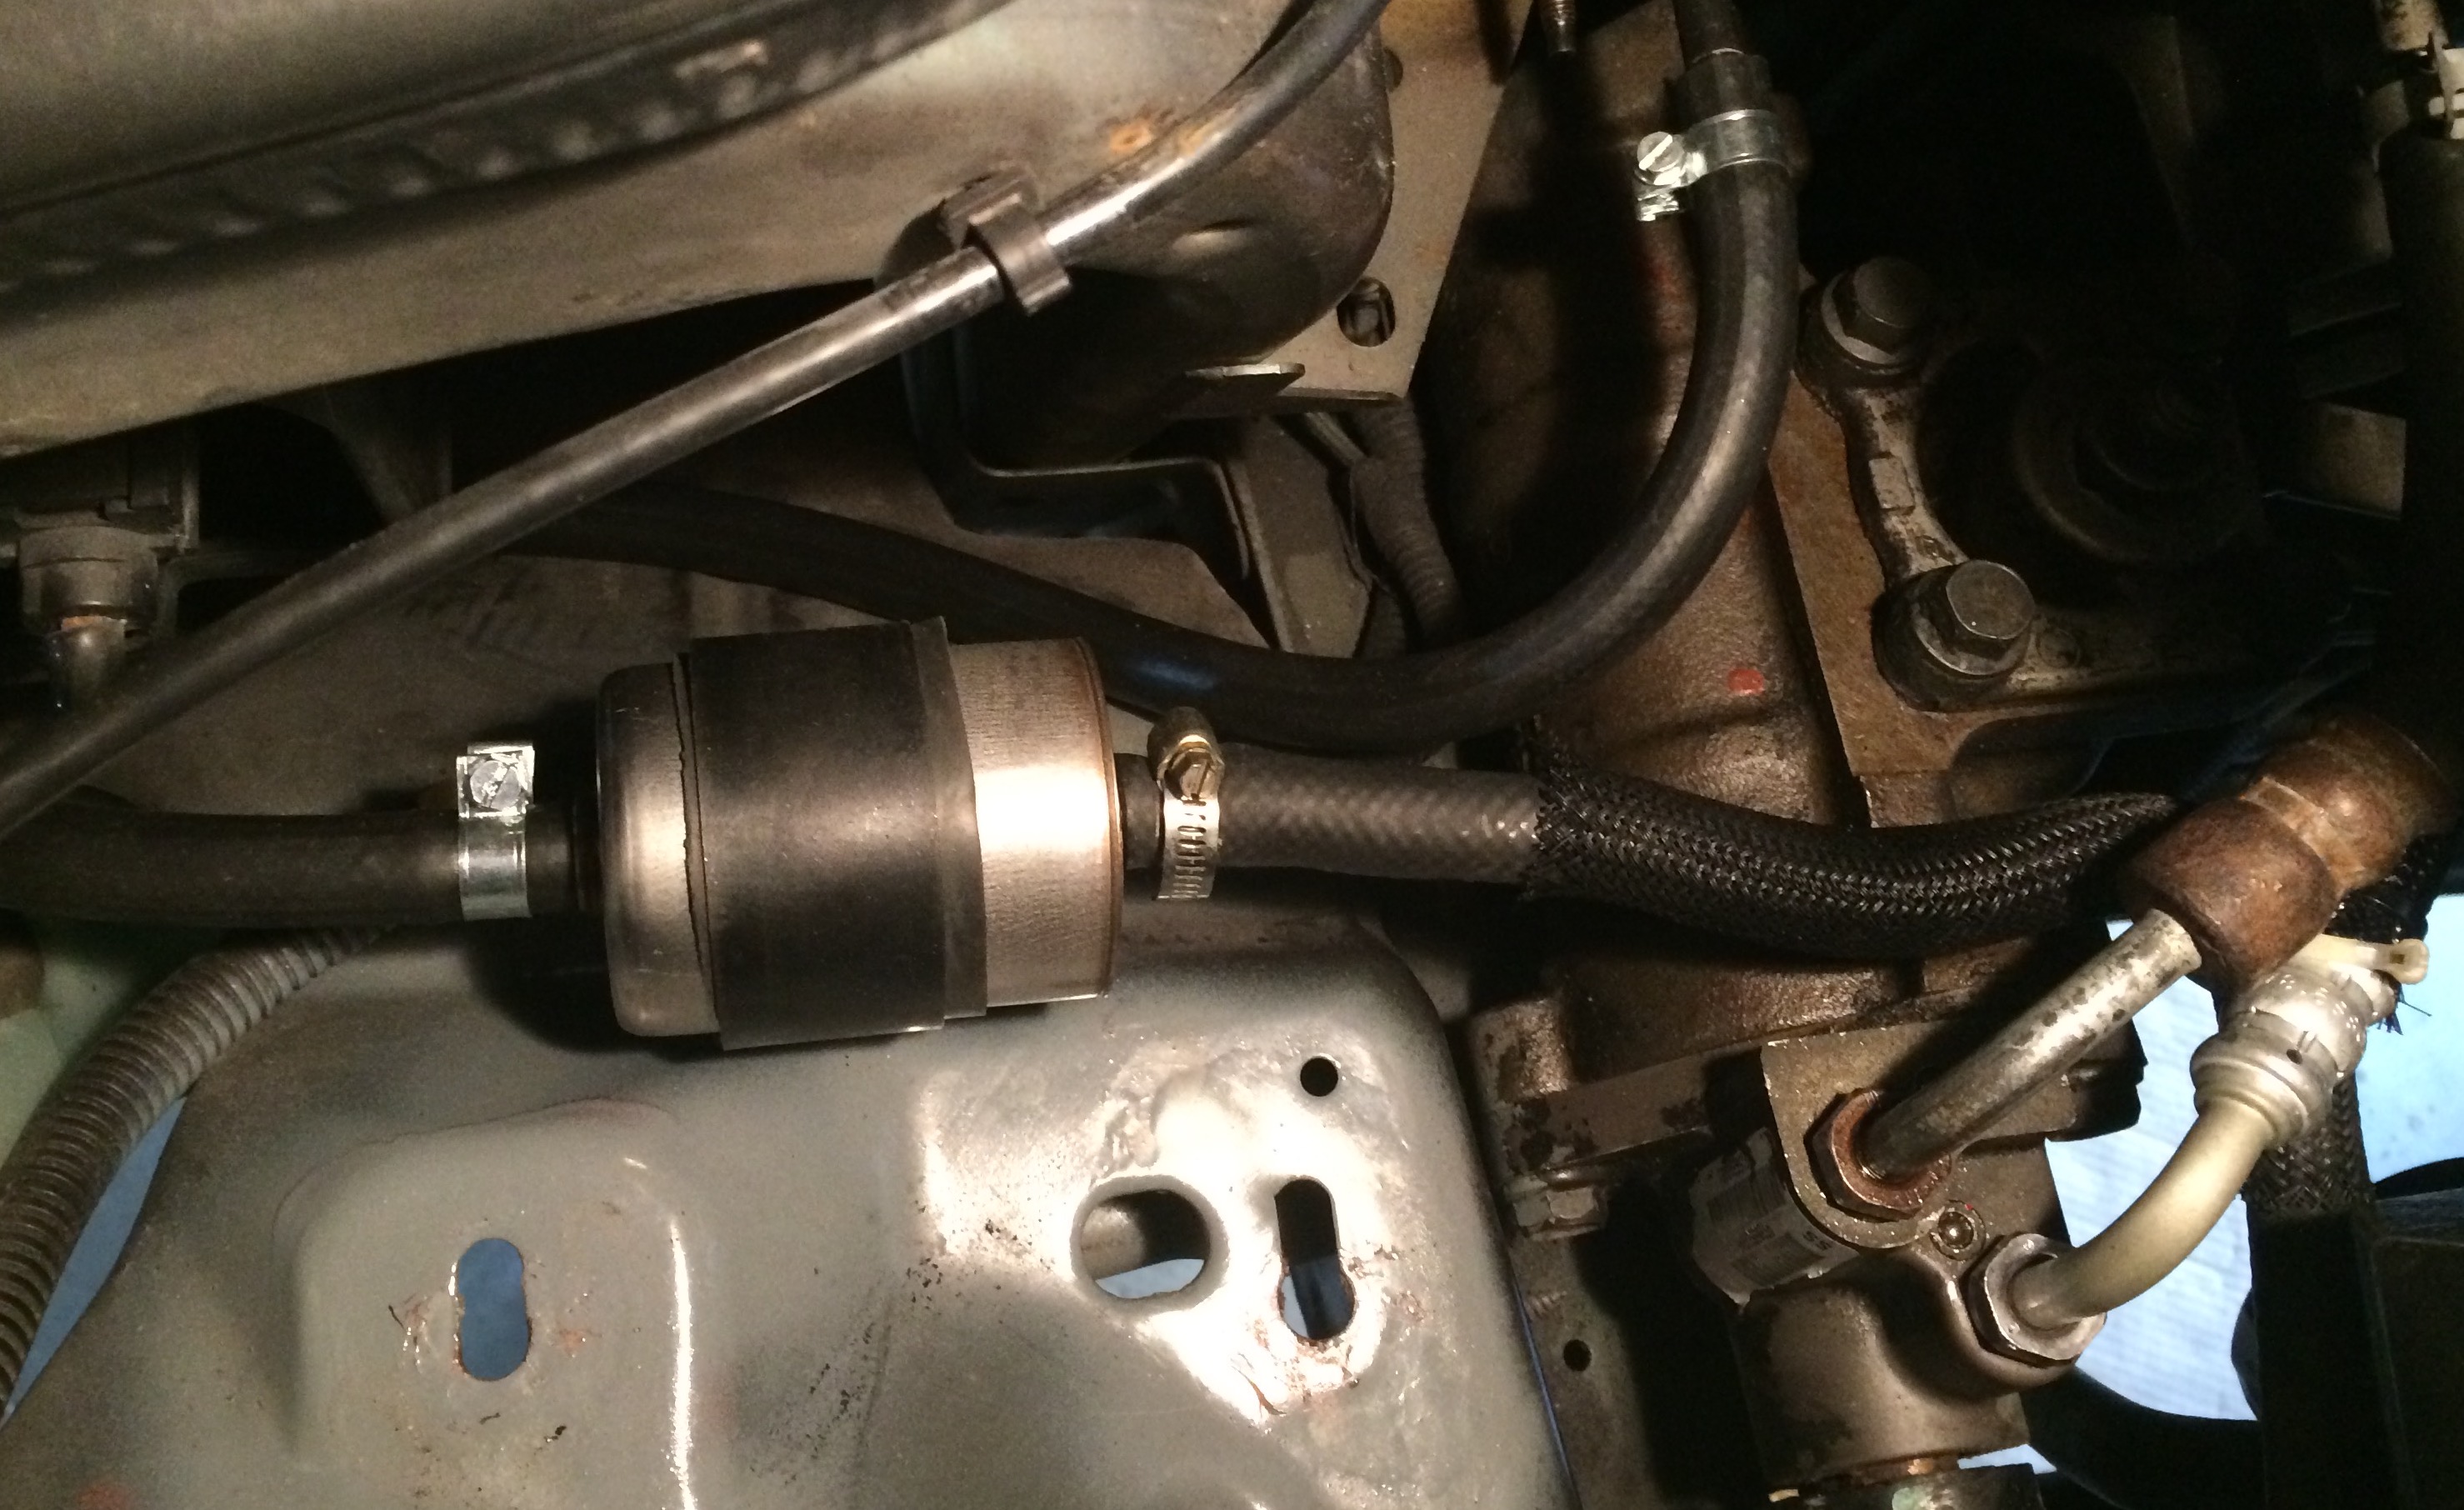
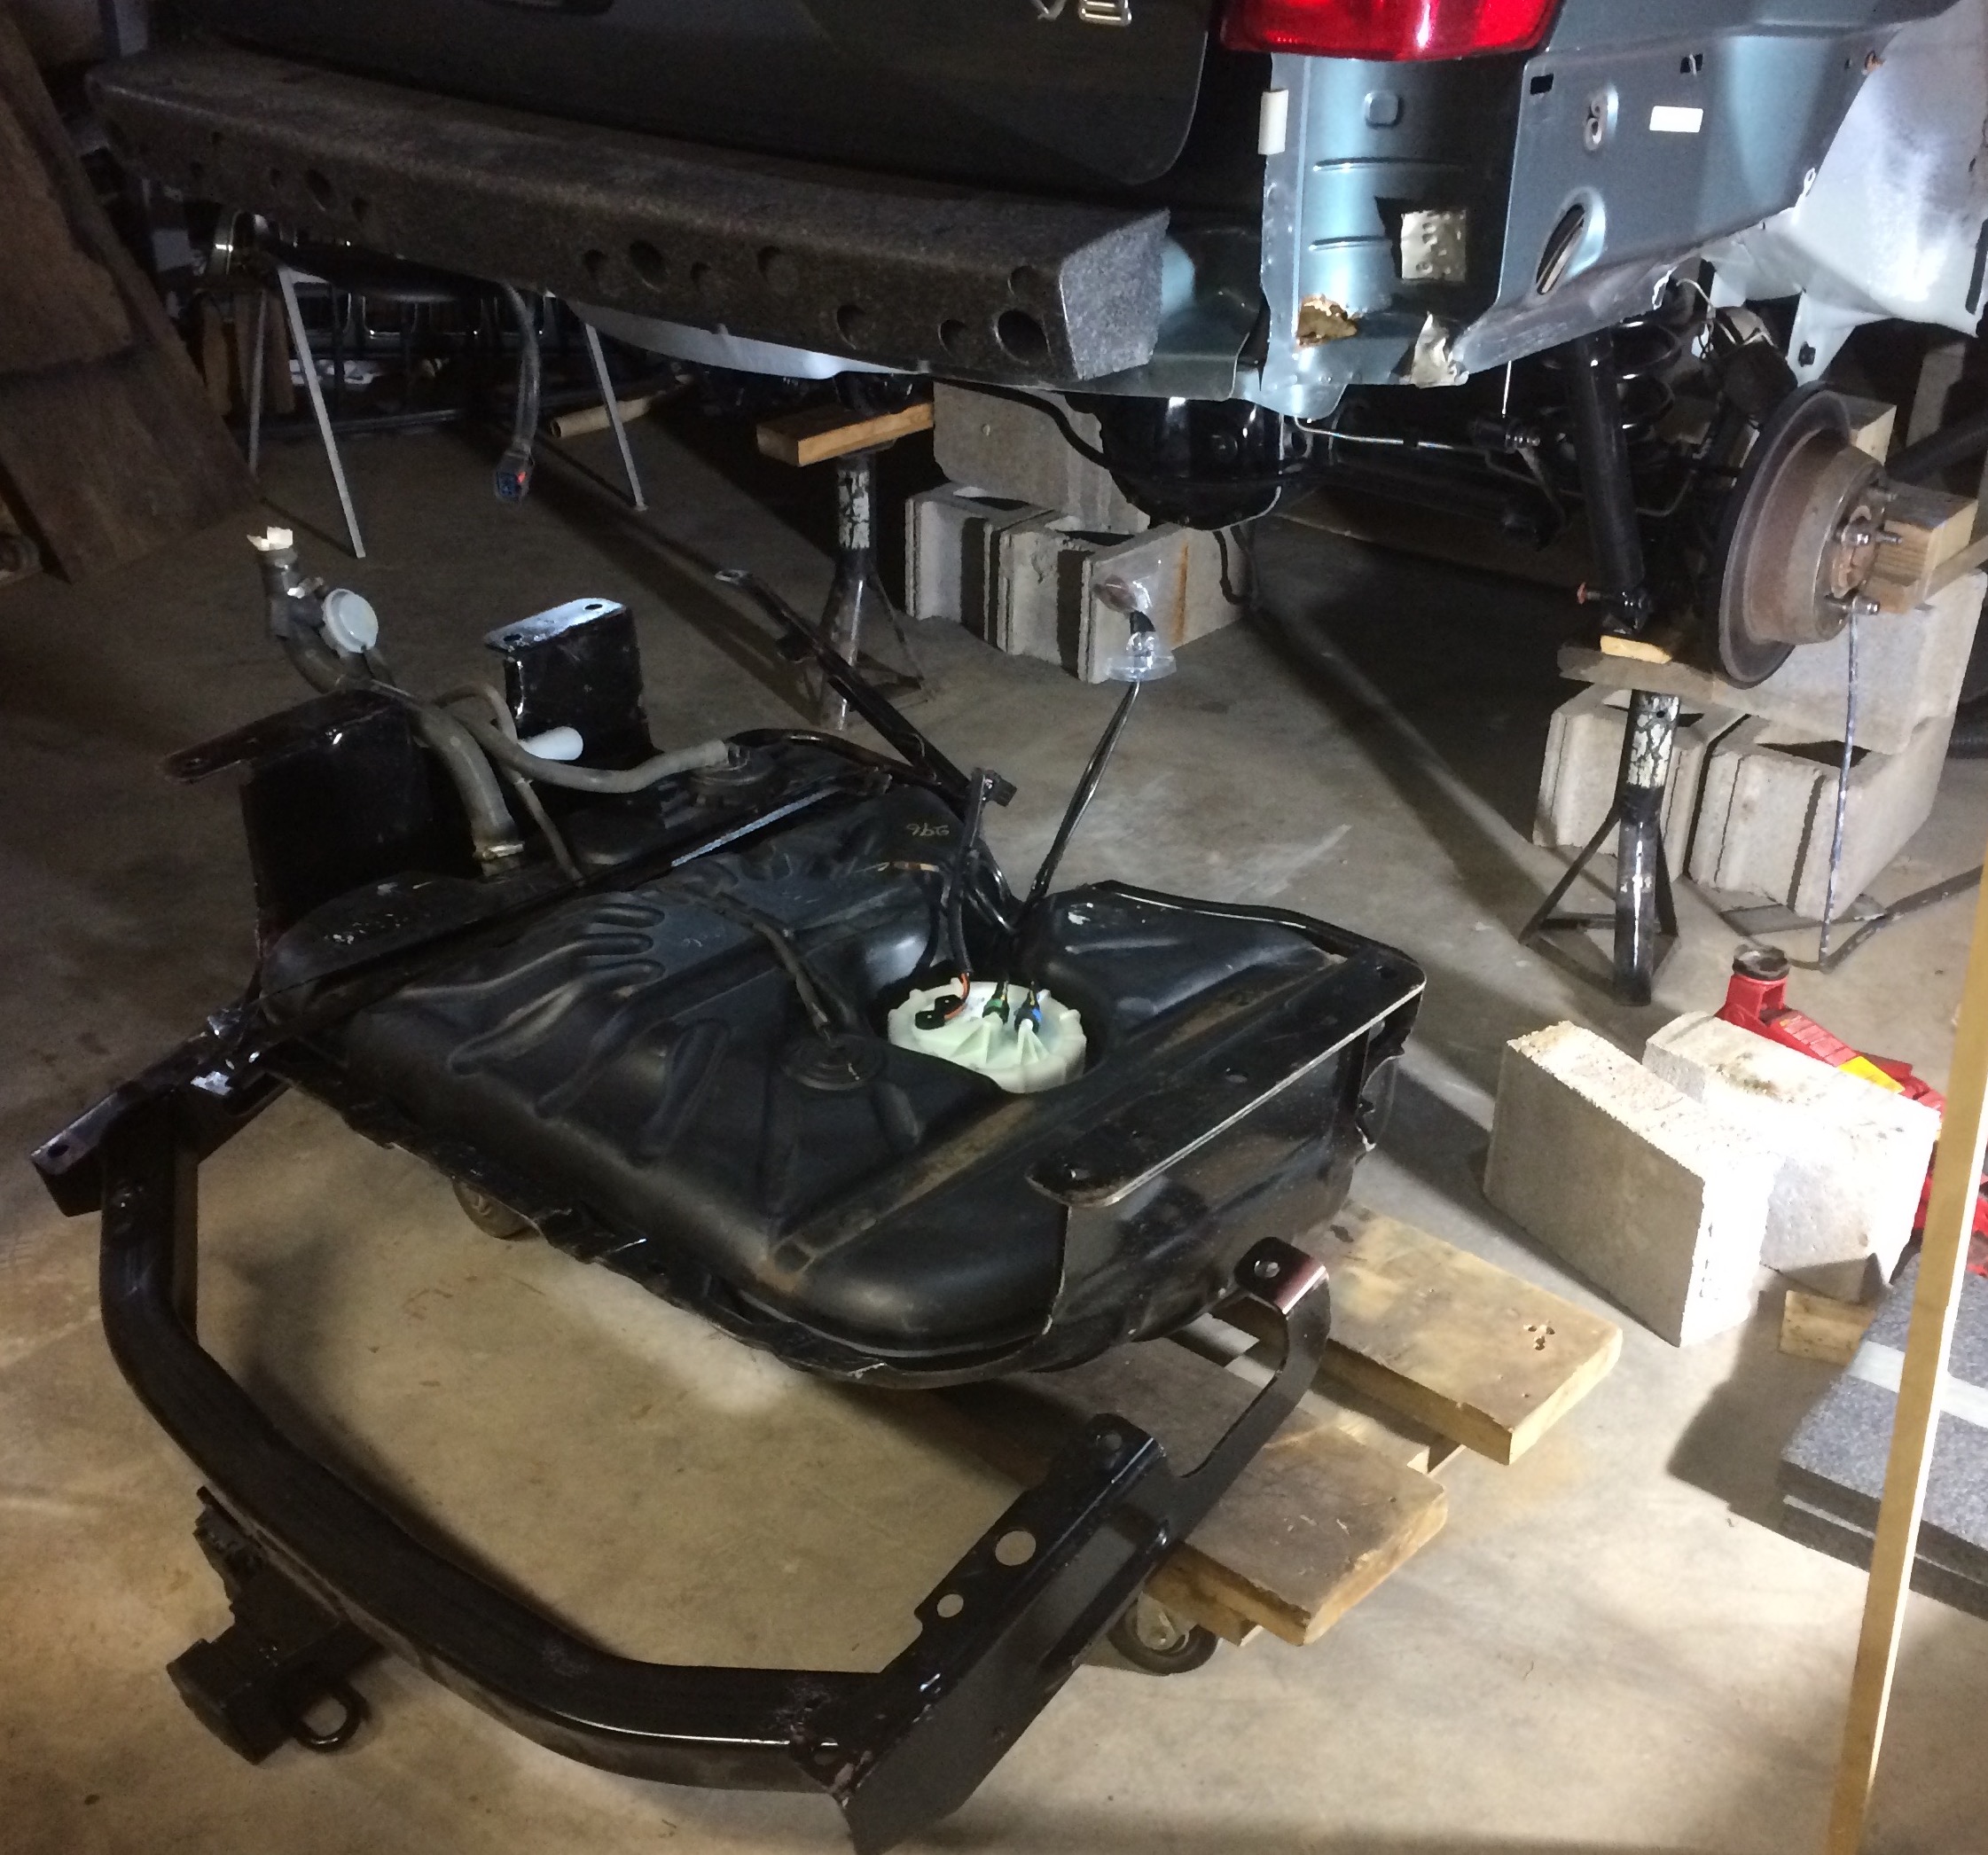
Fuel
- Cleaned fuel tank
- Replaced fuel pump
- Replaced fuel filter and regulator
- Rebuilt evap assembly that sits LR fender, installed some new hoses to/from it.
Interior
- Replaced leather drivers seat covers, back and bottom w/OEM leather
- Replaced all seat heaters, driver and passenger, using newer heaters in MOPAR OEM recall kit purchased on eBay for $40.
- Lubricated seat motors and rails
- Replaced steering wheel with new exact OEM one I found on eBay

Lessons learned: Buying NOS OEM drivers seat back and bottom leather covers is a good idea if you can still get them… original fit, correct look, makes vehicle look new…. well worth the money. Same for steering wheel w/leather covering.
Electrical
- Repaired/rebuilt drivers door harness at hinge
- Repaired heater fan harness at controller with new connector
- Replaced small dash speakers with slightly larger higher quality ones fitted in/under same cutout
- Replaced main battery
Comment: Google for YouTube videos on these common repairs, lots of how-to articles and pictures.
Body
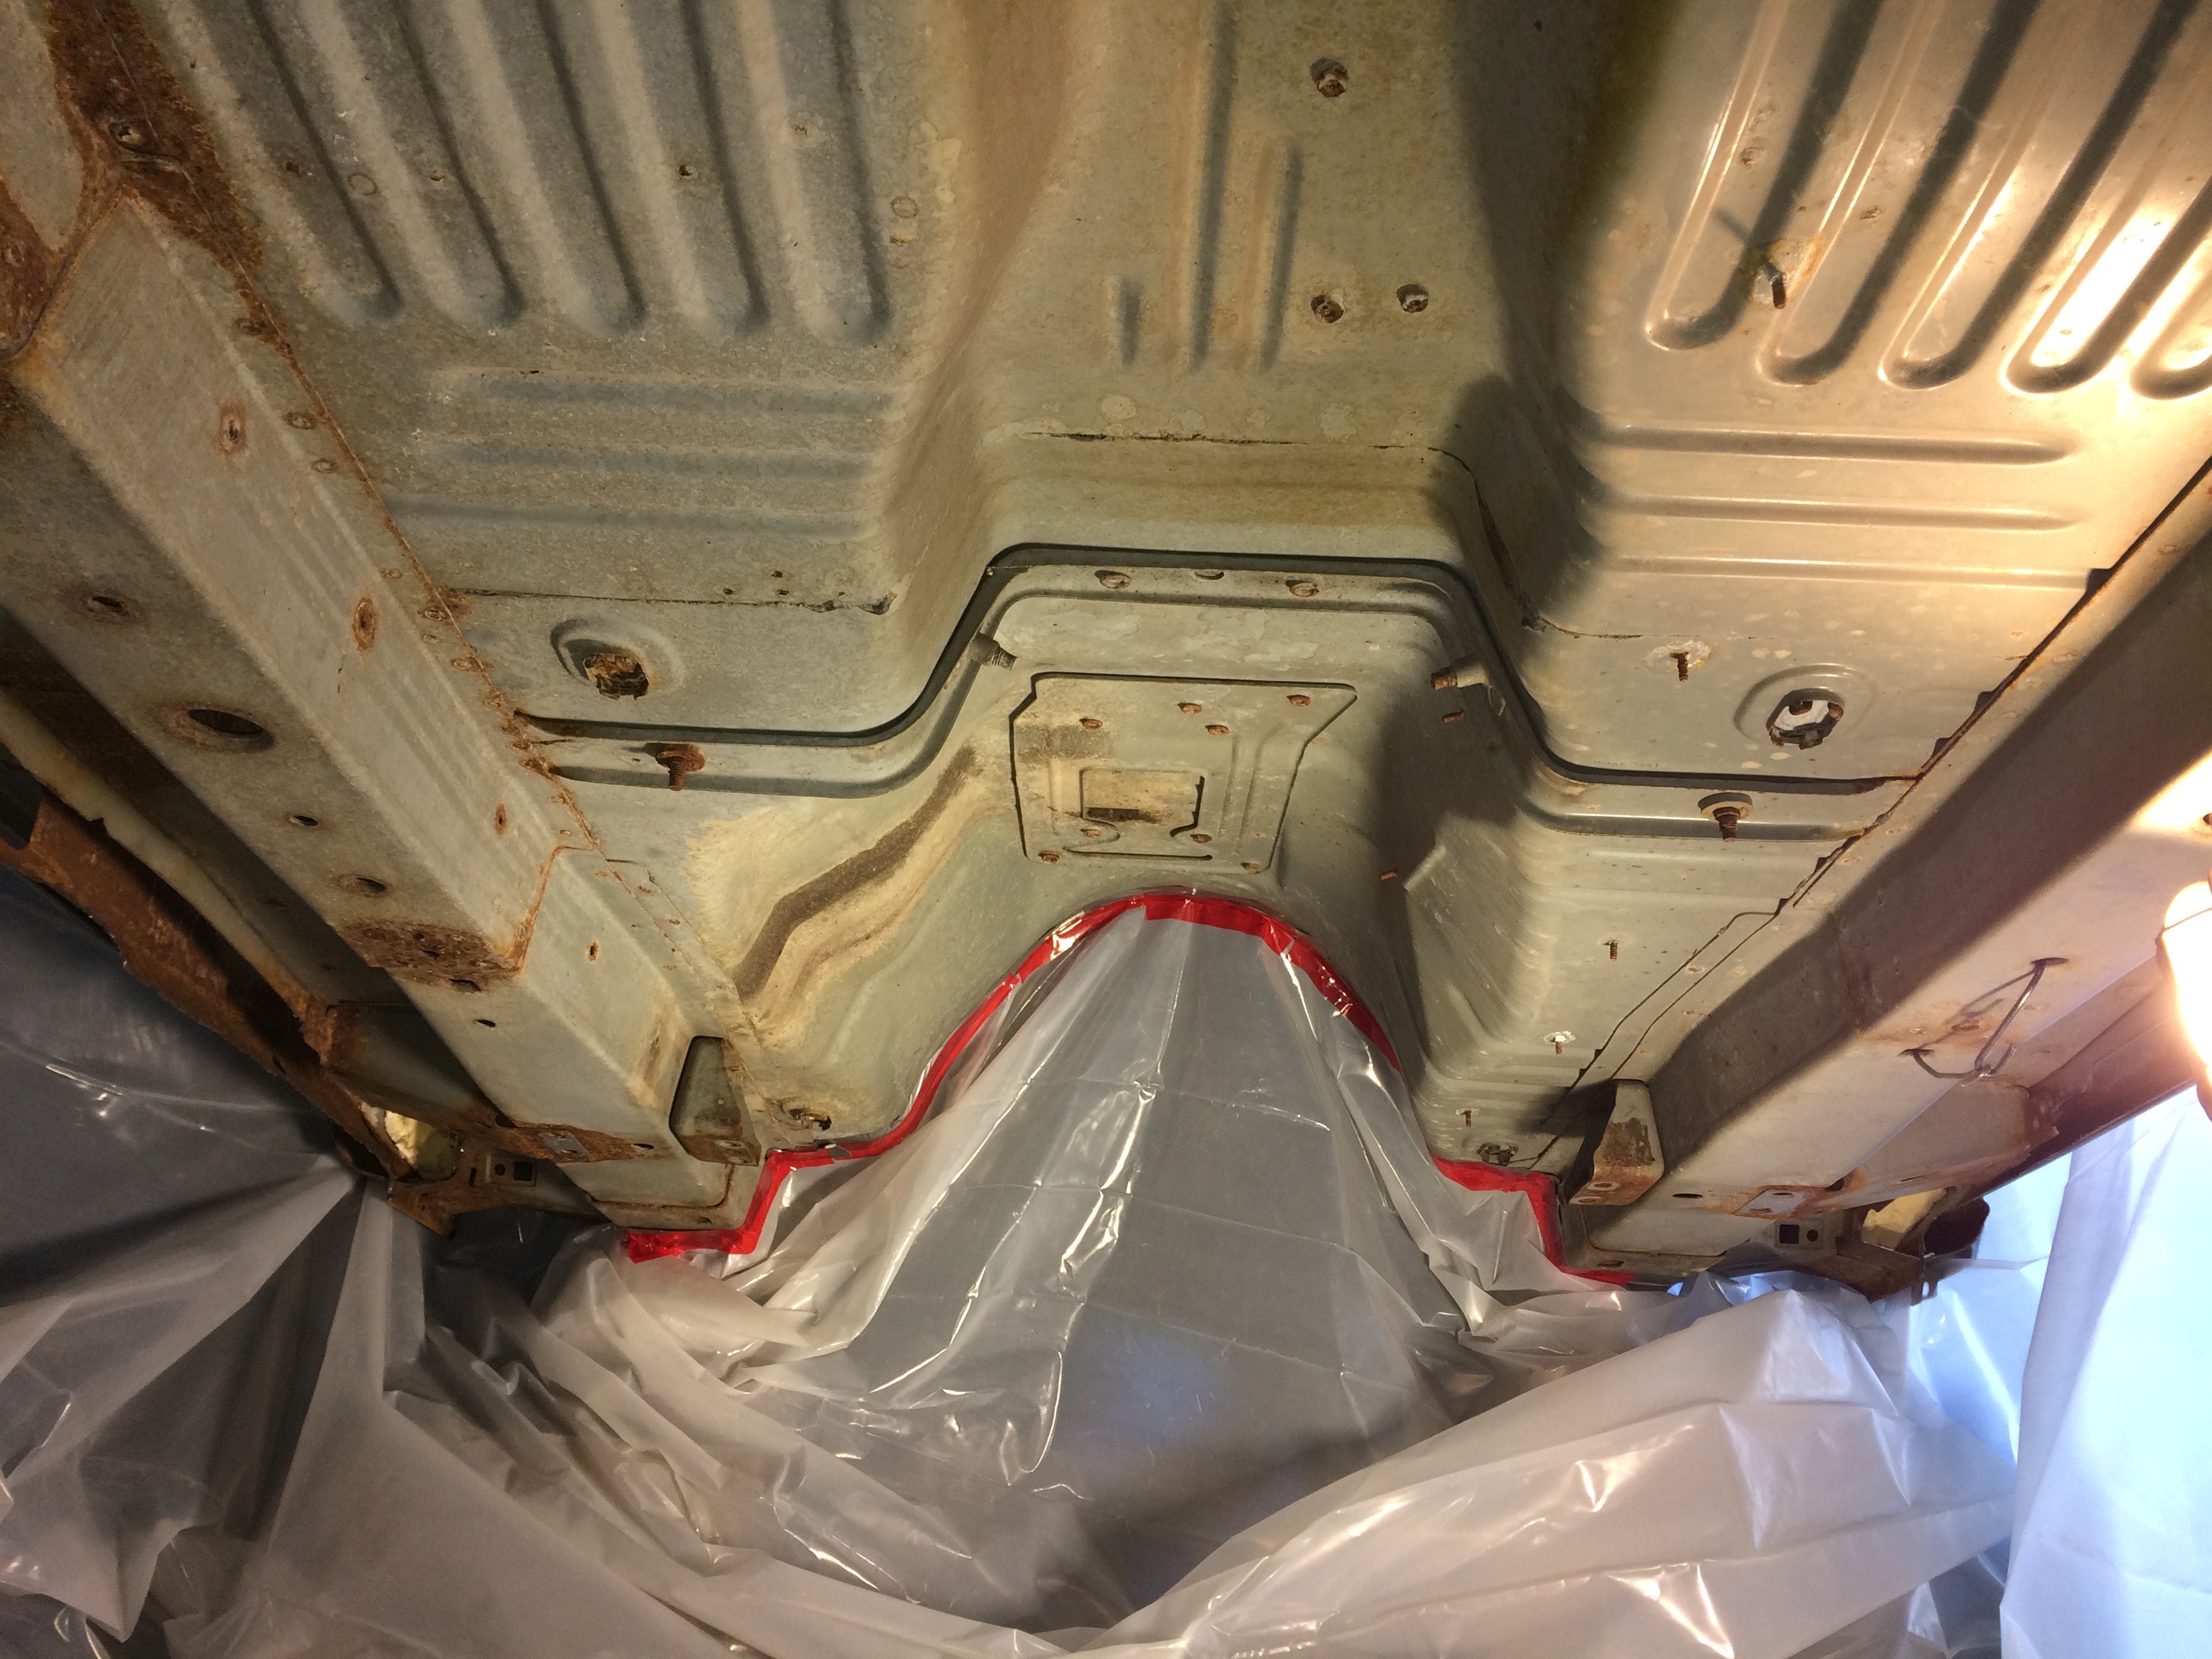
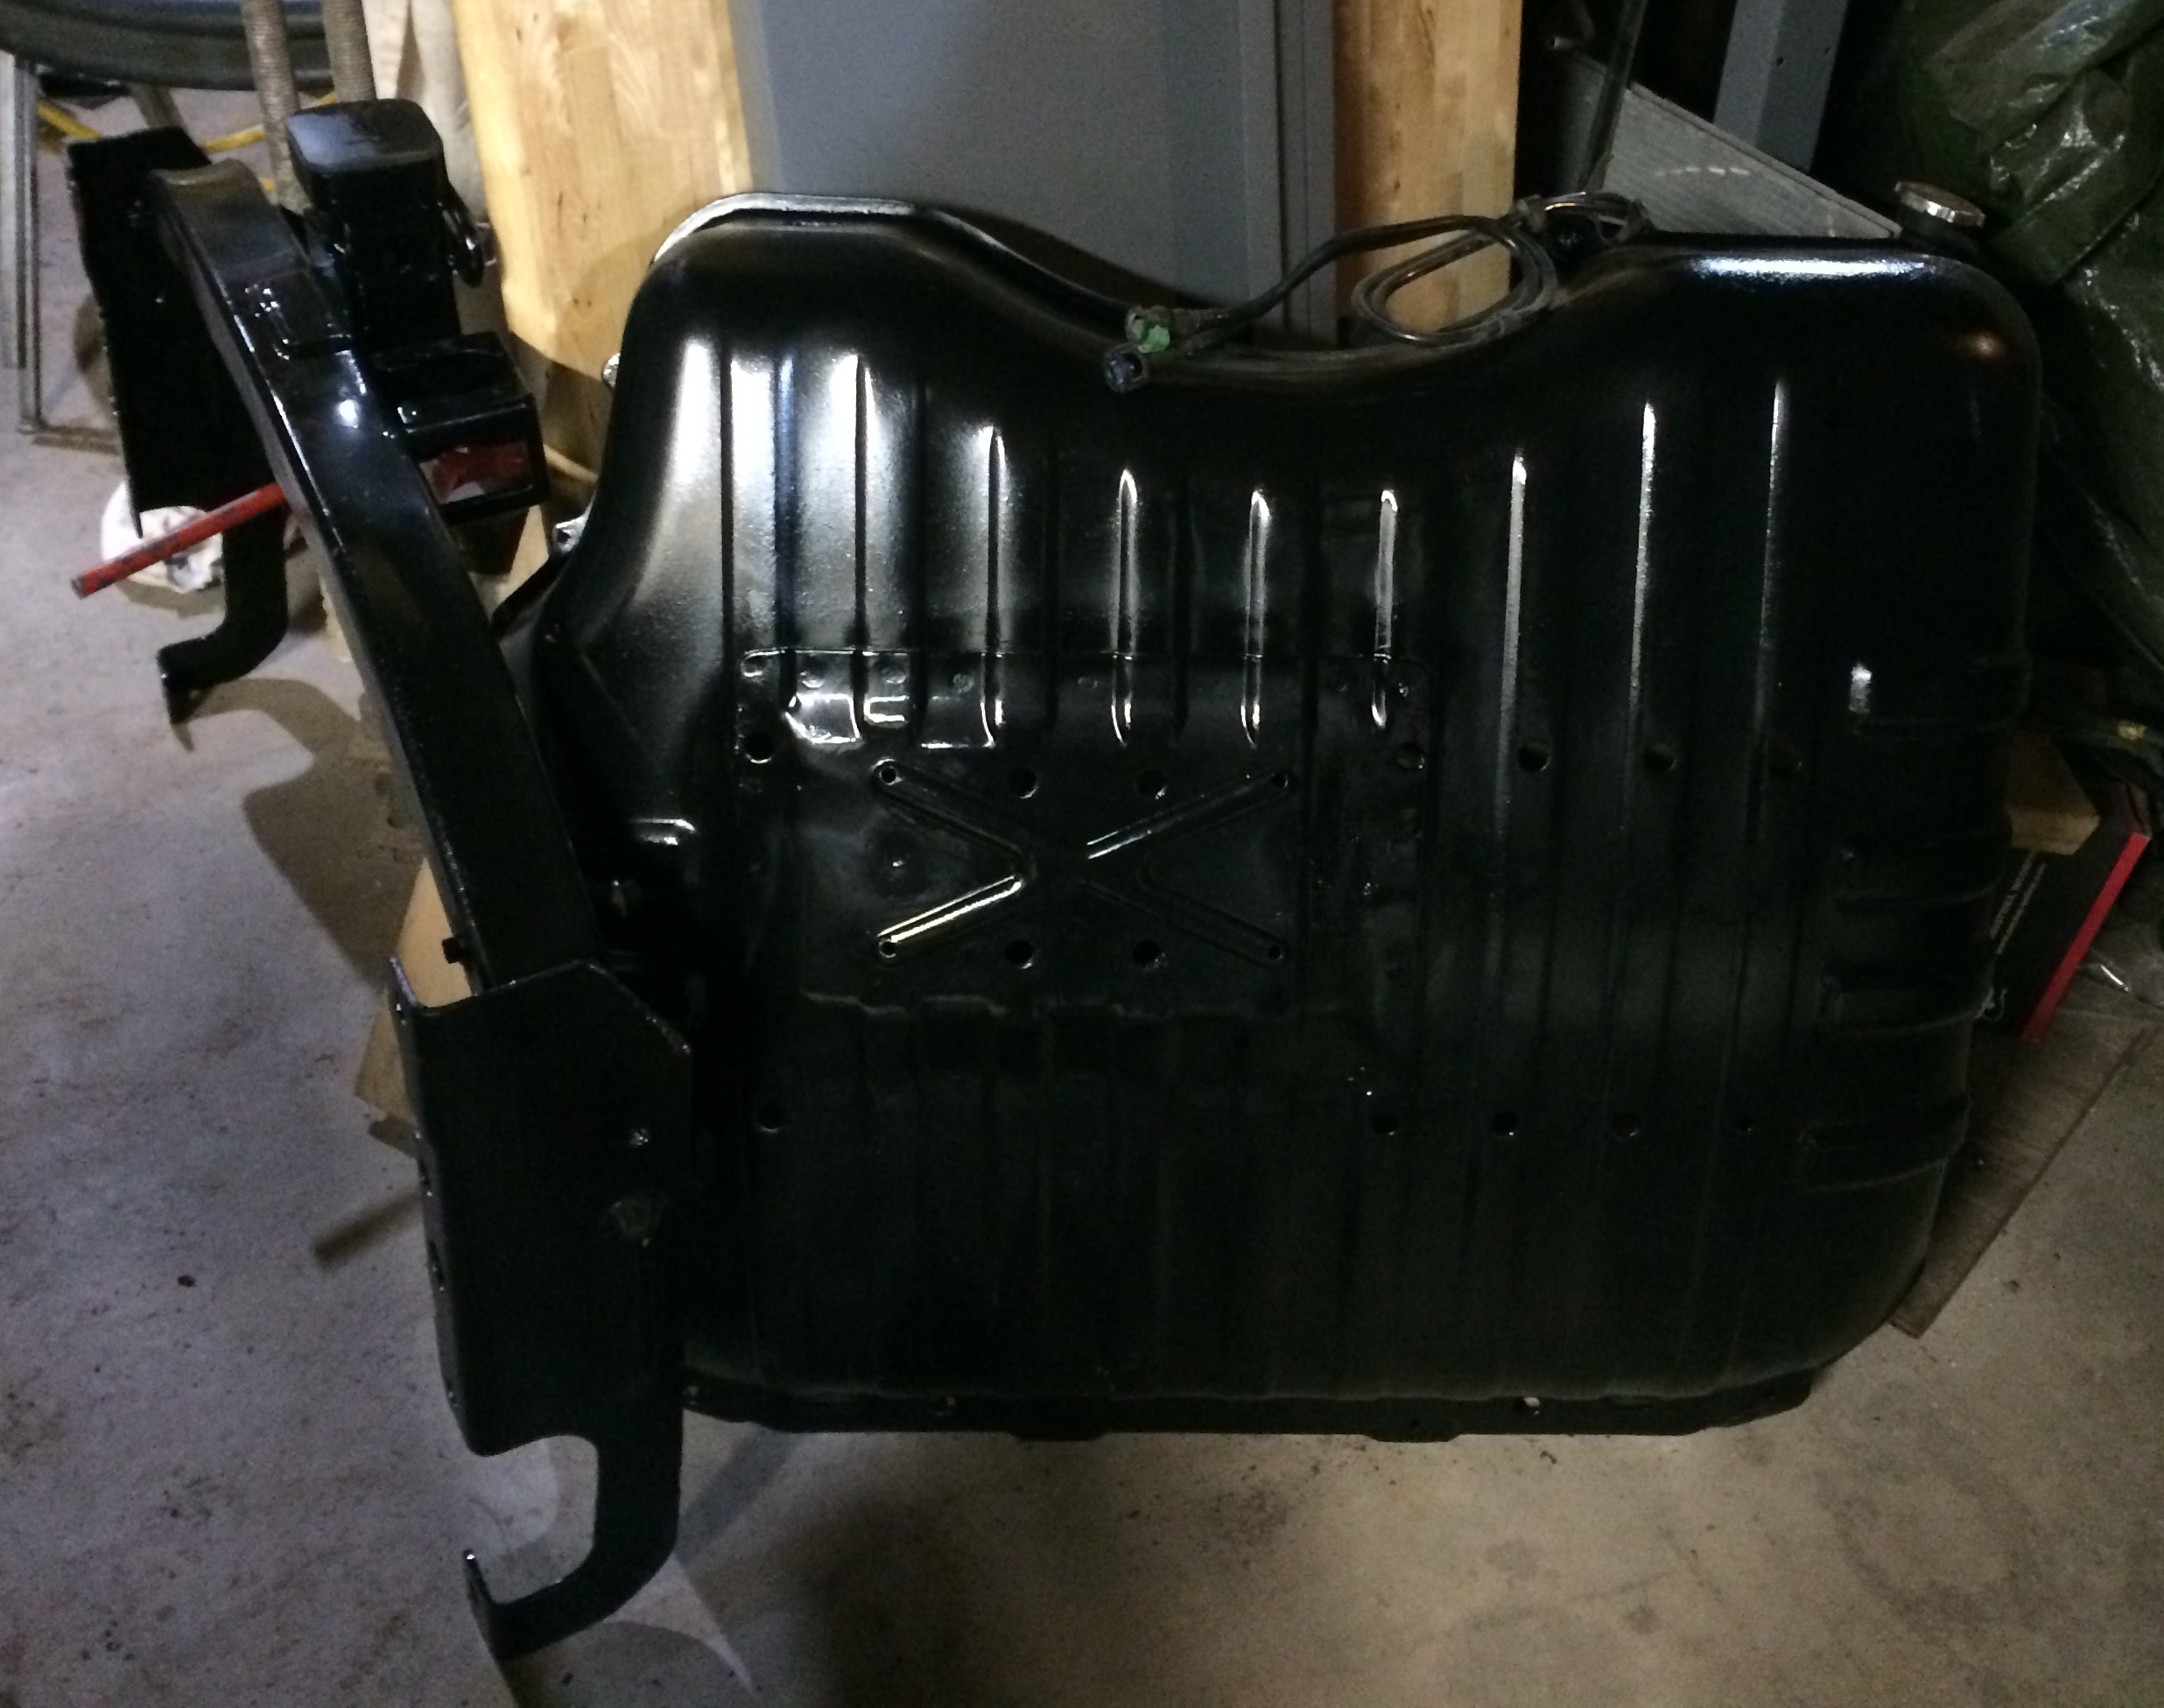
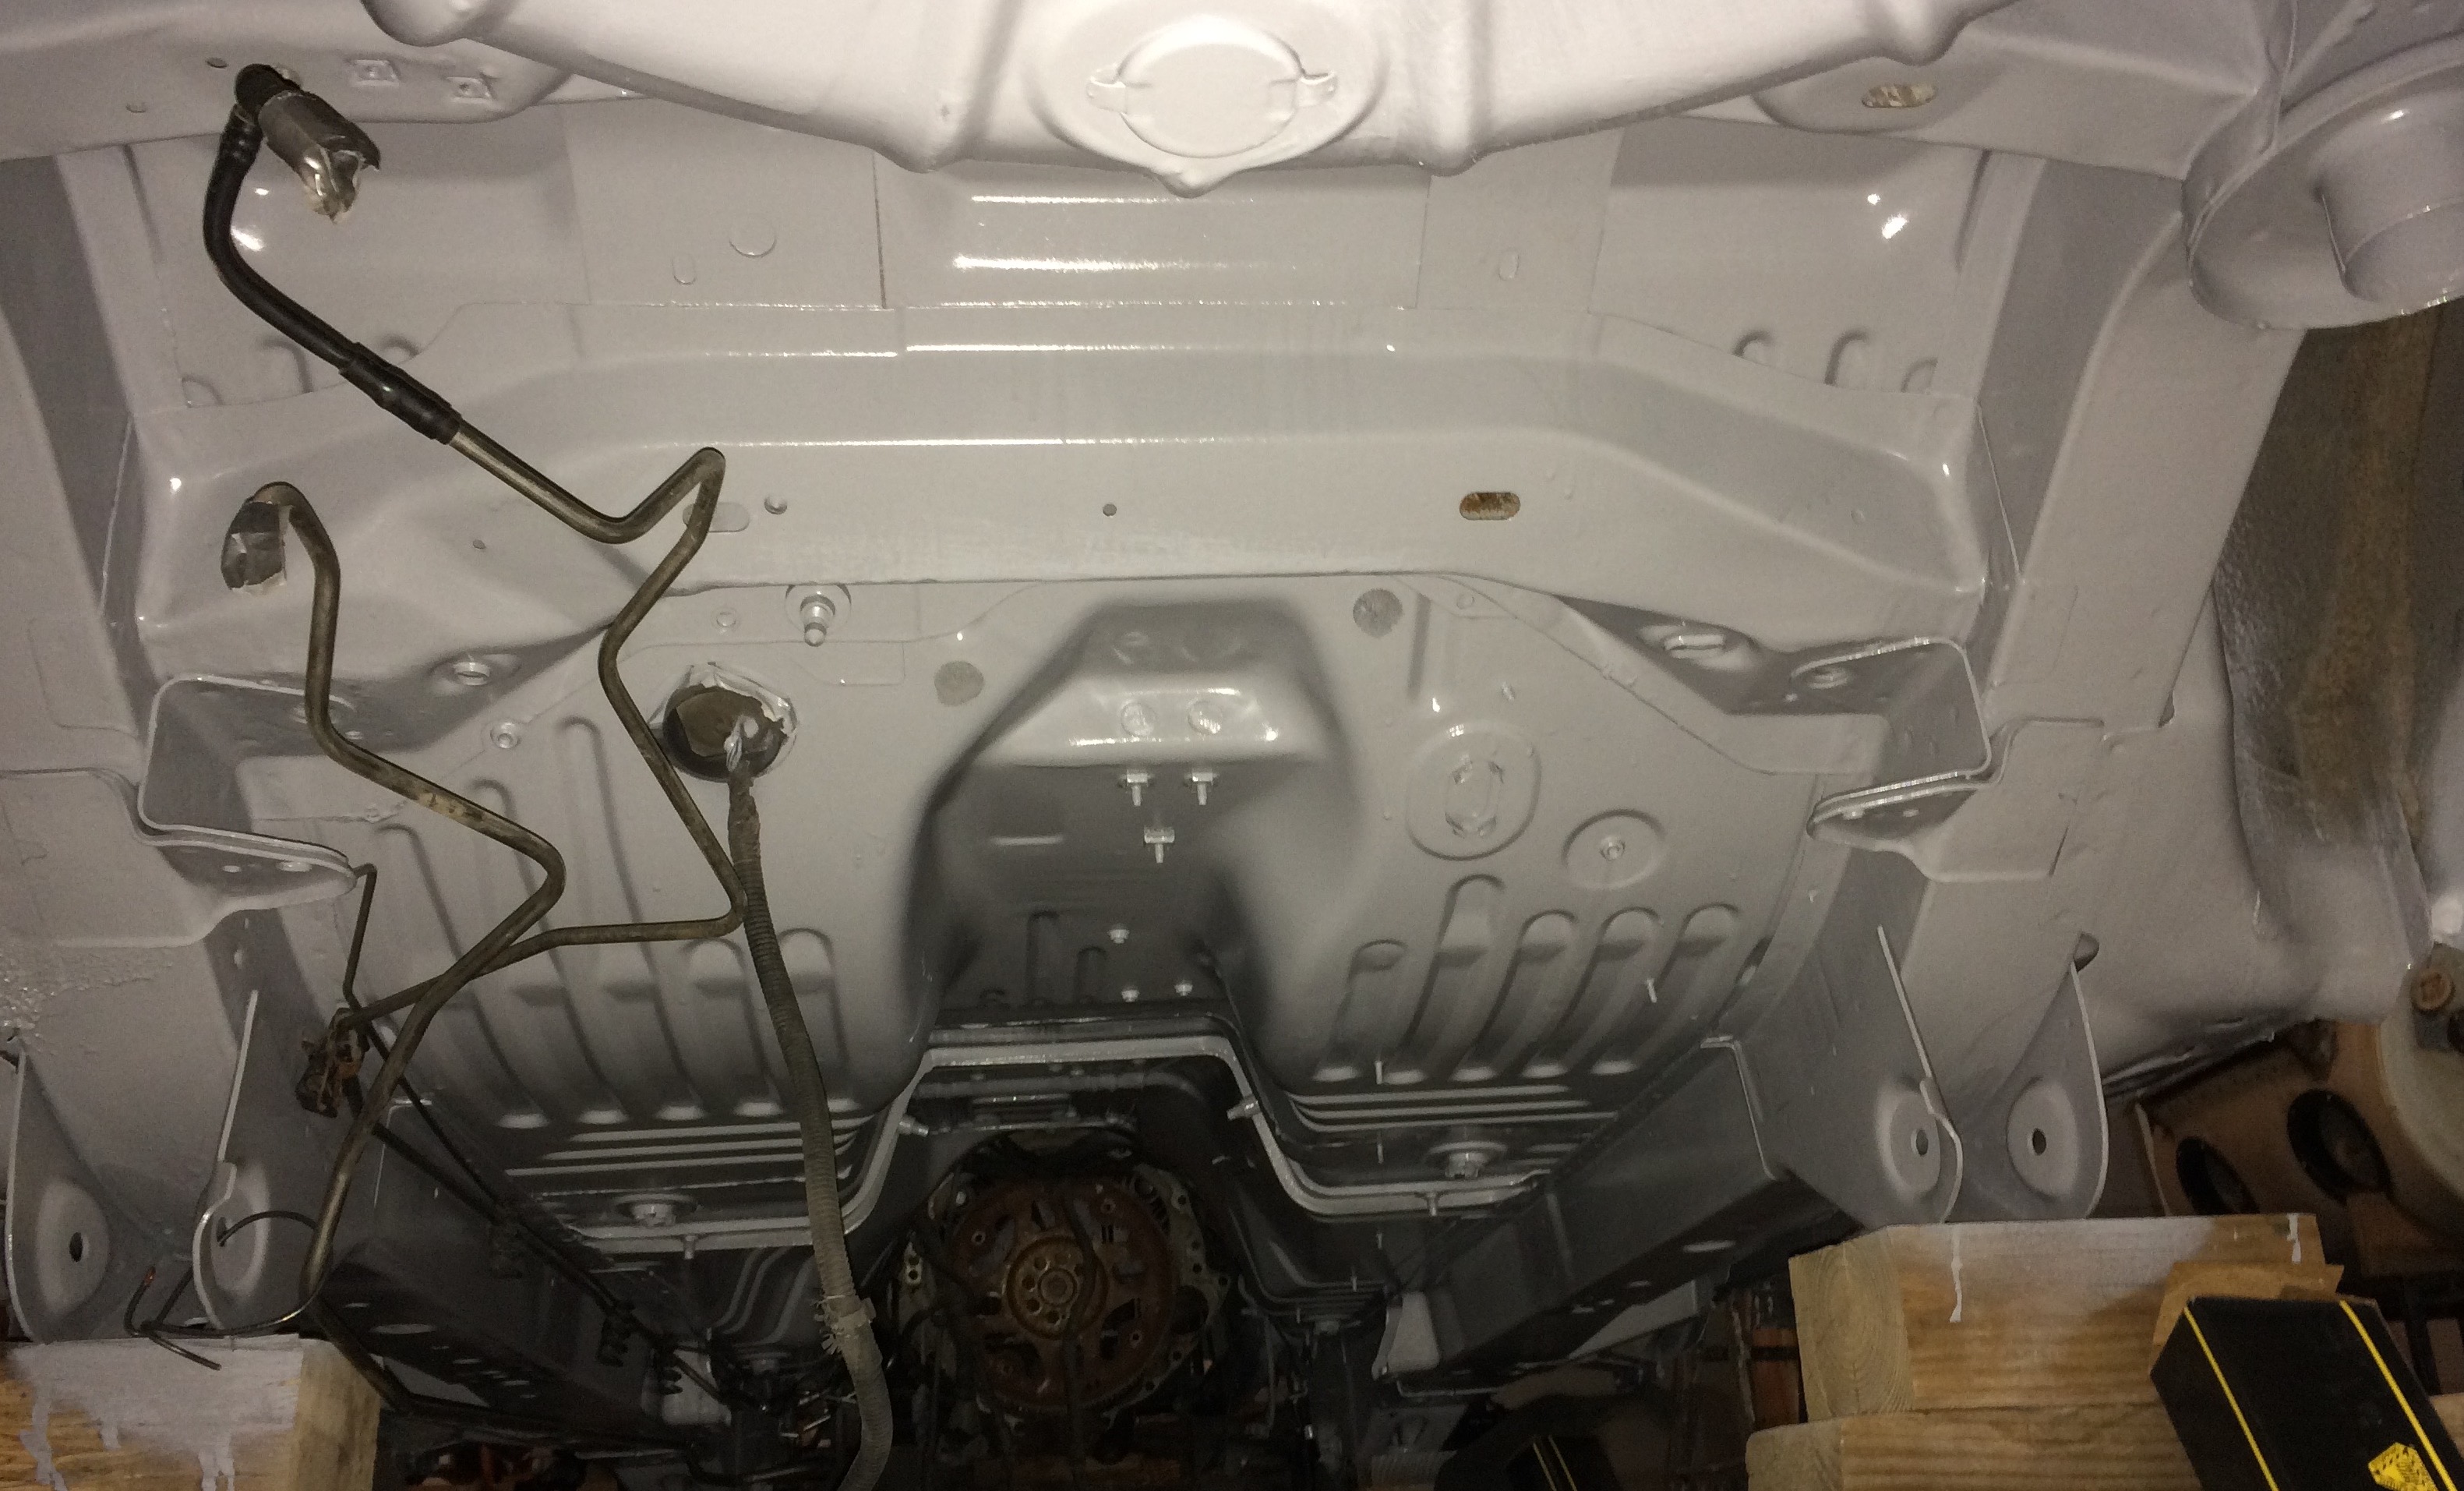
- Underside – Beadblasted, painted with quality SPI epoxy primer, and heavy gray enamel top coat (as a stone buffer) 48 hours later, filled all cavities w/spray paint as best I could. (POR15 or undercoat tar does not make sense to me, cracks and/or traps moisture, and then rust, annual coats of cavity wax is best in my opinion, stays flexible and self-heals)
- Beadblasted inside edges of wheel openings on front fenders while off vehicle, beadblasted rear while on vehicle, painted with Rustoleum.
- Beadblasted, primed with Rustoleum, painted with black Rustoleum, hitch, fuel tank skid plate, and transmission cross member.
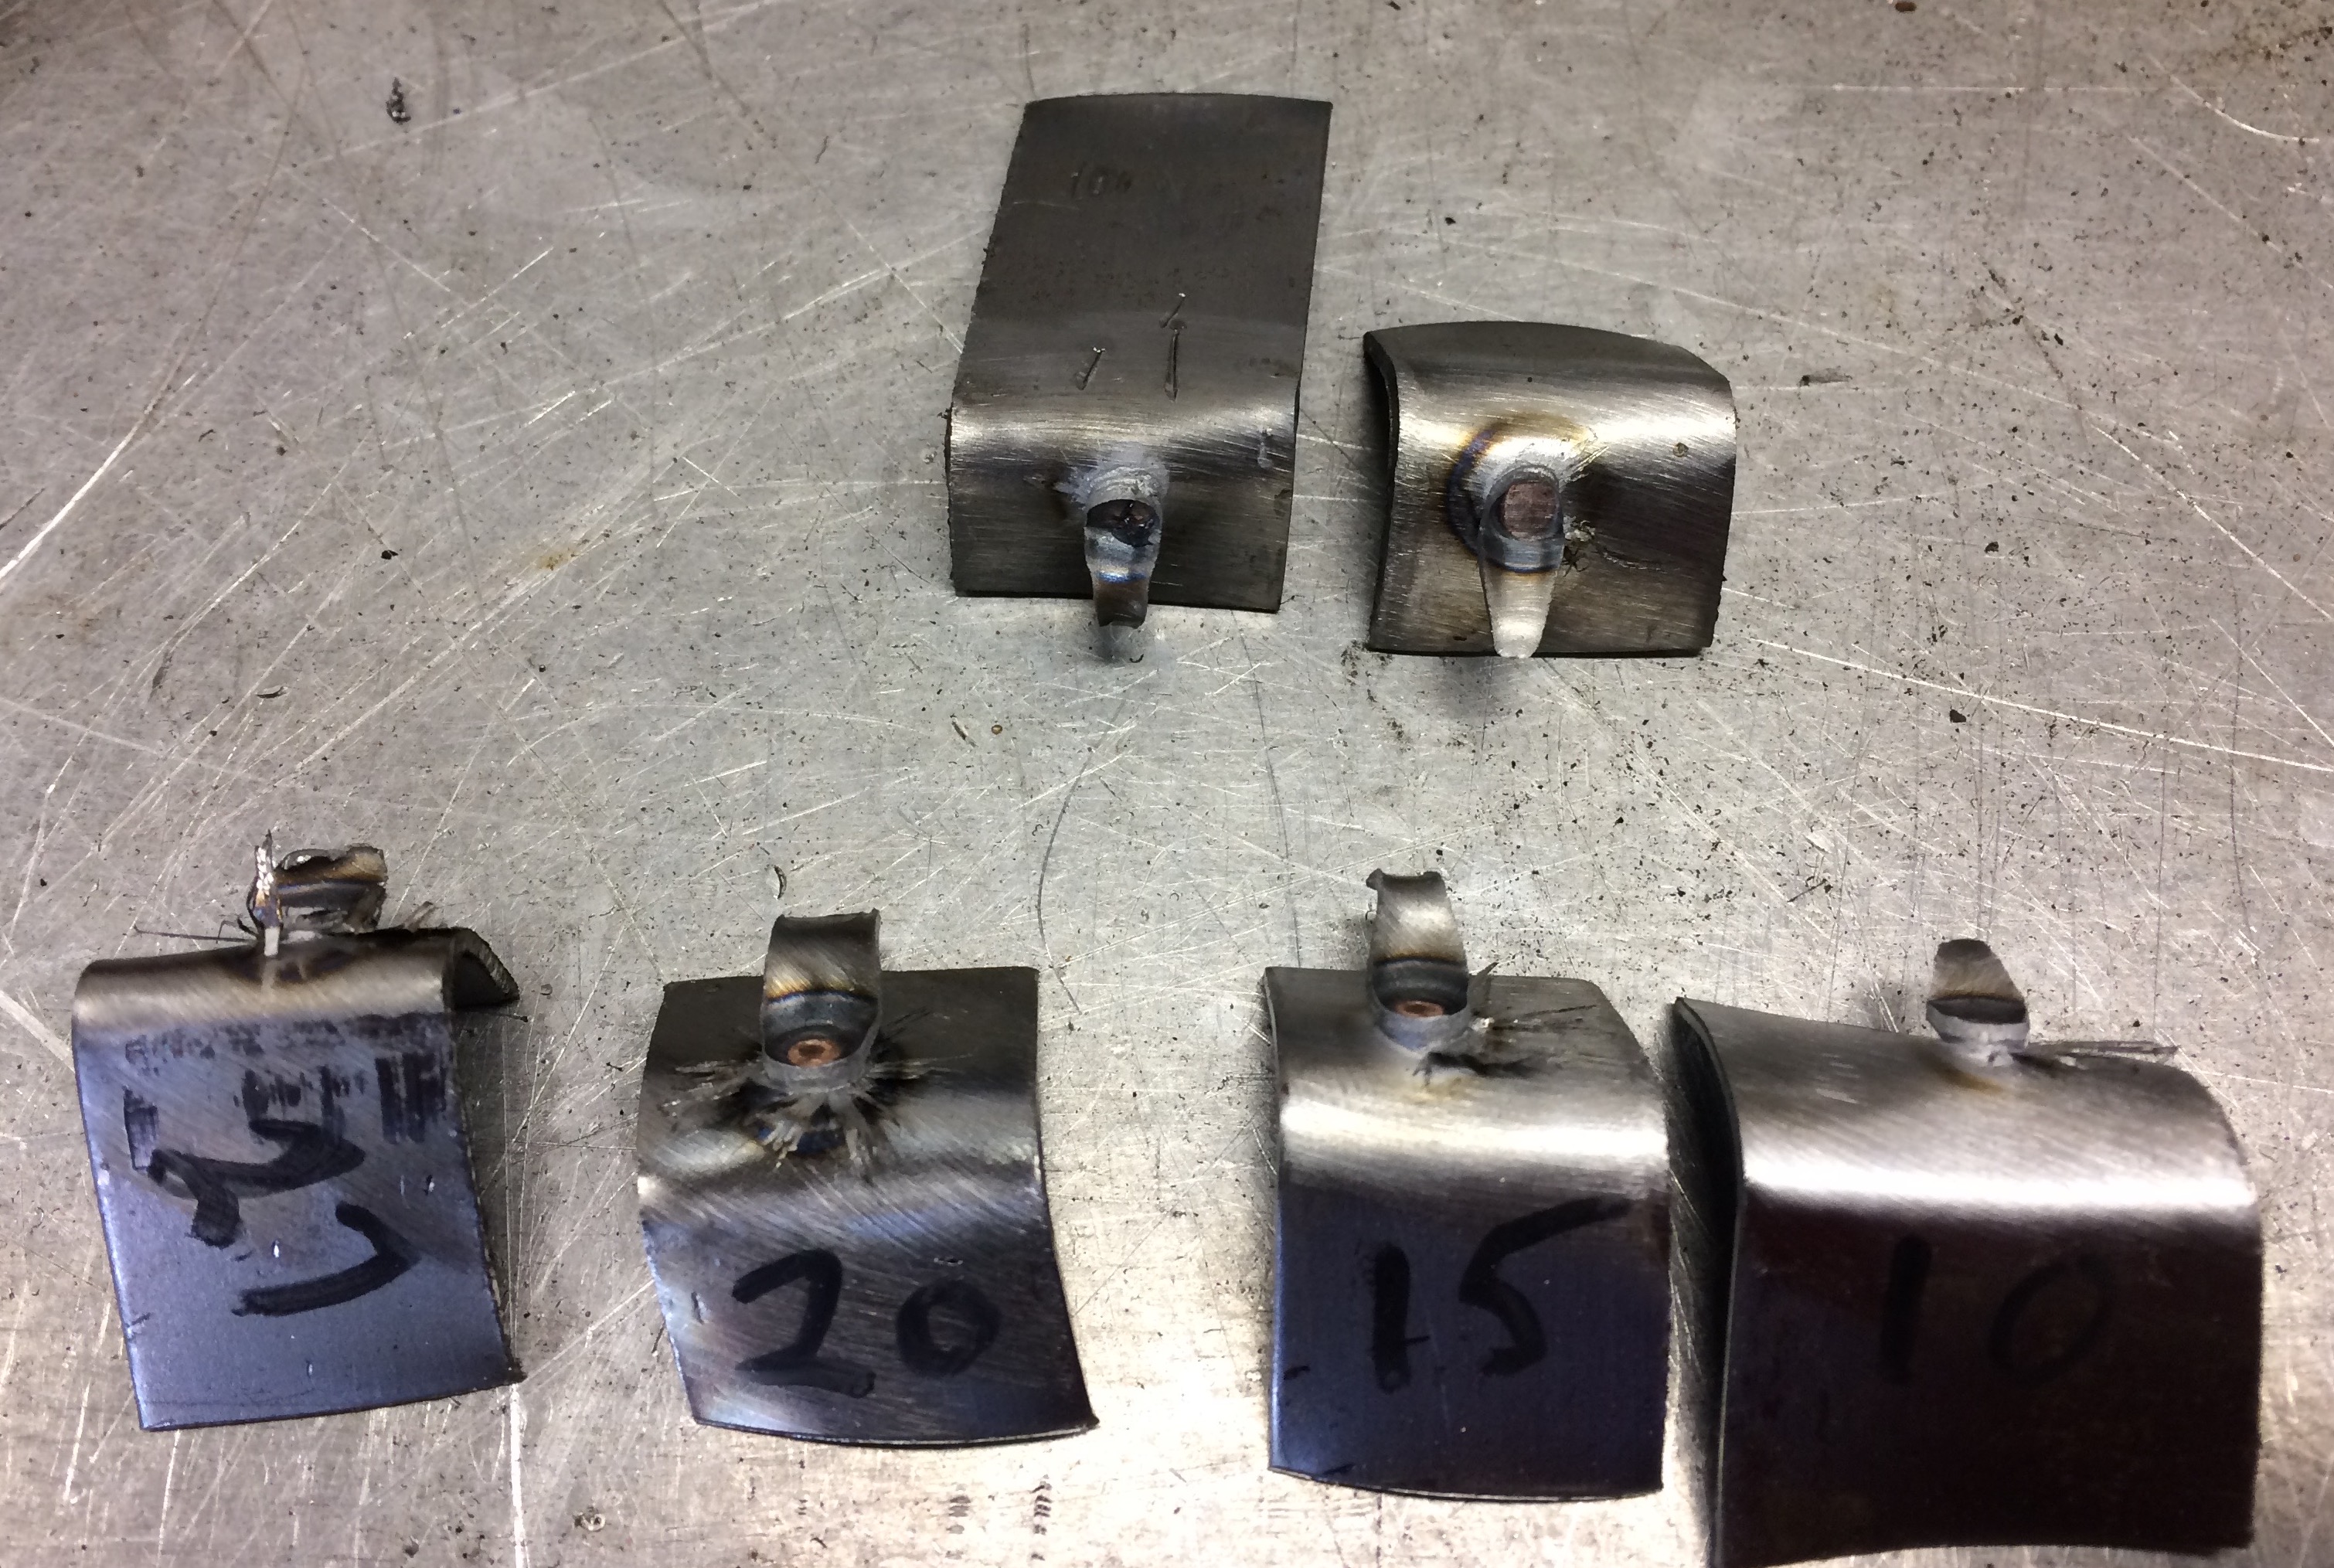
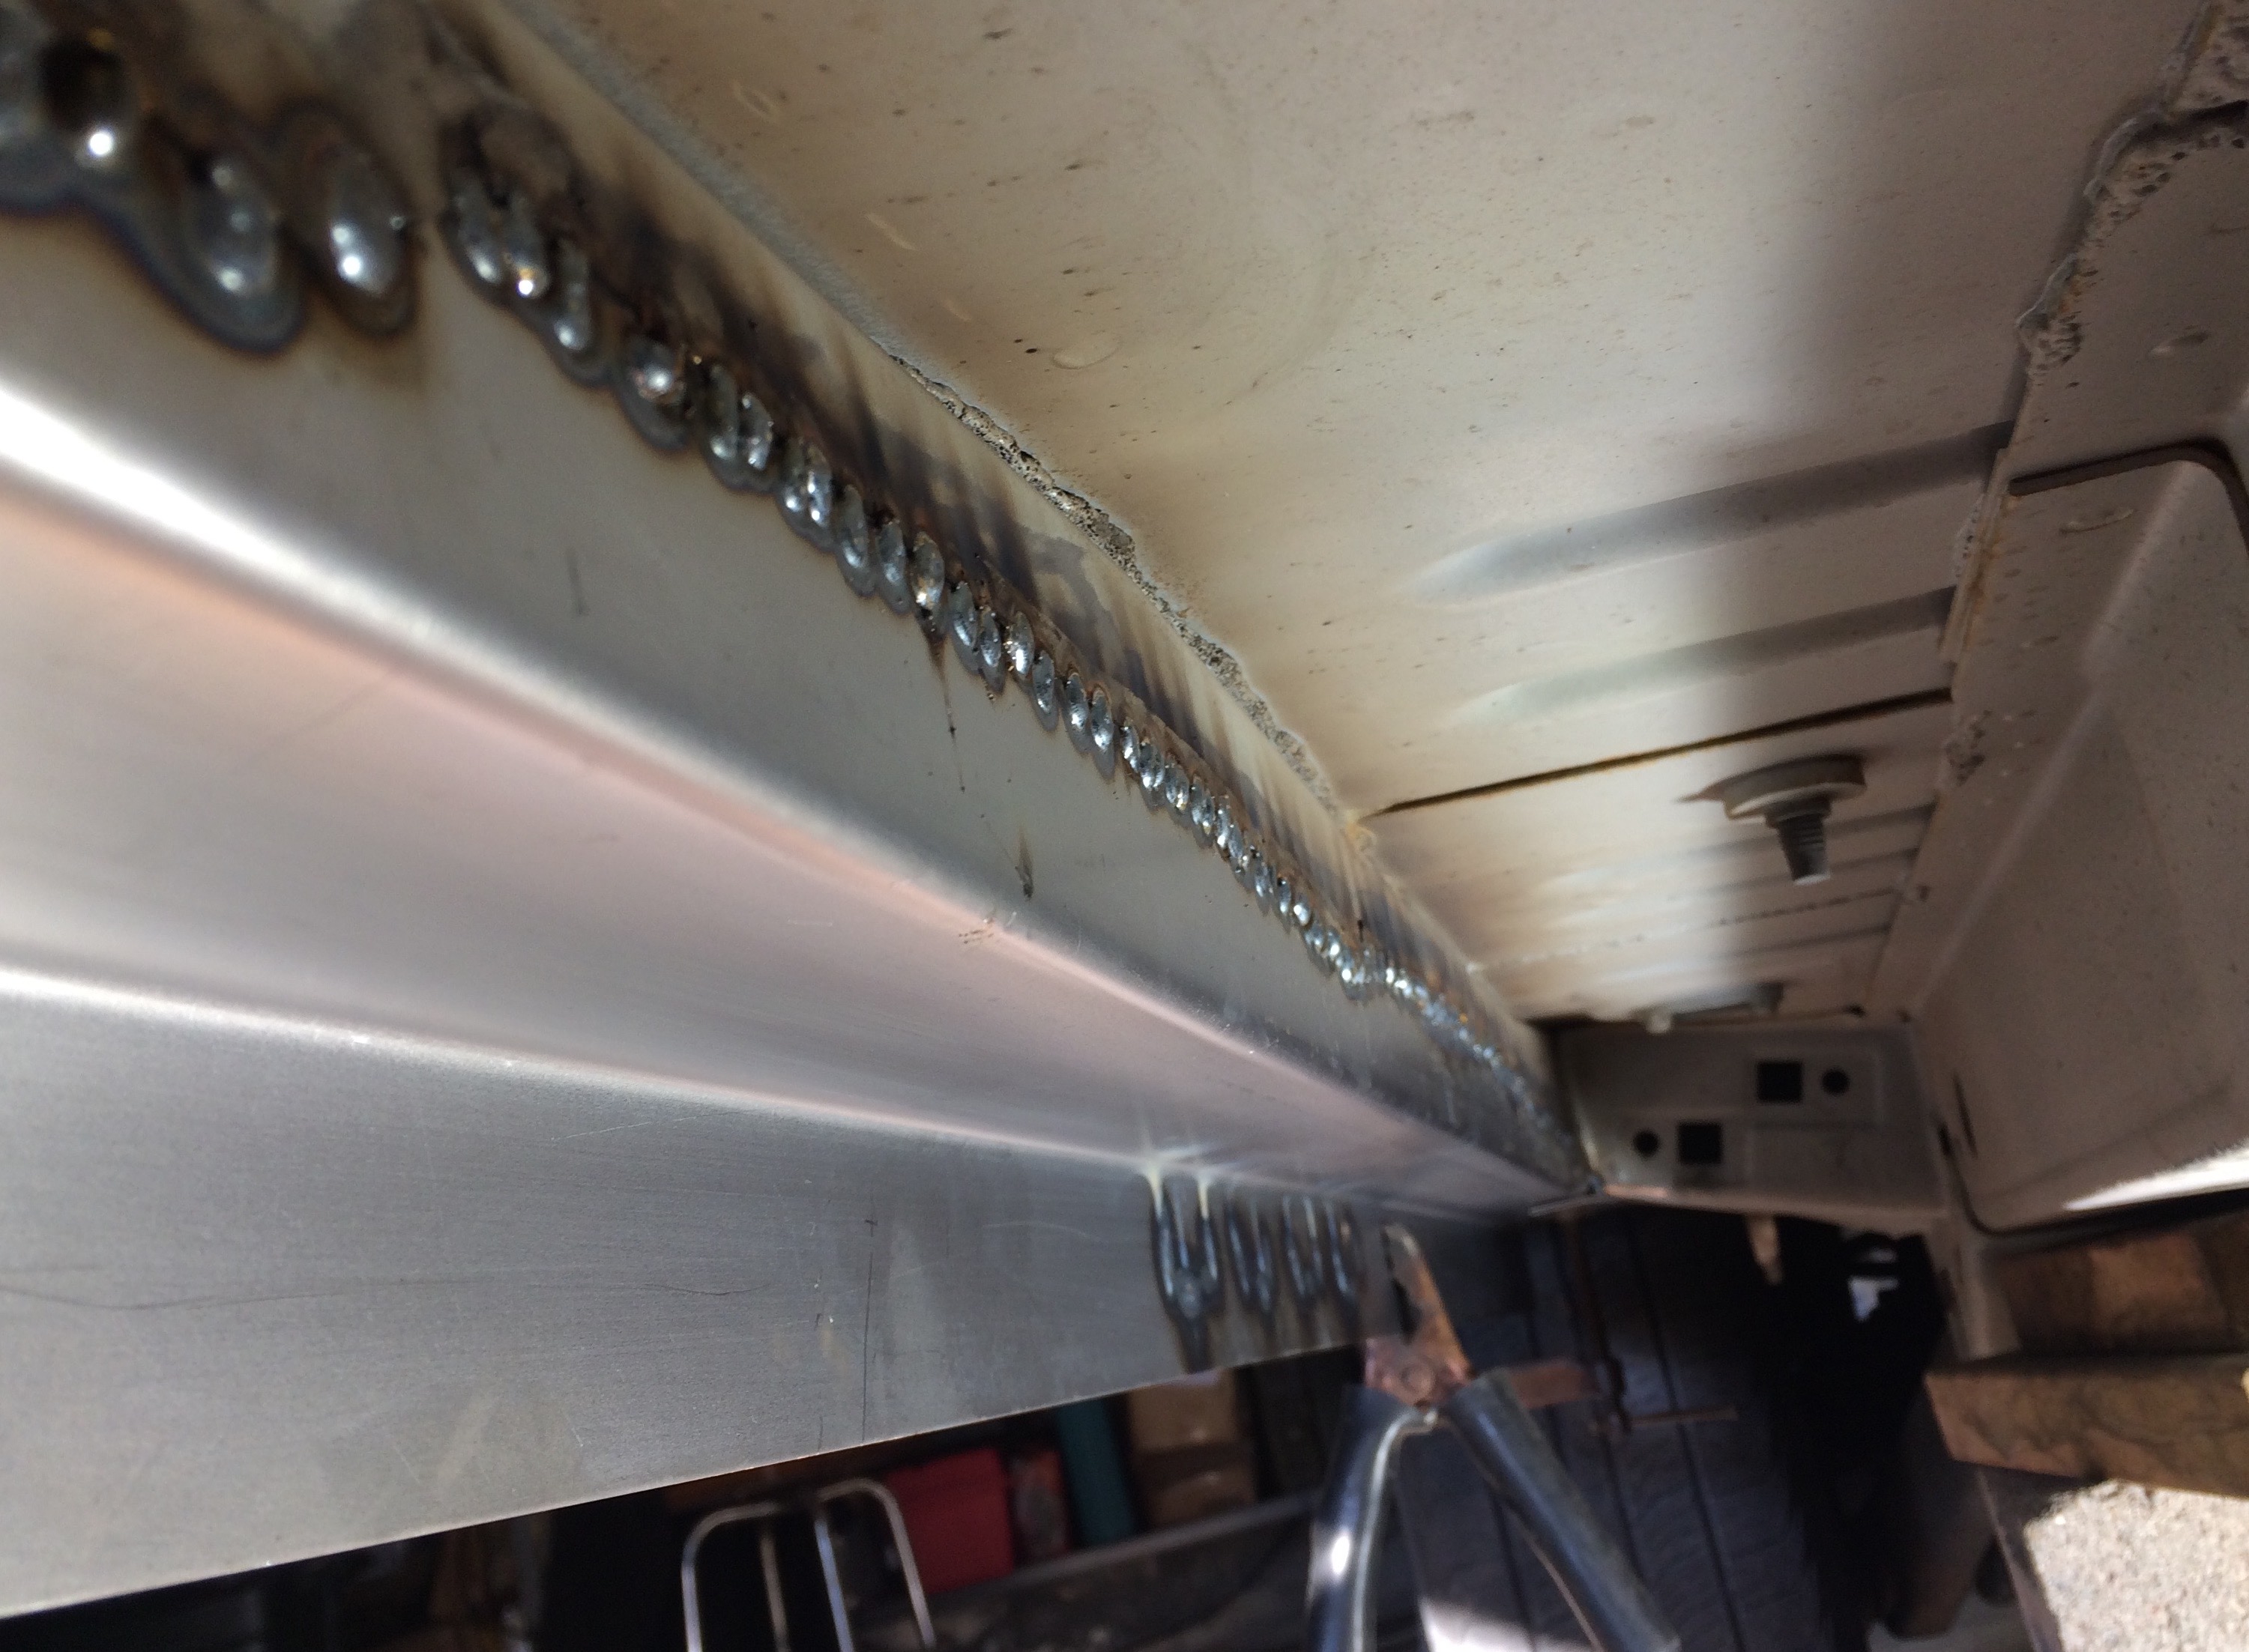
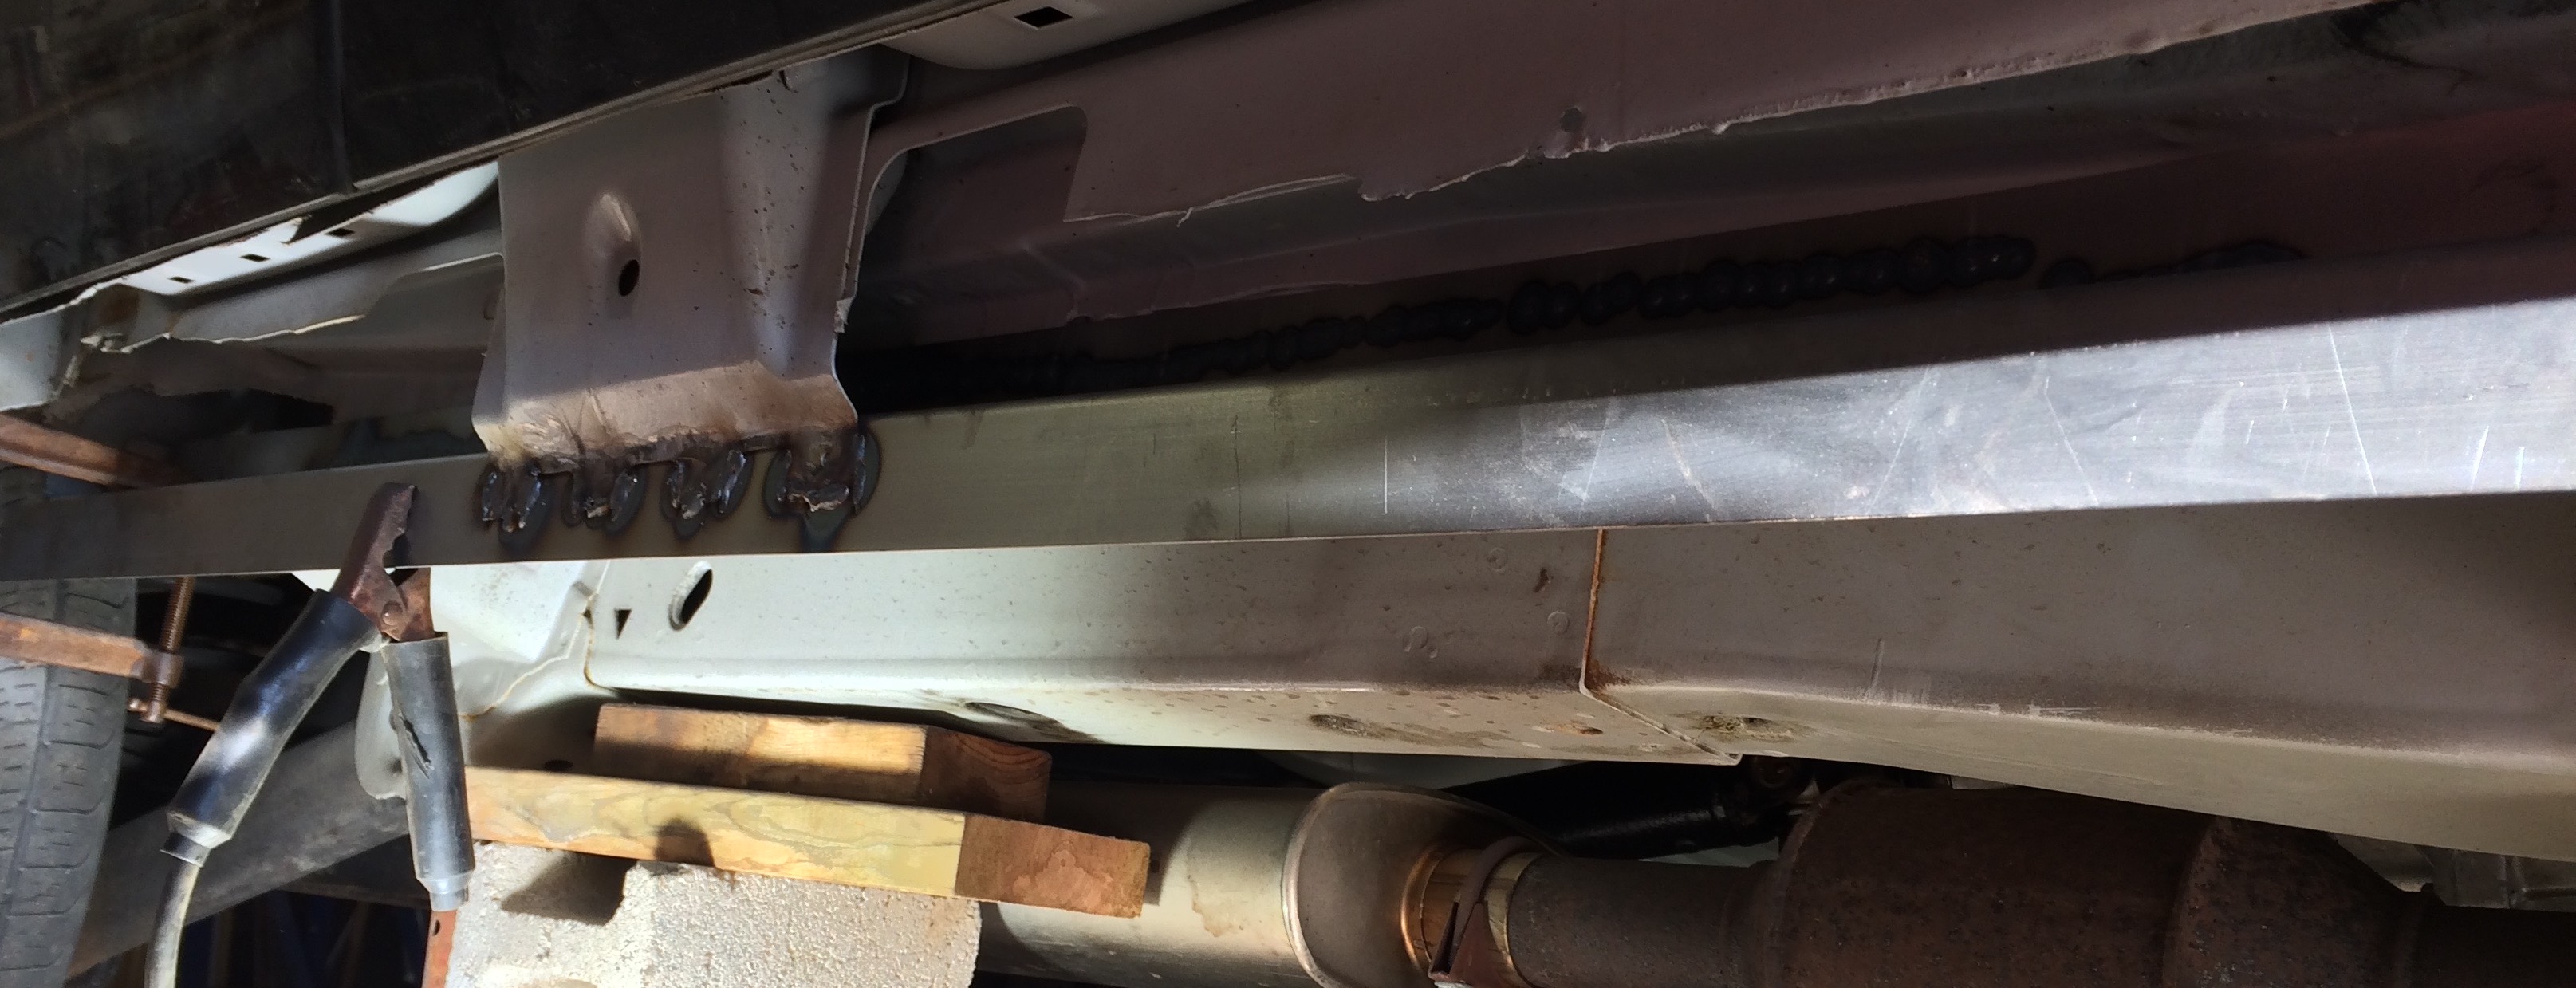
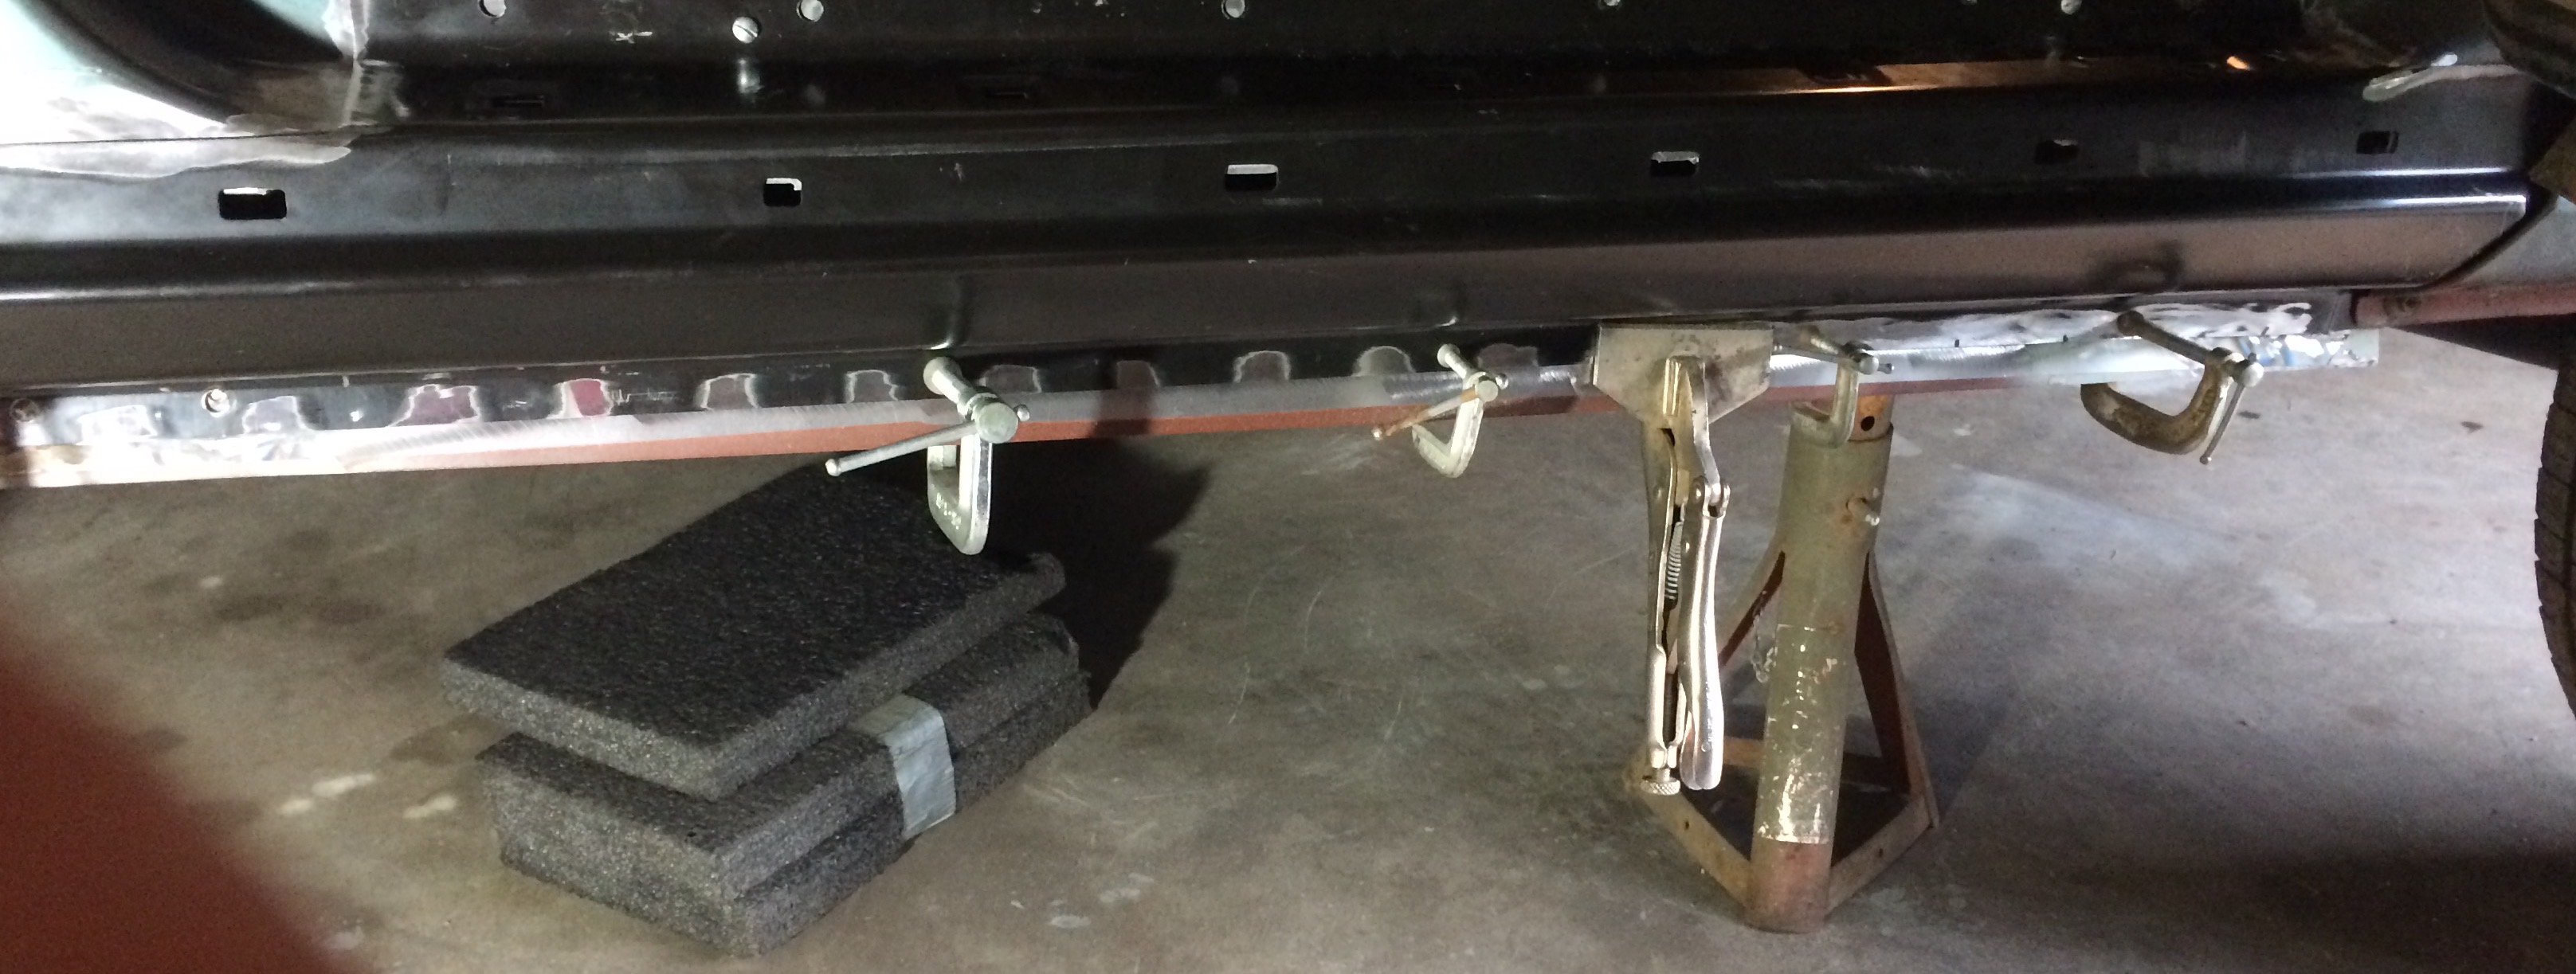
- Rockers – Cut away old with sawzall, beadblasted, welded in new inner 18Ga. Z I had made at local heating shop, MIG and spot weld on new OEM style fitted outers from Key Parts, grind smooth, trim bottom edge flush with outer, painted inside and inner with Rustoleum, primed outside with auto primer.
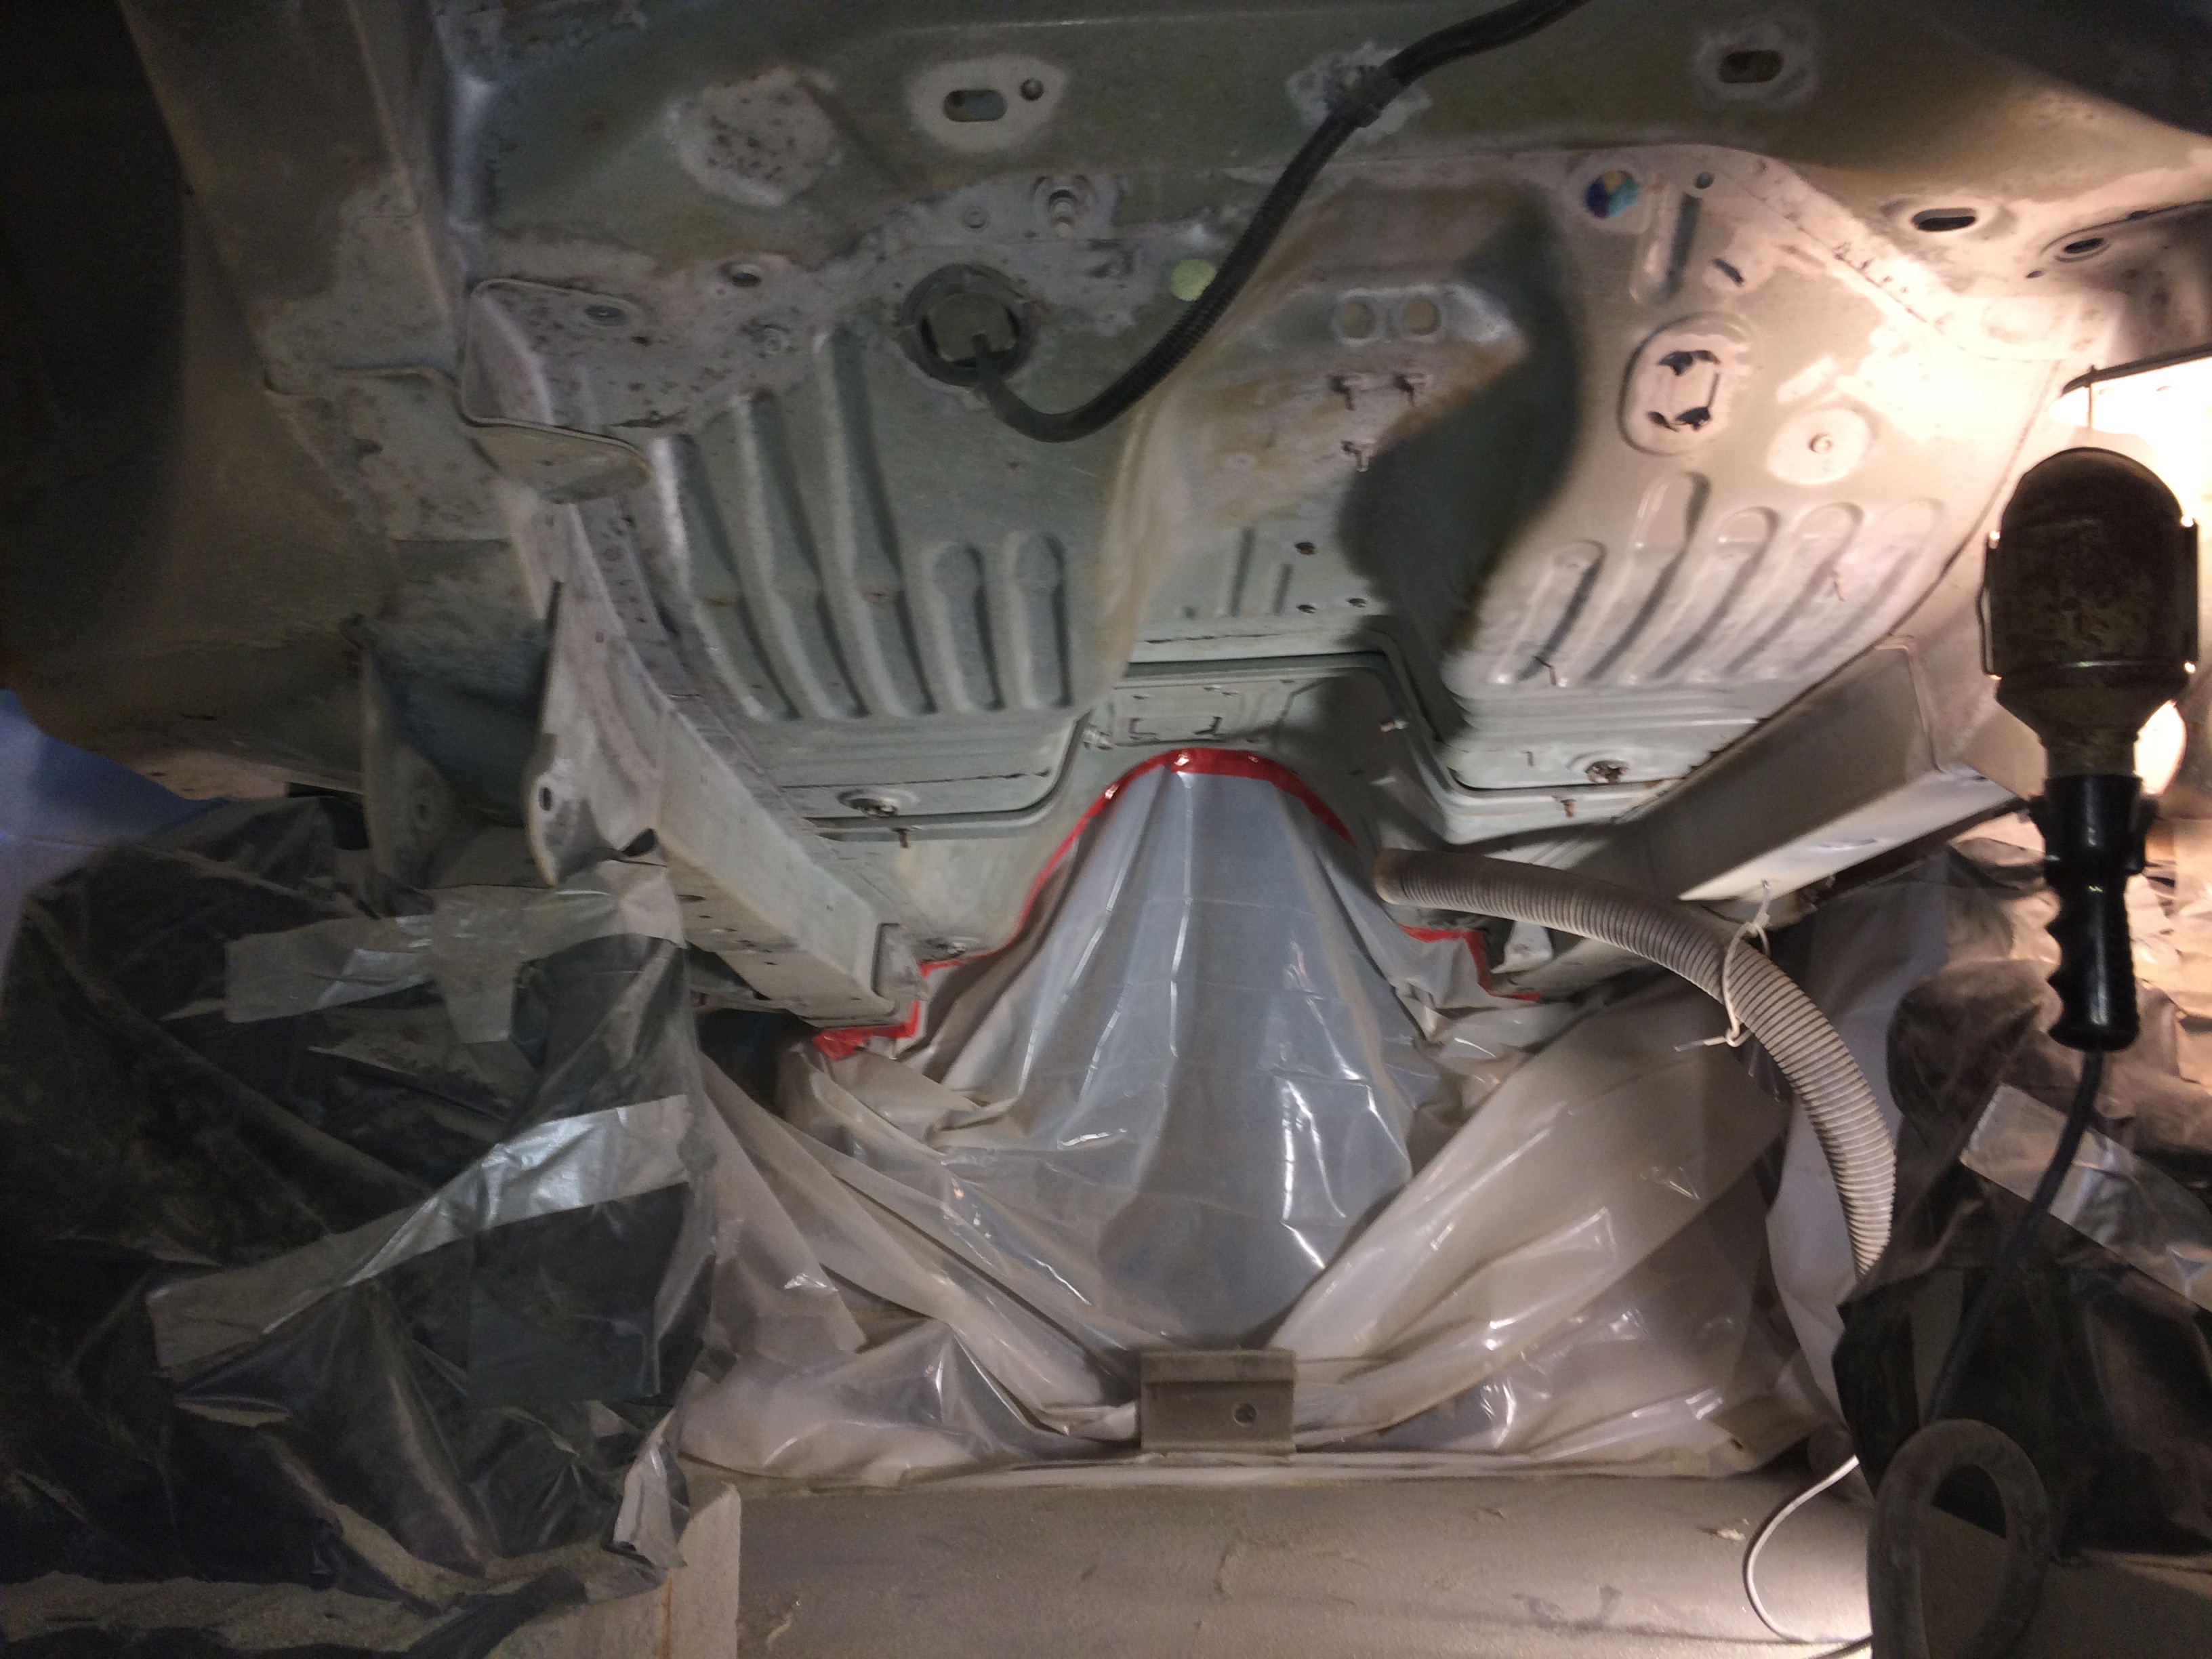
- Soaked all cavities (doors, rockers, under side frame channels, etc.) w/spray cavity wax using long extension tube after paint had hardened (German Wurth or Swedish Noxudol brands are good examples)
- Emblems – Replaced “Jeep” with after market look a-likes
- Wheel hub caps – Replaced all four w/new OEM (cosmetic only, really helps make vehicle look new)
- Painted all primed body areas (outside of rockers, fender edges, etc.) with matching Onyx Green and then several clear coats, using an air brush (handy, easy to clean).


General
- Beadblasted, washed, primed, painted, lubricated all used bolts prior to use
- Used red and blue thread locker where appropriate
- Replaced many plastic push-pin type fasteners
- Cleaned all electrical connectors that were cycled
- Replaced or shortened split ends on all vacuum, wiper, evap, etc. hoses
- Torqued all bolts to specified value
- Removed and discarded CD changer from rear compartment (obsolete)
- Installed full set of OEM style Goodyear Wrangler SR/A tires
Future work:
- Change all interior and indicator bulbs with matching style LEDs
- Replace OEM radio with “Double DIN” flat screen w/backup camera and steering wheel bus adapter
- Program more keys and fobs
- Polish windshield glass where wiper marred it
- Replace batteries in all five TPMS transmitters in the tires and re-pot them
- Eventually replace some of the suspension strut bushings (as they fail)
- Eventually replace front ball joints (as they fail)
- Replace left rear brake disk which is pitted
- Check all brake disk run-out with dial indicator (fronts might be slightly warped)
- Find a set of top cargo rack cross bars
- Replace left rear small cargo net bungee
- Clean, check, and reseal injectors, clean and reseal coils, replace plugs, clean and paint injector fuel rail
- Replace heater hoses (and possibly core), will carry bypass hose & clamps for now just in case.
Lessons Learned / Conclusion:
- Based on what I learned, I would never trust a local transmission shop to “re-build” a transmission. In retrospect the best choice is probably to buy a “re-manufactured” (not “re-built”) transmission from one of the reputable firms, such as Transmission Authority in Milwaukee (via RockAuto).
- If you catch it soon enough, rust can be dealt with using a little elbow grease, a beadblaster, a MIG welder, some sheet metal, and lots of paint, but finding a vehicle with minimal rust is probably a better idea…. However you are still going to end up doing some beadblasting and painting on any vehicle over 75K mi. (BTW, I strongly recommend treating the entire underside and doors with Swedish or German “cavity” wax every year or two, such as Noxudol, Wurth, or possibly 3M)
- There is no point in doing piecemeal repairs. I found issues in almost every subsystem on a vehicle that had looked pretty nice at first glance. If you want a reliable vehicle, expect to spend on the order of $6,500 to $8,000 in parts and you do all the work yourself. Having someone else do the work probably does not make economic sense, unless you know a good mechanic who has plenty of time and works for peanuts.
- I expect (and accept) to have continuing small repairs now and then over the remaining life of this vehicle. Things like corroded electrical connectors, split ends on vacuum and evap hoses, and occasional worn out or aged items I did not replace such as the heater core, heater hoses, windshield wiper motor, AC compressor, coils, injectors, door locks, etc.
I am happy with how my refurbishment came out, it is like a new vehicle…. I may do another for my daughter, to capitalize on my new knowledge of where I can cut corners… ;-). I may also purchase a $300 junker and strip it of all those expensive electronic modules, sensors, coils, harness connectors, mirrors, F &R Vari-Lok axles, etc. to store away as spares in case of “great national emergency” 😉 before taking the carcass to a recycler.
Hope this was useful. Now back to work on my MB/GPW projects….
Thomas.
Part II: August 2021 Update
Recent work done summer 2021…
Part-out Spares
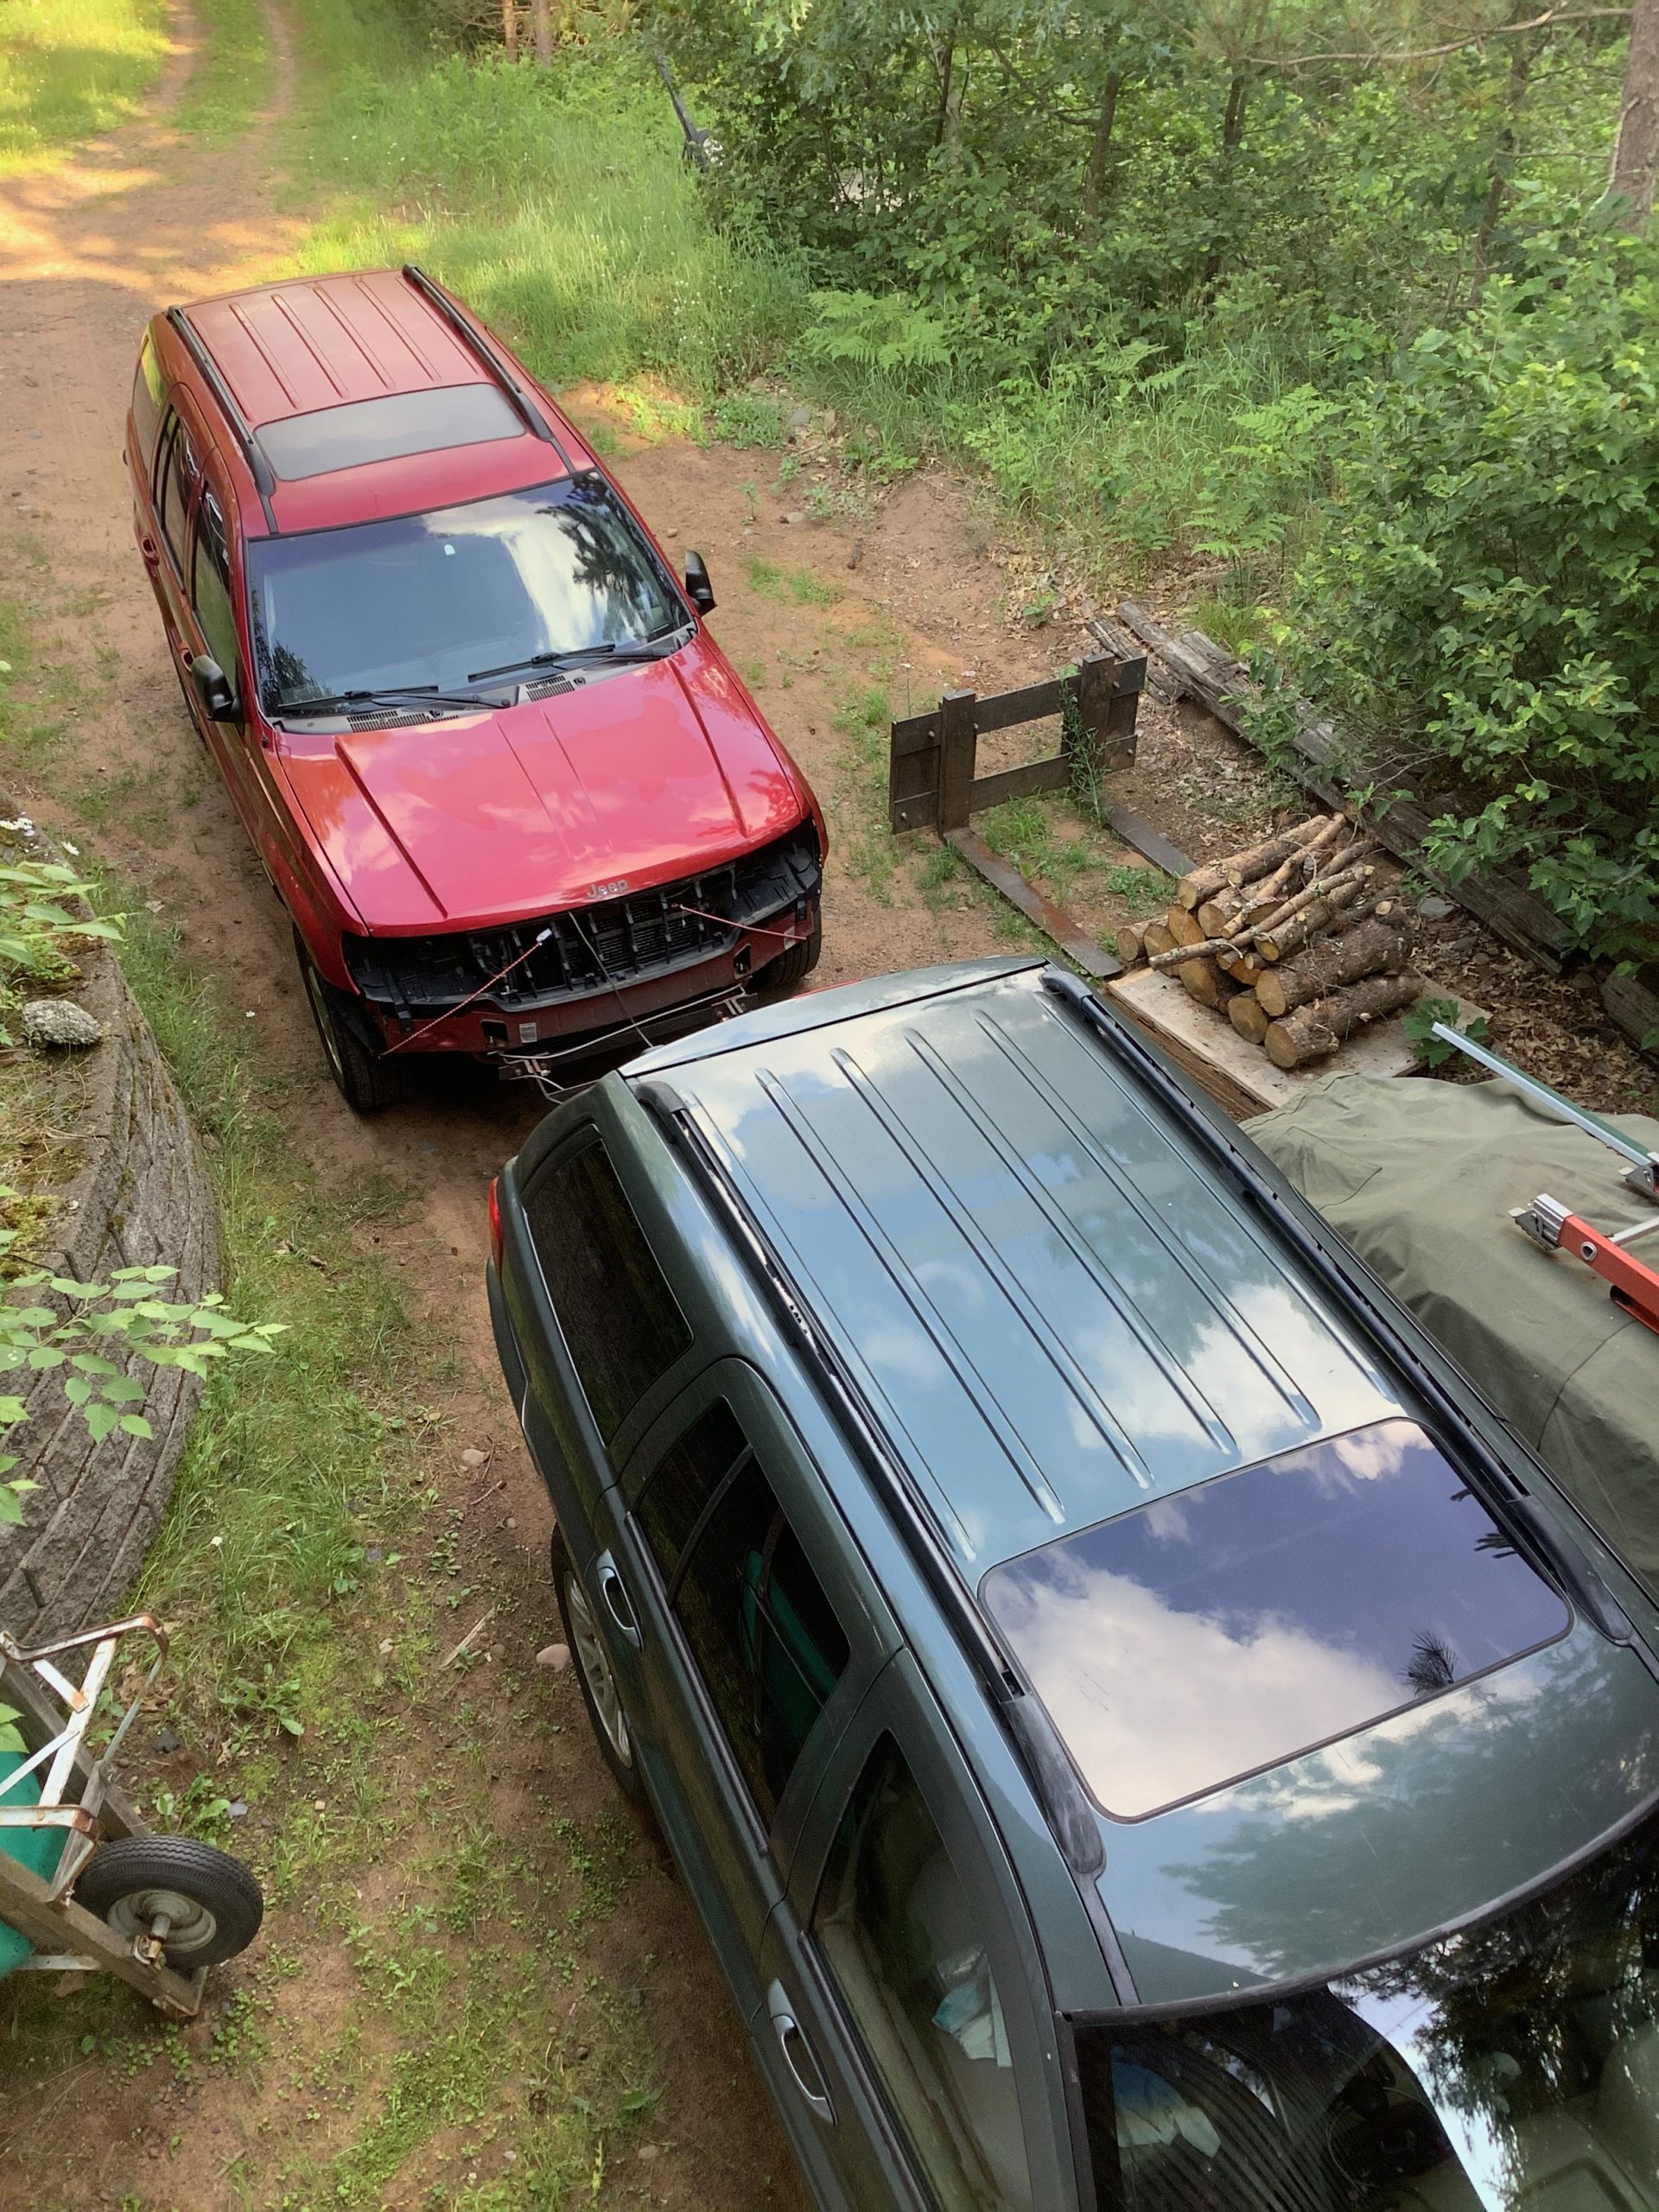
So I bought a 2002 WJ built four months before mine to part out that had a blown engine, but only 119,000 miles on it, and was 300 mi away. Paid $400 for it, and it cost me two tanks of gas to go get it….
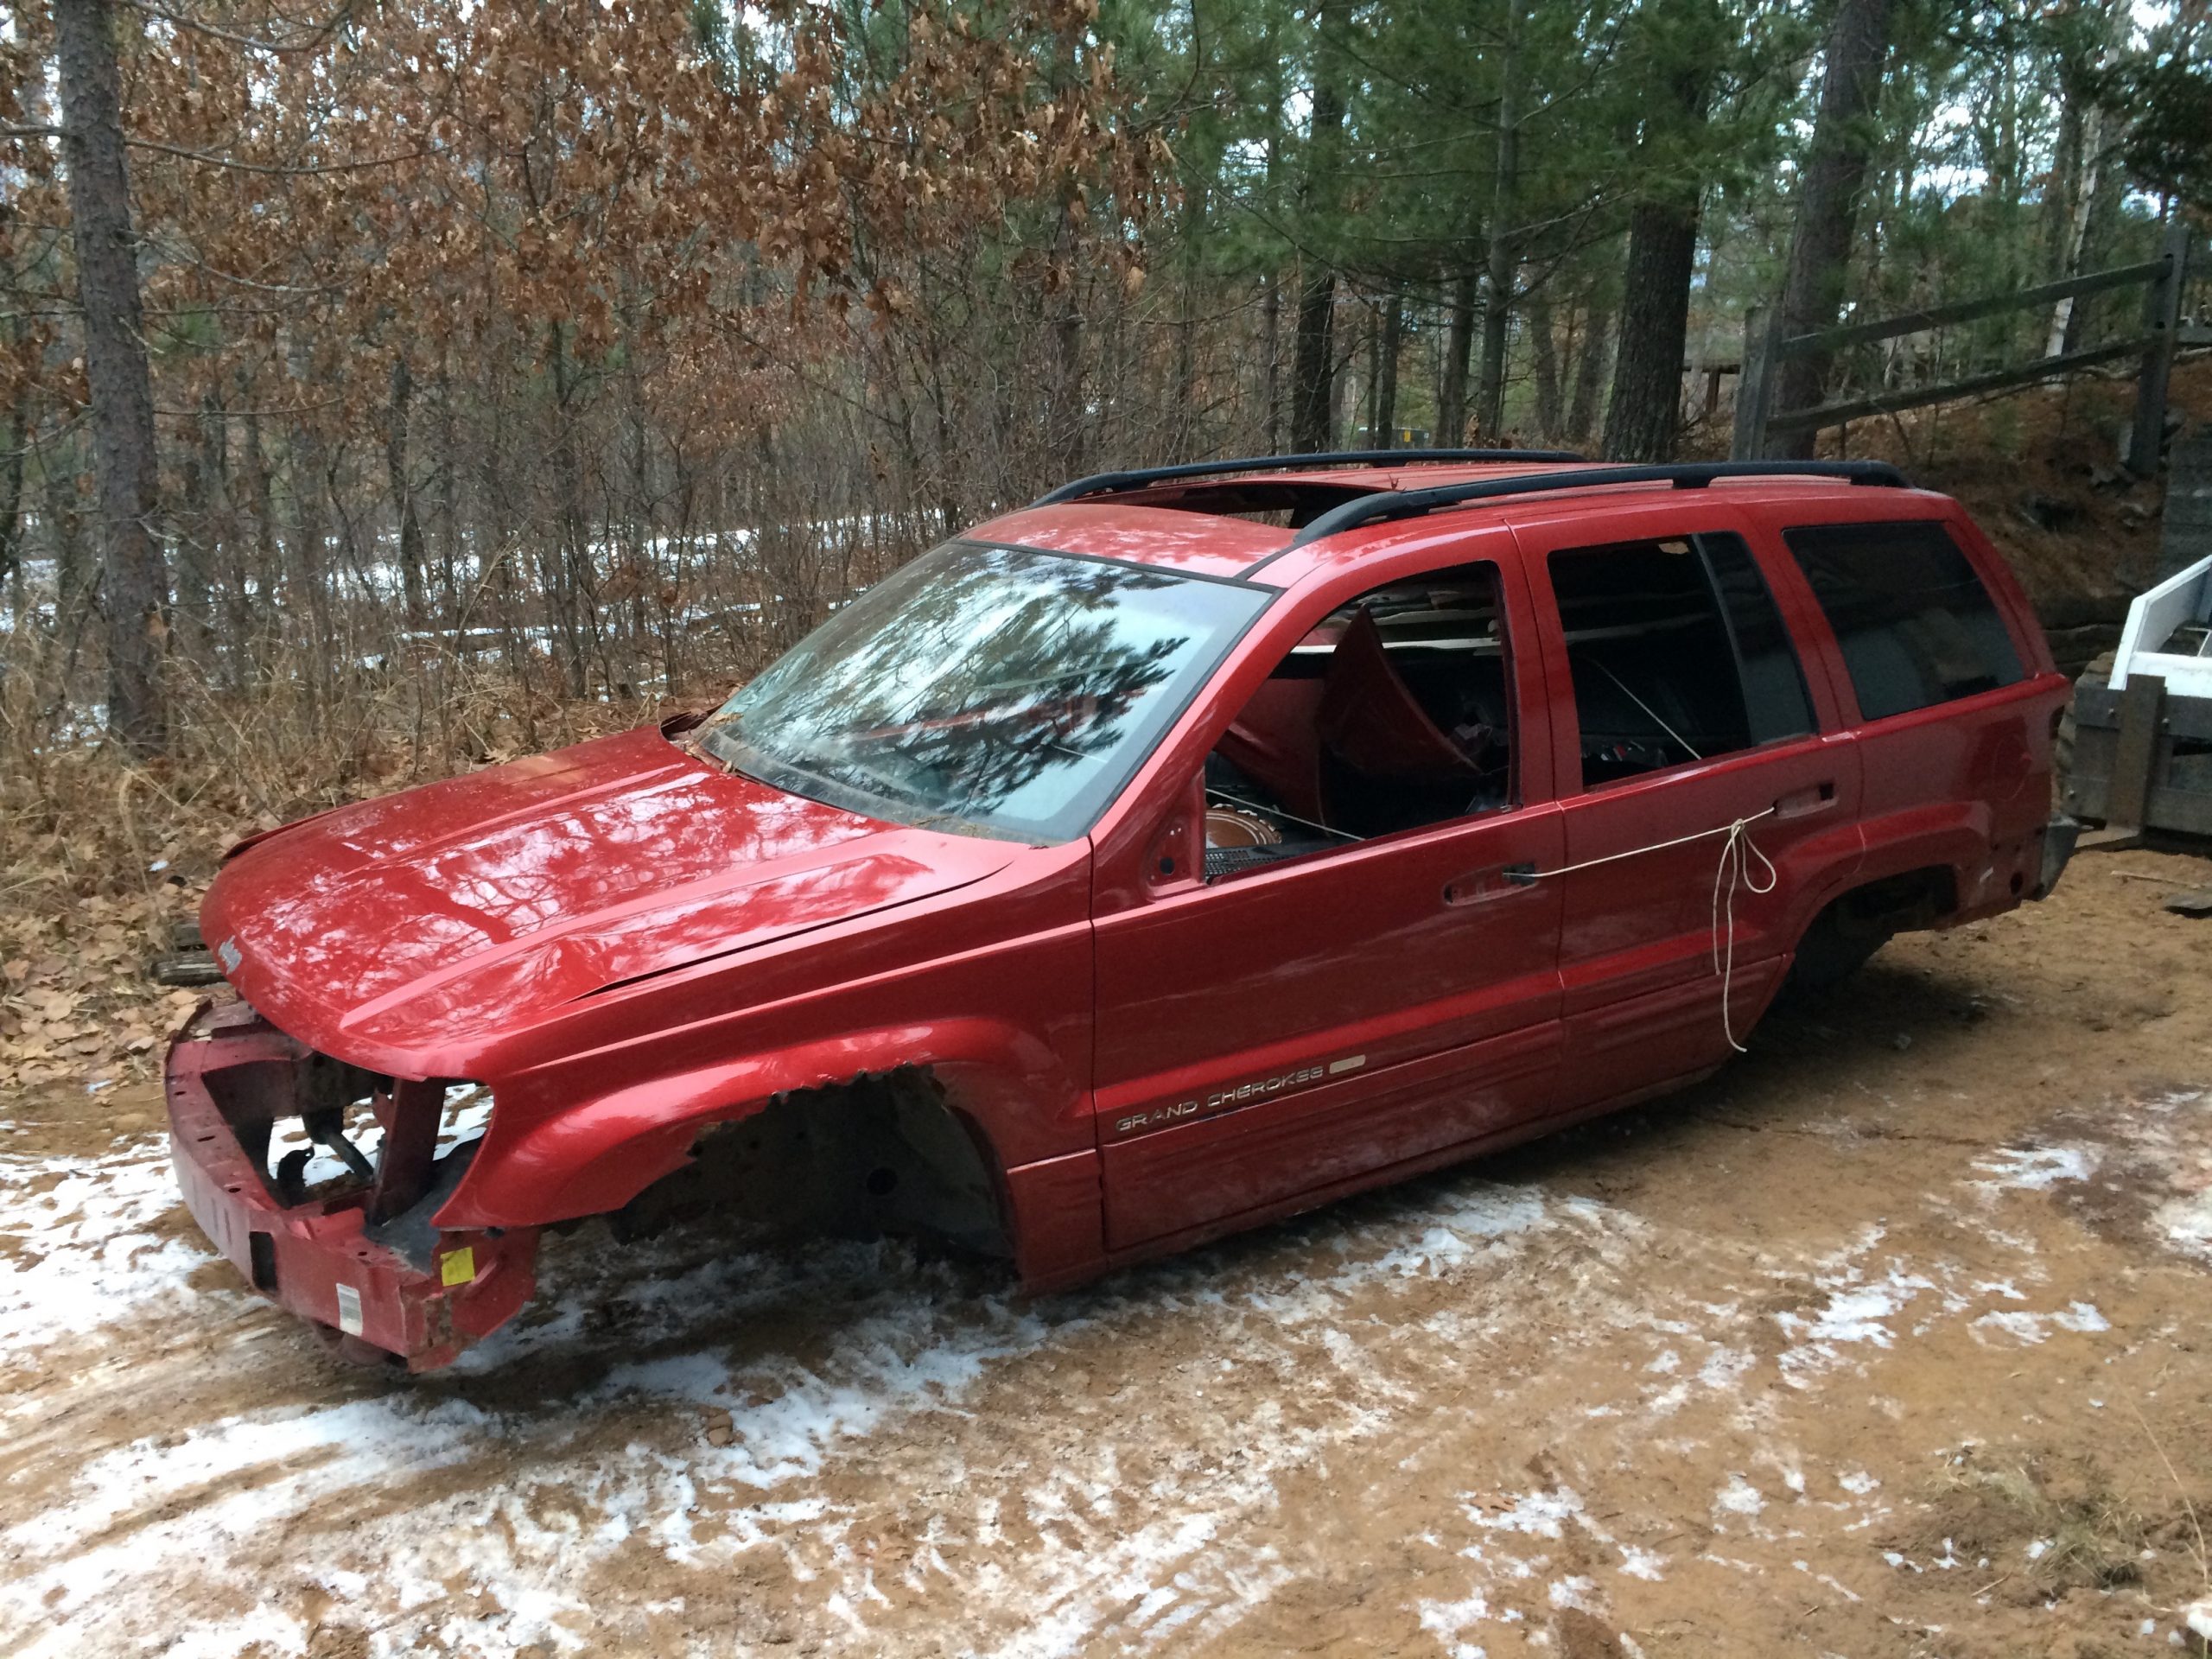
Used a home made tow bar. Usual body rust issues, chrome on wheels peeling, nice interior however. Engine was toast, looks like big end bearing on No. 8 seized up and the rod took out the cylinder wall, not to mention the piston… oh well. The engine became starved for oil as it died, so the cam journals were also damaged, had hoped for a pair of good heads at least… 🙁
Sold many parts, such as the 545RFE, front grill, steering gear, front drive shaft, intake manifold, etc. all of which paid for the car and the gas to get it. Invested way way too much time parting it out… stripped it down to metal, even removed wiring harnesses. Got lots of spare parts, including all the electronic modules, spare wiper and seat motors, spare NP247 viscous coupler, nice set of injectors and coils, nice A/C pump, etc. for times of “great national emergency” :-). Got a good Dana 44 rear Vari-Lok, but was annoyed to find that someone had changed out the front Dana 30 Vari-Lok for a regular open diff… As I understand it many soccer mom’s complained about the Vari-Lok tugging as they tried to park at the local supermarket, and so dealers frequently changed them to open ACK!!
Rebuilt HVAC
I suspected both my heater core and A/C evaporator were leaking, so I pulled the dash and rebuilt the HVAC unit with new. All doors were still in good condition except for foam. Glued on new hi-temp foam, reenforced one of the doors with metal sleeve and epoxy, and replaced heater core with OEM Chrysler copper (returned the AL aftermarket one I had bought), and an aftermarket A/C evaporator. Made cuts in HVAC case for future access to diverter doors, although mine were in good shape.
 .
. 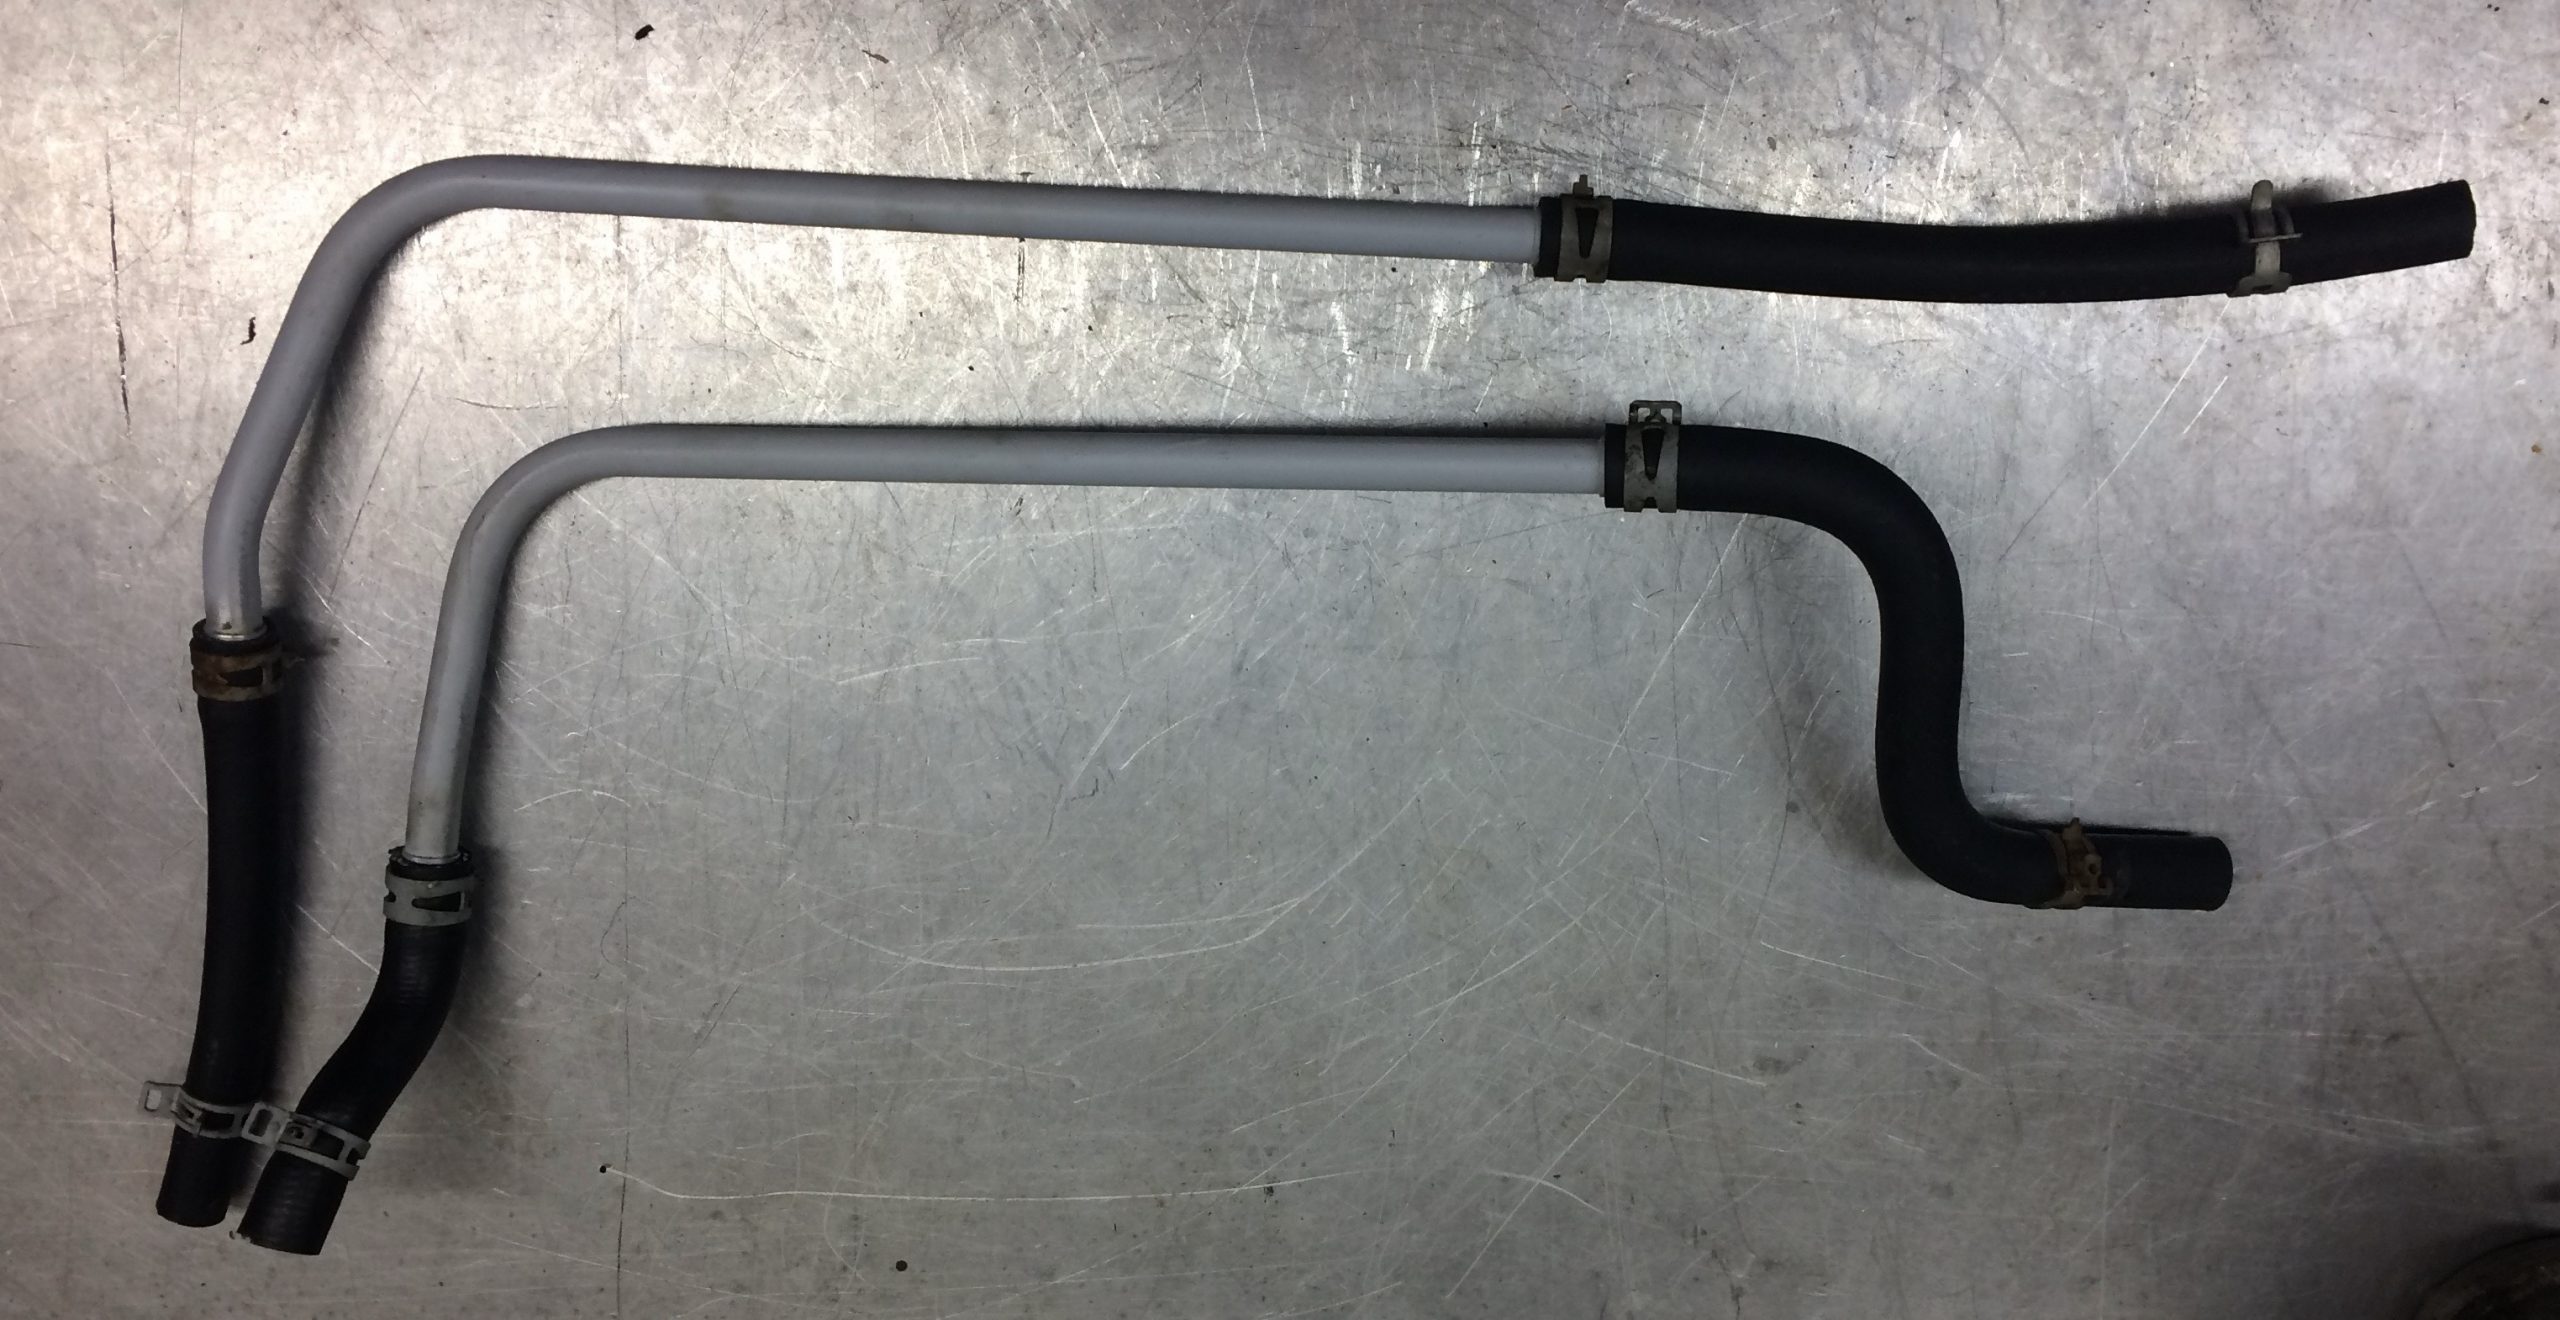
Leakey cores…. Replaced hoses as well. Note that the Gates aftermarket hoses typically sold do NOT seem right. Ended up using a Dayco 87784 hose, a cut down Gates 19035 (Dayco would be better), and two sections of straight 5/8 generic hose, per picture above, used spring clamps rather than SS screw type. Looks like they don’t use pipes, just long hoses, in the 2004 WJ.
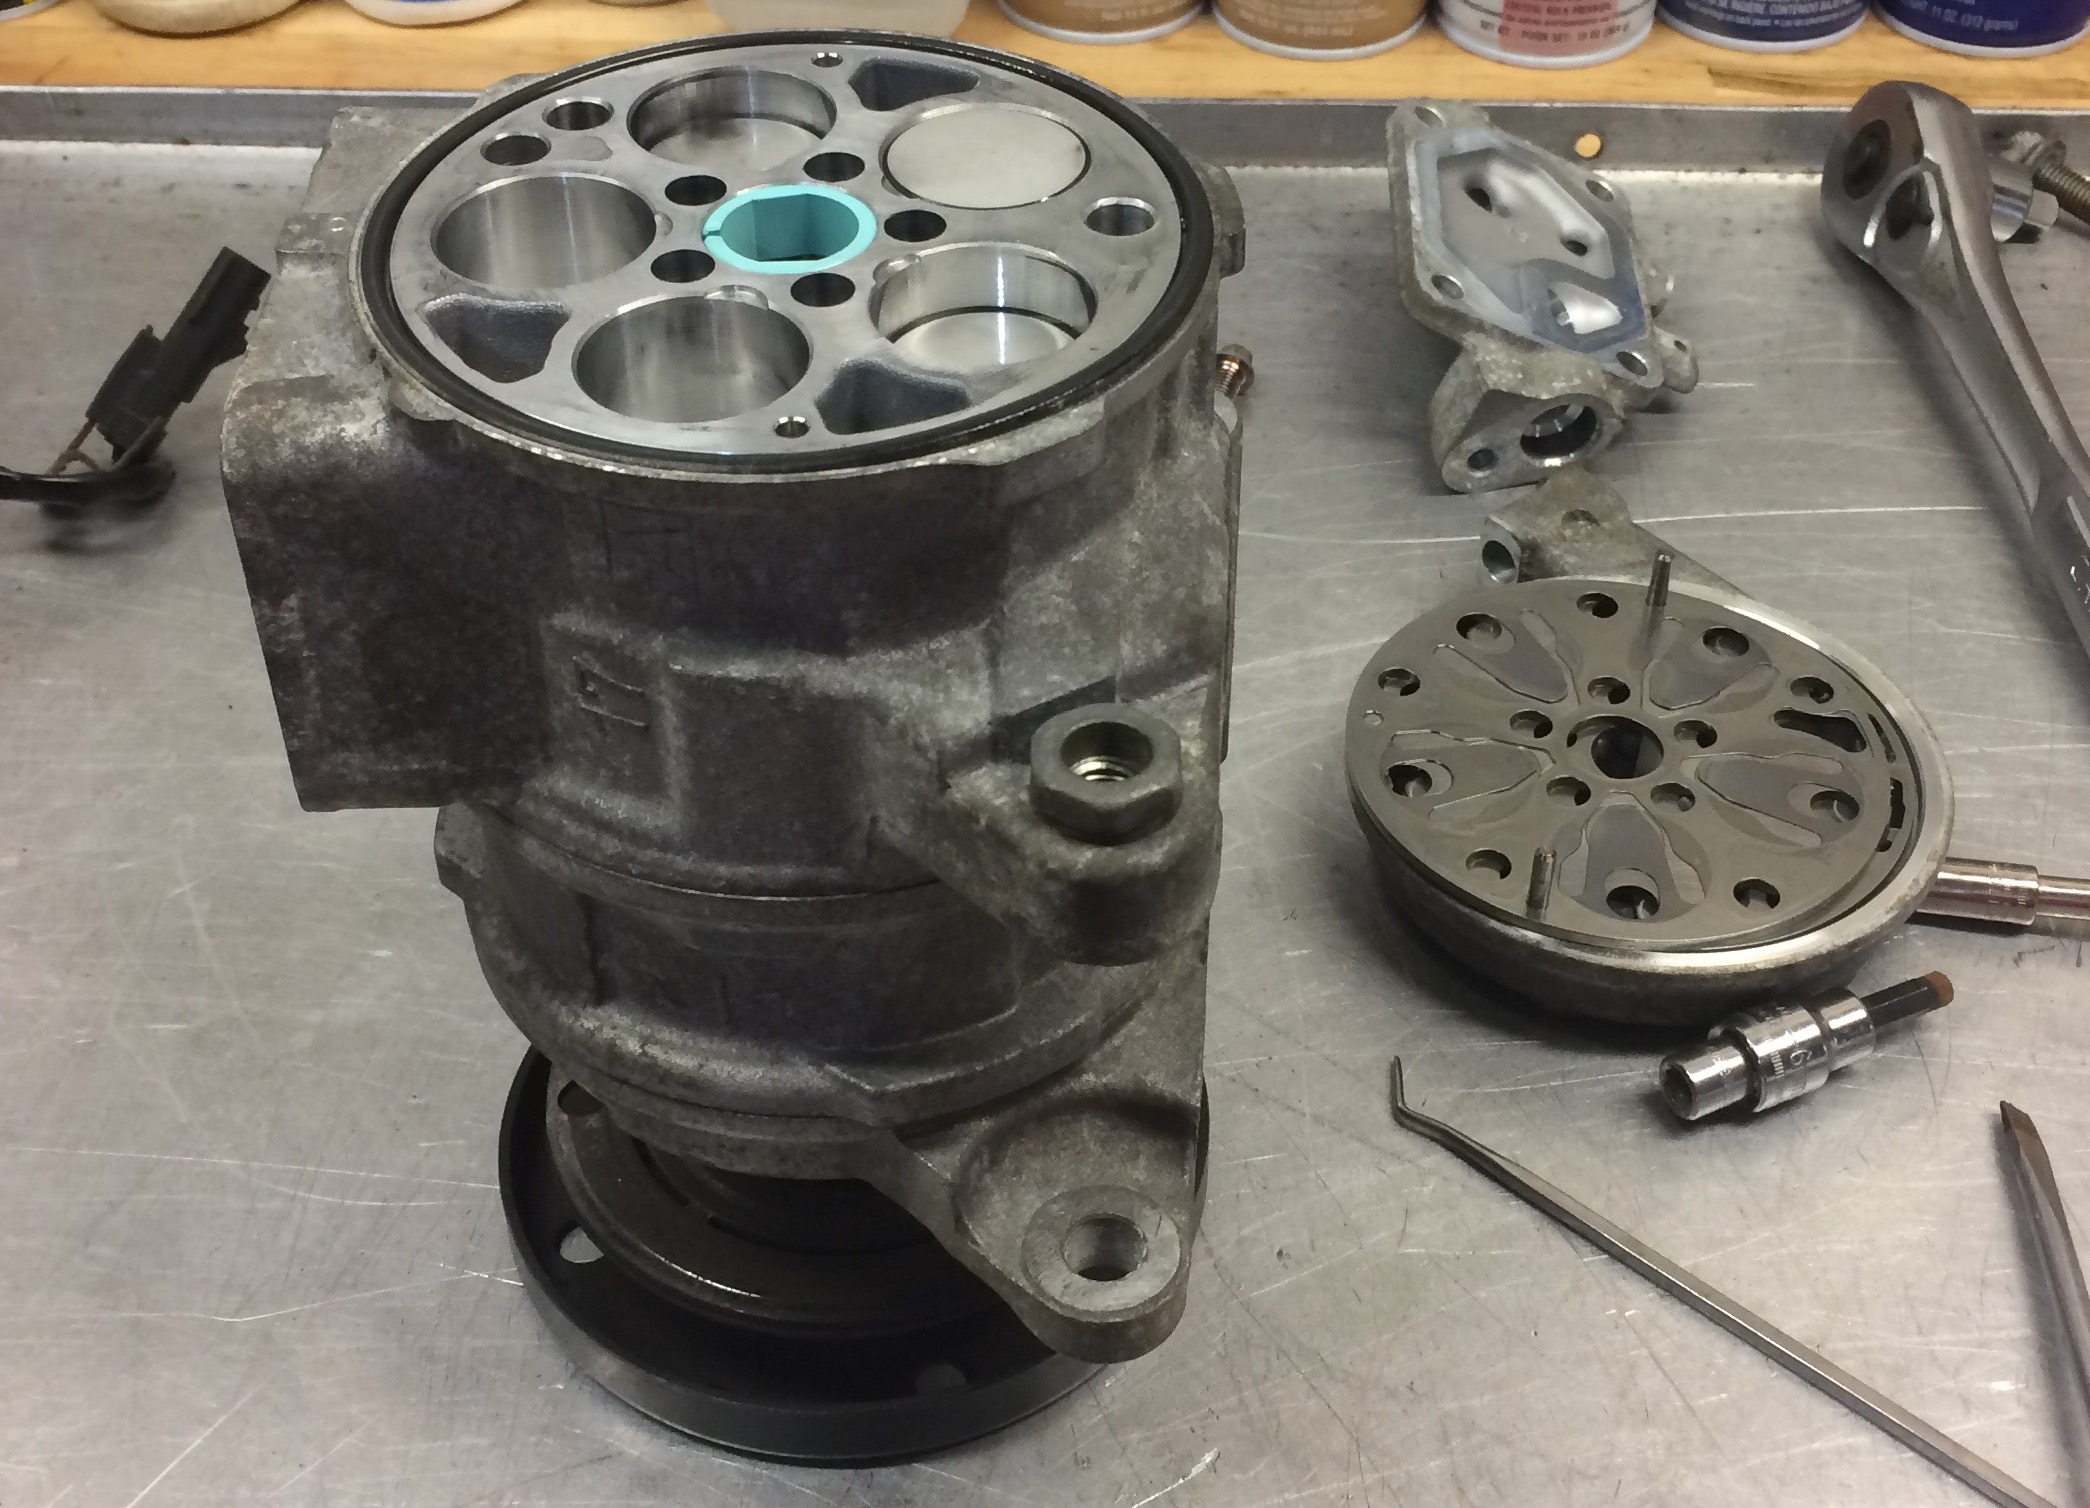
Rebuilt A/C pump by replacing shaft seal (purchased a kit w/special tool), replaced dryer, O rings, etc. and refilled w/correct Denso oil and R134a (borrowed vacuum pump from local parts store).
Refurbished Injectors and Coils
Given rising gas prices, decided to clean, check, and install injectors from the low miles parted out WJ.
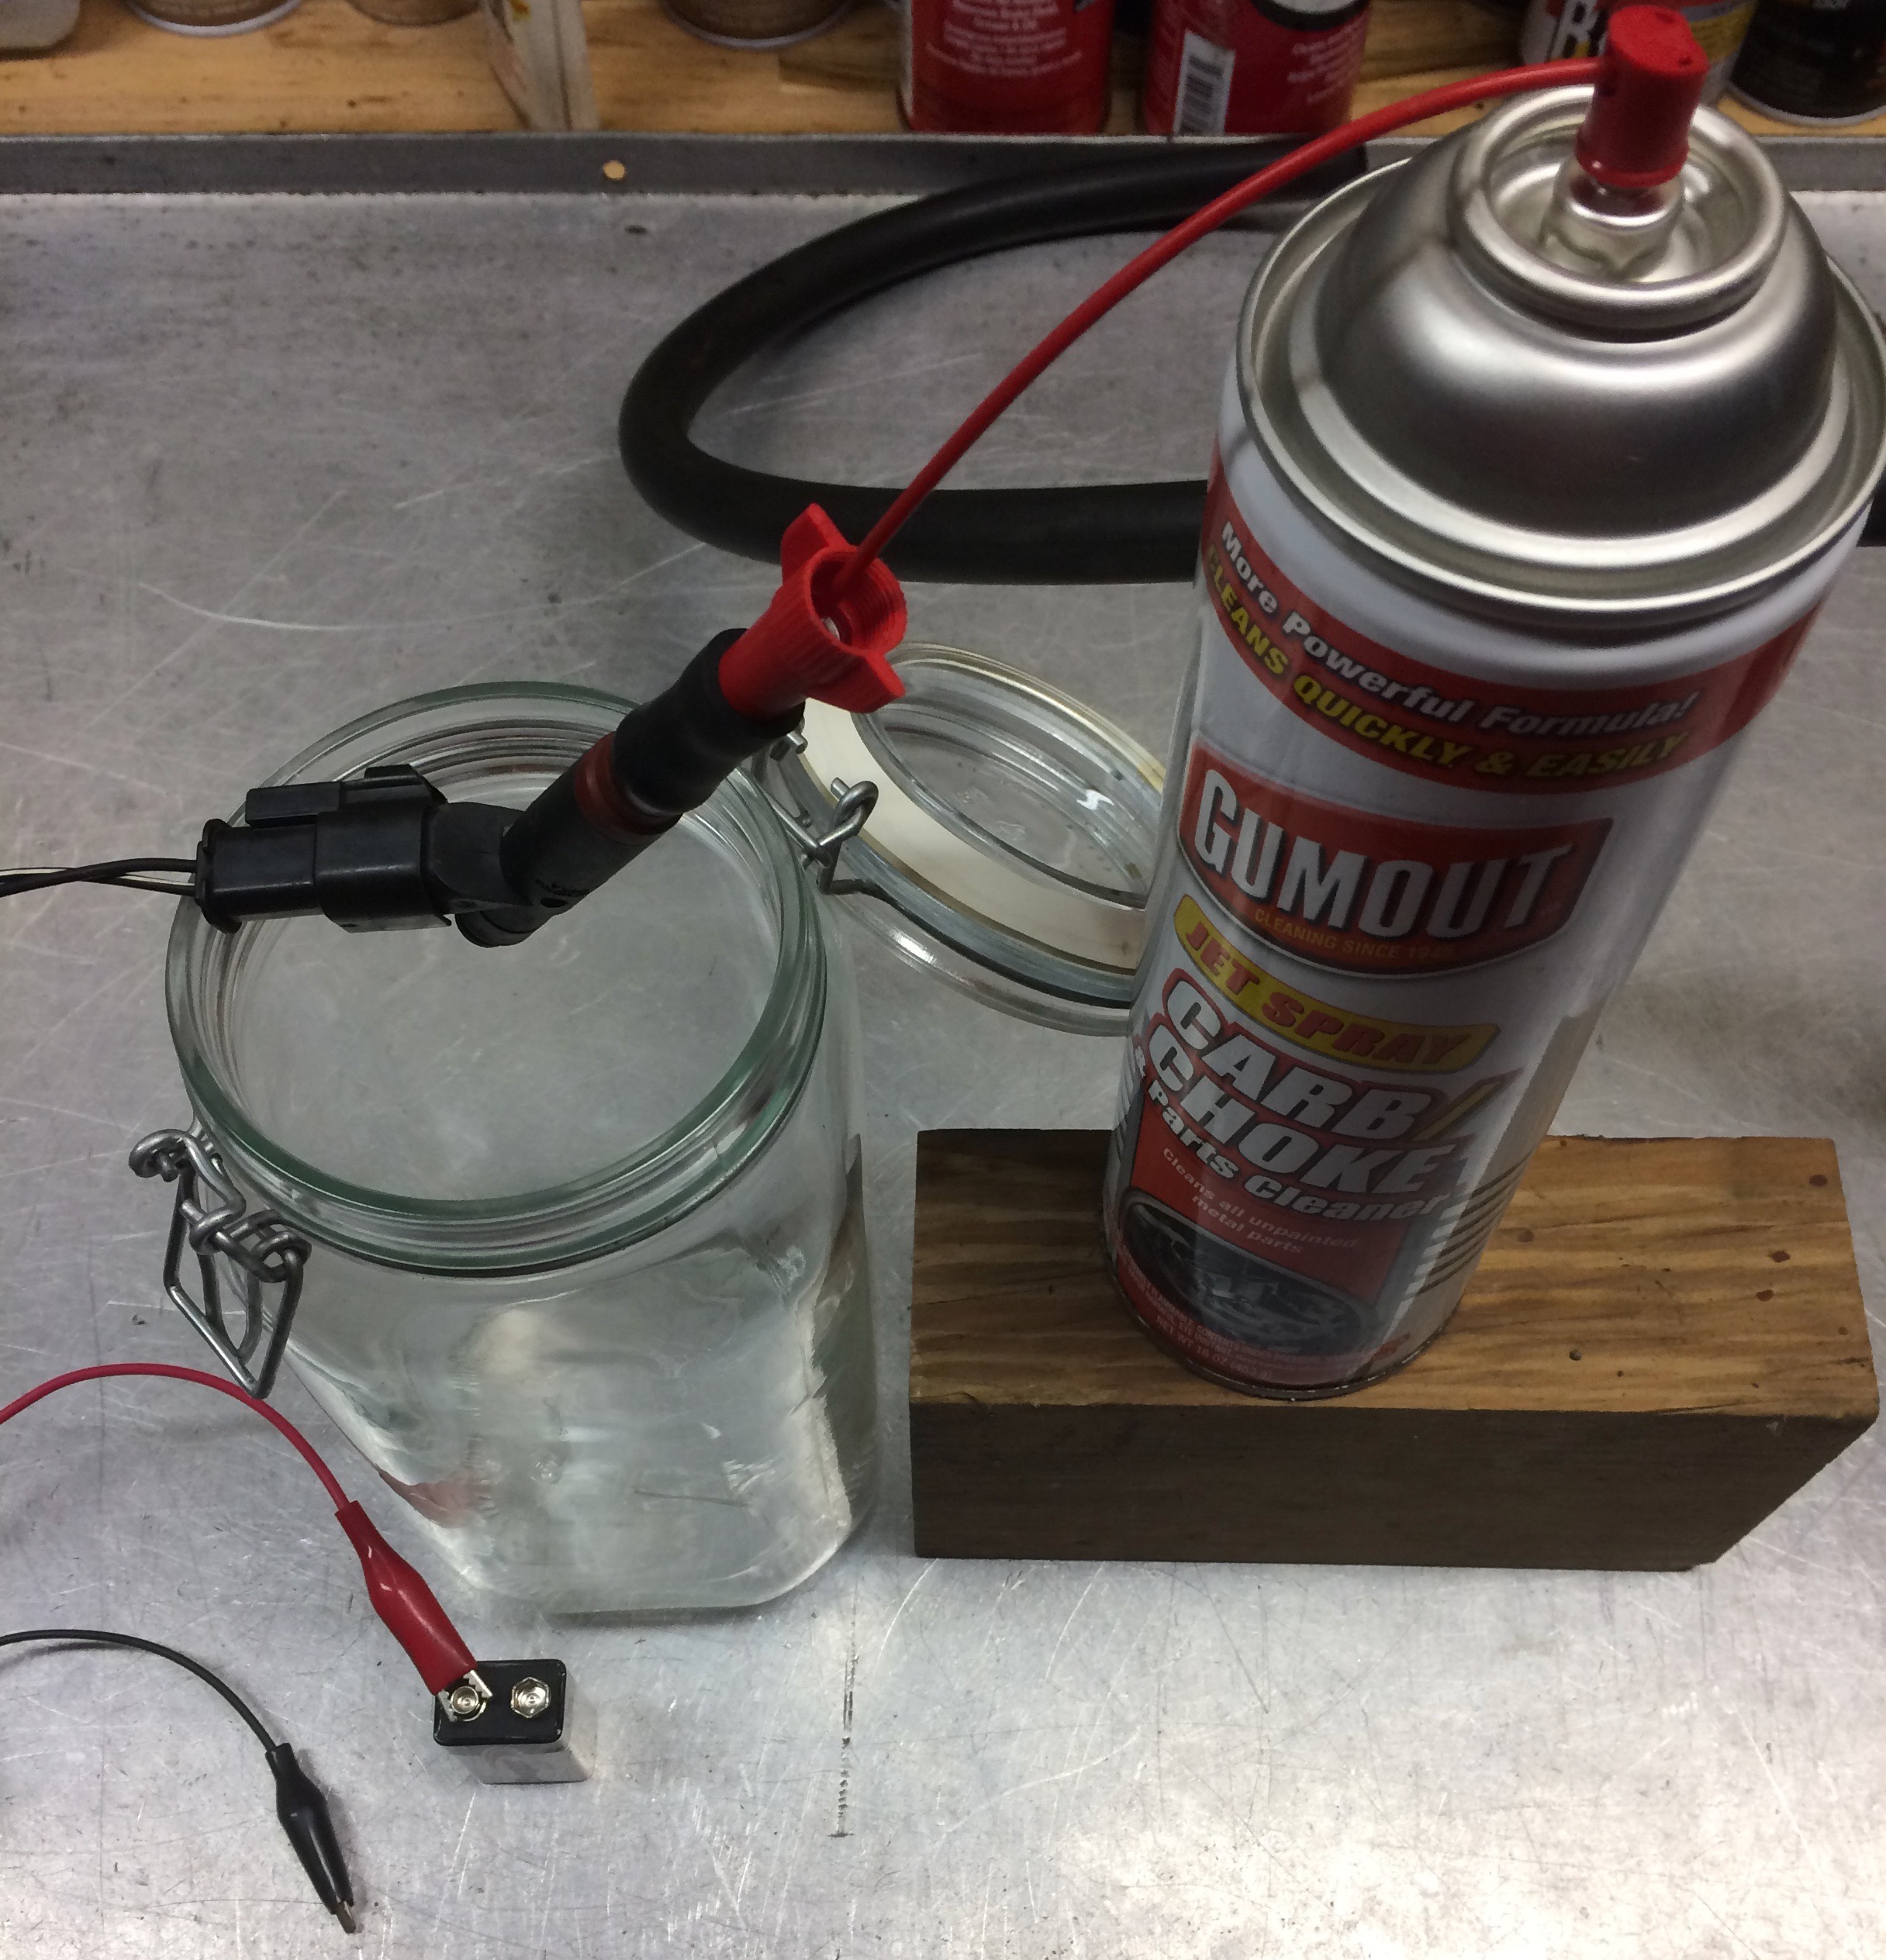
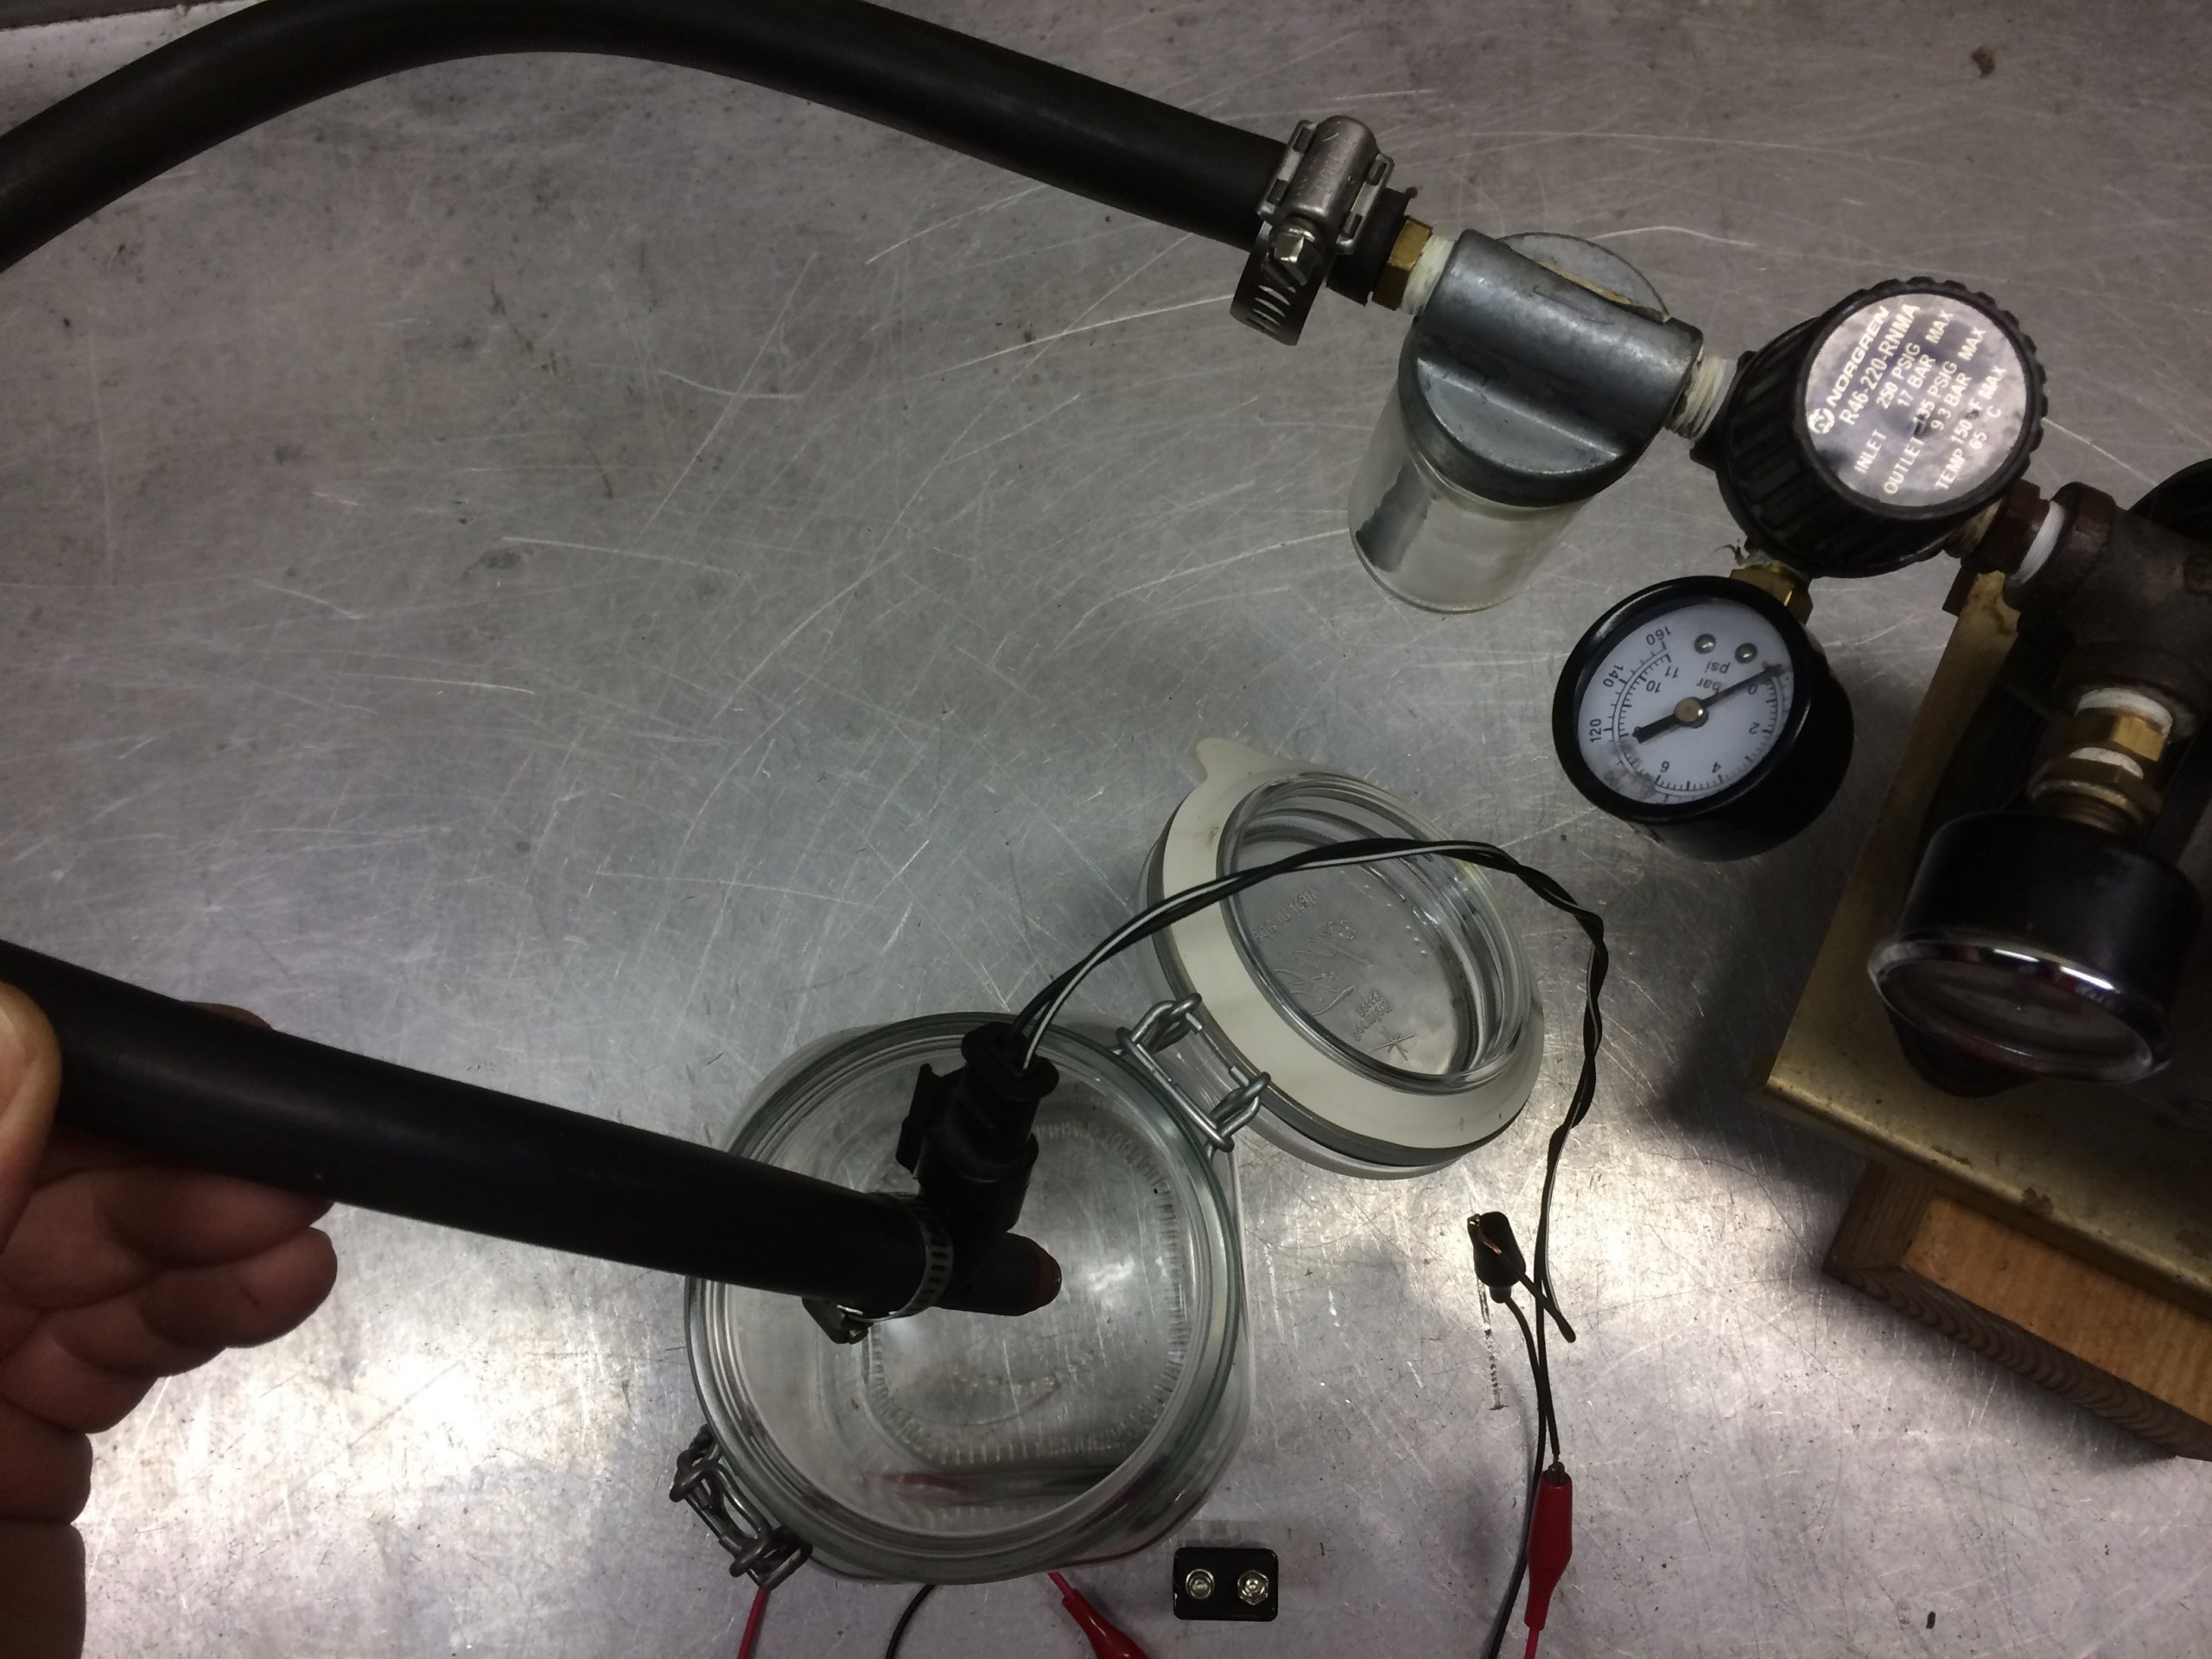
First I removed the tiny inlet screens with a big screw as a tool, and reverse flushed them with acetone based carb cleaner and 9V battery, did it twice after letting rest for 10 mins. Then immediately forward flushed them with mineral spirits at 40 psi using small oilless air pump, partly to limit time nasty acetone was in the injector. Inspected spray pattern and that that there was no dripping when injector was closed. Installed new correct O rings (FelPro kit) and gently pressed in new Bosch inlet screens purchased on eBay using bench vice.
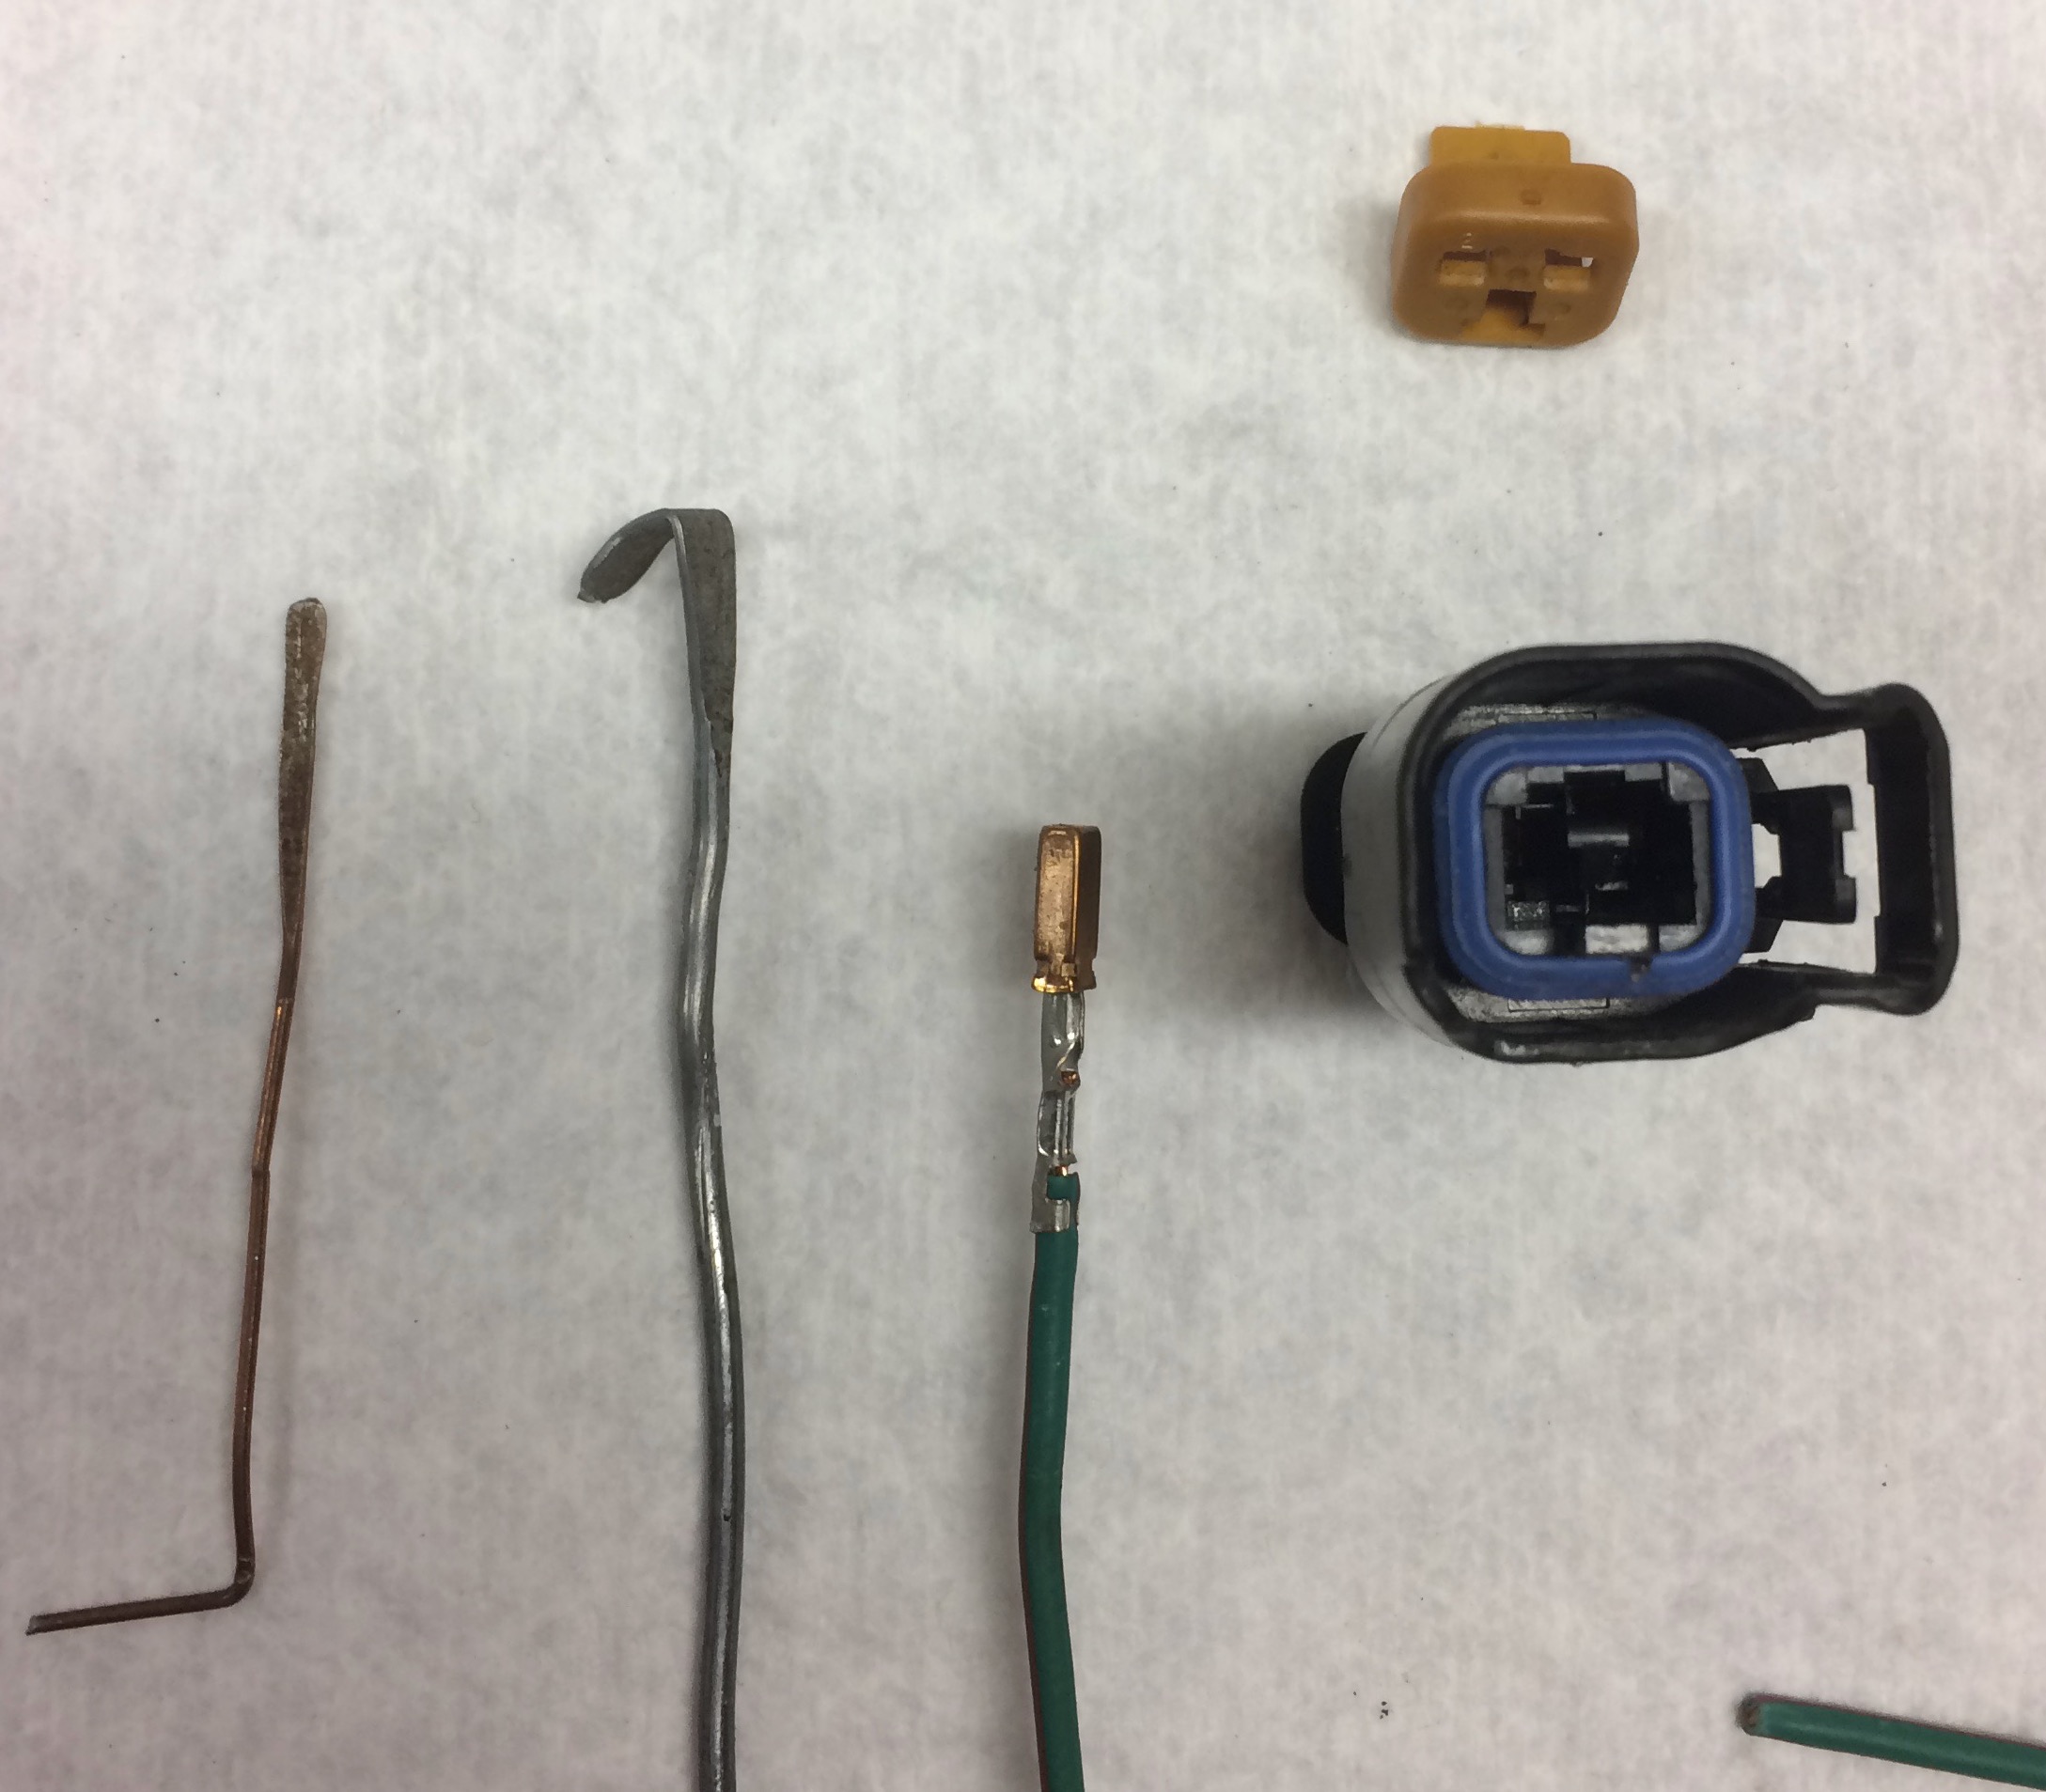
Replaced several of the injector connectors as they seem to get very brittle, and the release lock and release break. Method to do this is to pry off front cap in connector, insert small flat pry along surface of contact while pushing contact into connector, then pull wire back out. Also made a hook tool to release connector lock from injector side by simply flattening some fence wire, which worked well.
Put a dab of silicone grease on coil O rings, and new set of plugs.
Additional Keys
Only had one key and fob originally. Was able to program several additional fobs I had collected to the vehicle using a bluetooth ELM327 dongle and terminal program on my MacBook Pro, per hex programing instructions found on web. Had to find a real ELM 327 OBD-II dongle, which is quite difficult as most are Chinese knock-off and simply don’t implement the full ELM327 command set. Ended up using a “TONWON OBDII Pro”, OBDII Bluetooth dongle ($26), only one that was known to pass ELM327 tests, probably uses a real ELM327 chip, and knows how to talk to the PCI bus (as opposed to newer CAN bus cars). (Not sure about the similar iCar Pro that looks the same)
Asked several dealers for quote for spare transponder key, they wanted $69 for the MOPAR key blank, and at least $60 to get out their DRB-III for 5 min. and program it to the car. Only had one key so could not do the customer self programming method discussed in the owners manual. Purchased two spare transponder keys on eBay which probably have the exact same Texas Instruments 4D Crypto Tag Transponder Chips in them as is used by Chrysler for a few $$. My older Snap-On Solus scanner does not do key pairing, so I had a locksmith make me a spare key, he charged me $78 including tax. He first made a clone key… when I asked him when was he going to step out to the car to program it, and gave him the PIN, he said not needed. Oh-oh! The key worked, but was an exact clone of my original key, so did not support two key customer self programing. Locksmith was nice enough cut one of my eBay keys and get out his fancy programmer (since I had the PIN), plug it in to my ODB-II port, and program one of my eBay keys to the car. I was then able to self program my second eBay key using the customer self programing method. I don’t trust the clone key… should not be possible to do, depends on a very special key blank I suspect, and a questionable hack. Remember to specify you do NOT want a clone key if you have a locksmith make you a spare key, and to get your PIN from the dealer or off paperwork beforehand.
Update to the update: Today, Aug 13, 2021 I finally found some discussion of possible ELM327 hex commands on www.jeepforum.com to program a new transponder key, looks like someone there may have done it. If you have the PIN for your car, and are computer literate, and read the ELM327 IC data sheet… you might be able to do it. Posting is entitled “Jeep key programming attempt using ELM” and most interesting post is from 06-11-2021, 12:20 PM. I may try it with my spare ECM someday when I have time. ACK… $78 down the drain.
Rear Shock noise
After inspecting things, even changing rear lower control arms, I finally found the bumping noise I had when going over rough roads was coming from the rear shock bolts being stepped and not torqued enough. Put in new full shank bolts, and torqued them to correct 80 ft. lbs. and nose is gone.
Added a new head unit w/backup camera
As you get old like me, you don’t like to turn around so much, and you like to listen to golden oldies from your iPod or iPhone. Purchased a Pioneer DMH-2660 that has Apple Car-Play and a nice big screen, along with an ASWC-1 steering wheel controls interface, and Metra harness installation & bezel kit. Seems to work well with the existing Infinity amp and speakers, sounds great. Installed a backup camera on the rear hatch. Also went to the Pick-a-Part and got the ash tray cubby hole replacement out of a 2004 WJ to put my iPod in.
Next Project – get my spare ECM flashed
No doubt at some point one of the VFET transistors in the ECM will “give up the ghost” as they say. As I want to take the car on a long trip or two, now that it is totally rebuilt, I would feel more comfortable if I knew I had a spare ECM, (not to mention speedometer cluster, BCM, and TCM) at home on the shelf ready to go, that could be FedEx’ed to me if needed. Have to understand VIN, SKIM and milage issues, and get my spares flashed/tweaked appropriately with the correct VIN etc. (I am a computer guy). Since the donor car was fully functional, no need to test them I think.